13 DIY mini greenhouses you can make yourself
Short on growing room? These DIY mini greenhouses are simple, budget-friendly solutions for raising tender plants and crops
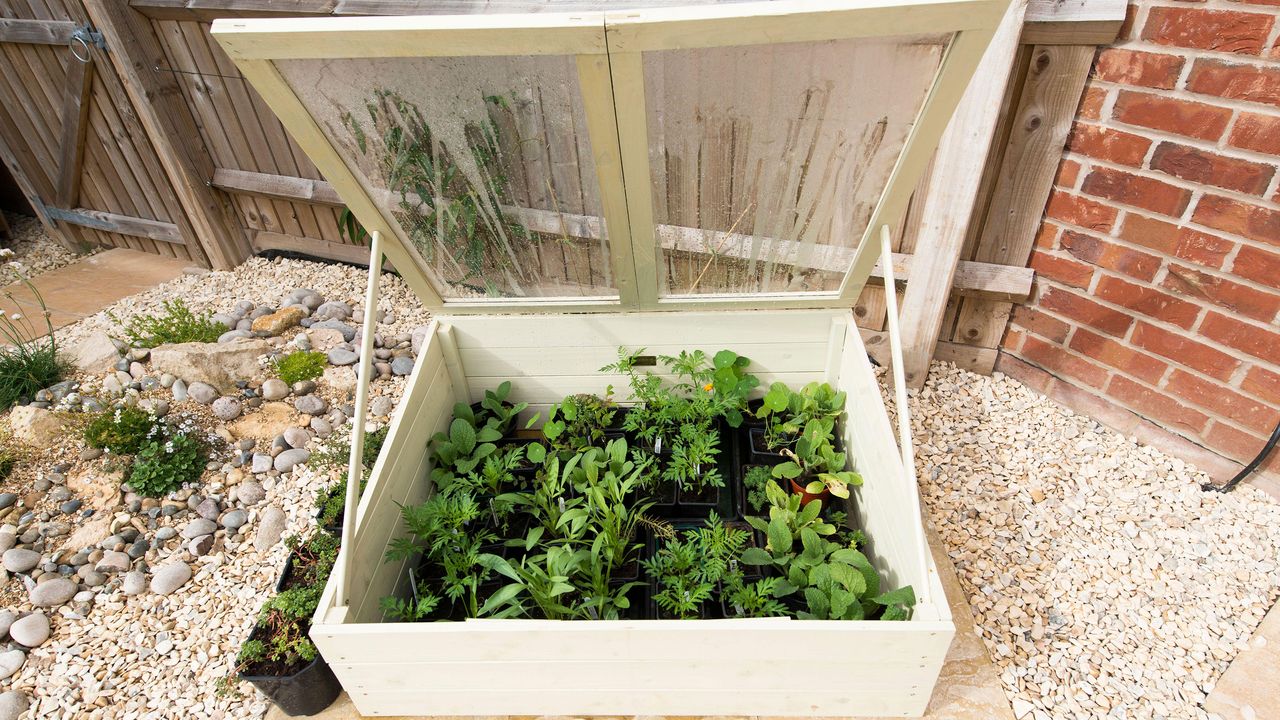

Protecting tender plants and seedlings needn’t prove expensive thanks to these DIY mini greenhouses you can make yourself. With just a little know how and some smart upcycling, you can create some ingenious tiny grow spaces that will give your precious plants a serious headstart.
Redundant glass panes, wooden fruit crates, plastic bottles and soft fruit punnets can all come in useful for keeping frost and rain at bay and raising the inner air temperature by a crucial few degrees to aid germination and strong, healthy growth.
DIY greenhouse designs work well whatever size plot you have. From compact courtyards to bijou balconies, it’s always possible to raise beautiful plants, and with these ideas you can grow precisely the blooms and crops you want.
You can also give more exotic varieties a try, ones that would normally prove tricky in a cool, wet climate. Chillies, sweet peppers, morning glory, zinnias and echiums will all prove hugely rewarding and benefit from the extra protection these DIY mini greenhouses will give them.
Maximize your growing space with these DIY mini greenhouses
Raising and protecting tender seedlings and plants can be easier than you might think as long as you offer them adequate protection from poor weather and cold temperatures. These DIY mini greenhouses are a quick and easy way to boost the potential of your plot.
1. Upcycle picture frames and construct a mini grow box
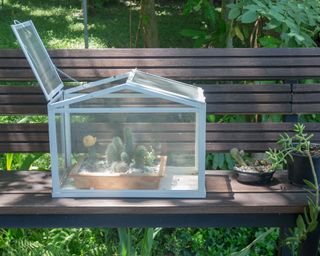
Upcycle old materials such as picture frames to create a mini greenhouse
The best mini greenhouse doesn't have to be overly fancy or elaborate. A simple design can still work a treat, as this compact glasshouse proves.
For this design, you can put unused picture frames to good use to create your mini grow house. Just big enough to raise precious seedlings or to give salad leaves a head start, it can be put together for very little cost and with just a few basic DIY skills.
Simply choose five or six glass or acrylic fronted picture frames and fix them together using small wood screws or panel pins. Create the box using two pairs of frames that are the same size – this will determine the shape and proportions. You may want to add a timber base for extra rigidity. The backboards from the picture frames are ideal and can be fixed or glued in place – Gorilla glue (available from Amazon) is ideal for this.
To create a lid, opt either for a flat design by adding another picture frame on top or a pitched design with two smaller frames hinged together.
2. Protect seedlings with plastic cups
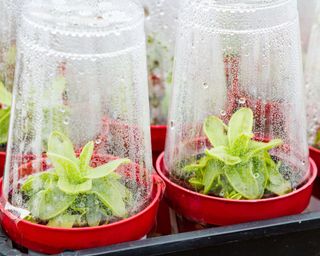
Plastic cups are a really simple way to shelter tender seedlings from the cold
If you're growing flowers from seeds, you can ensure young plants get off to a steady start by giving them their own mini grow houses. Inexpensive plastic pint glasses make excellent miniature greenhouse ideas and can easily slot, upside-down, on to plastic plant pots and saucers. Moisture from the compost and retained heat will quickly create a biome with steady air temperature enabling roots to establish and leaves to thrive.
Choose pots or deep saucers with drainage holes and place on a larger tray so you can water plants from below without having to remove the plastic protectors. Look for biodegradable plastic – they will easily last for the growing season and will break down completely within 1-2 years when composted.
3. Raise the temperature with balcony screening
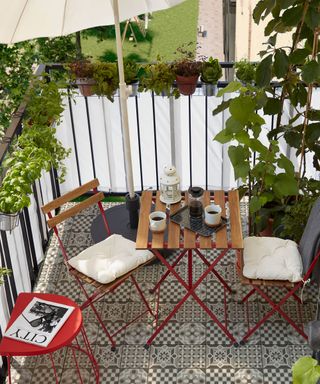
Screening can help to raise the temperature of a balcony garden
Cutting out brisk chilly winds with a simple plastic screen can have huge effect on the air temperature on an exposed balcony garden or terrace. Creating a warmer environment will help tender plants to thrive and can ensure seedlings grow steadily to form strong, healthy crops and blooms.
Look for lengths of clear plastic sheeting – available online or off the roll from garden centers – that can be clipped or secured with cable ties to your railings. Alternatively try Ikea’s Dyning balcony privacy screen which has handy eyelets along the top and bottom edges ready to be laced in place.
If you fancy something a little more decorative, consider a printed shower curtain. You will need to cut it to size and add a second row of holes, but it will do the same job and bring instant character and color too.
4. Grow plants on in a clear storage container
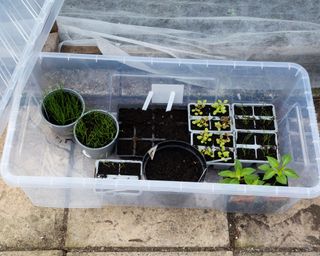
Large plastic boxes are perfect for a temporary greenhouse
Like to keep things neat and tidy, especially when space is limited in a small garden? Then plastic stacking crates are perfect for DIY mini greenhouses. Robust and affordable, these clear boxes come complete with snap-on lids and are available in a range of sizes.
Strong enough to stack one on top of the other, they make a highly effective and practical temporary greenhouse, ideal for raising a good number of seed trays and pots. What’s more, they neatly slide into each other for easy storage when no longer needed. You will need to keep an eye on moisture levels though to prevent young plants from damping off or drying out.
5. Use waste materials to keep the warmth in
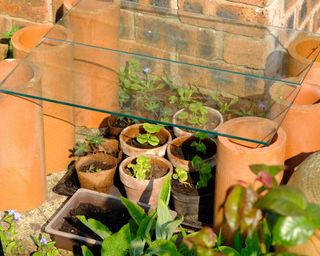
Recycle old garden materials to create a mini growing space
Creating a sheltered spot for plants doesn’t have to take up space or cost the earth. Enclosing a small sunny area with pots, bricks or clay tiles will cut out any chilly breeze and the heat retained by these materials will help raise the air temperature within the space too.
Add a sheet of clear plastic or a spare pane of glass on top to let the light in and encourage plants to grow. Do avoid watering plants in direct sunshine though, as the sun’s rays can magnify through any water droplets sitting on the leaves and cause blistering.
6. Make a small greenhouse with polycarbonate sheets
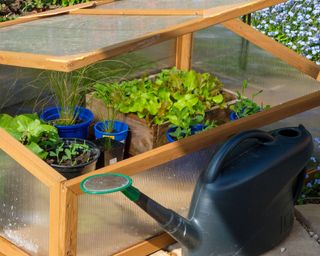
DIY cold frame kits are quick and easy to put together
Clear polycarbonate sheets are lightweight, shatterproof and perfect for protecting plants from frost, snow and ice thanks to the tiny insulating air channels.
Handy with a saw and screwdriver? Then why not put together a nifty cold frame kit, readily available online or at garden centers. It will take less than an hour to assemble and will provide the perfect spot to raise young plants.
If you fancy more of a project then you can design and make your own. The beauty of this is you can tailor the shape and size exactly to fit your space and growing needs.
A basic box frame is pretty straightforward to make from timber battens, just be sure to measure and cut side lengths accurately, before joining the corners by screwing together with metal right angle brackets. Fill in each side with polycarbonate sheets cut to size and tacked in place with small flat headed tacks.
Creating a small glasshouse like this means you'll have plenty of options when choosing what to plant in a greenhouse.
7. Use upturned glasses for emergency plant cover
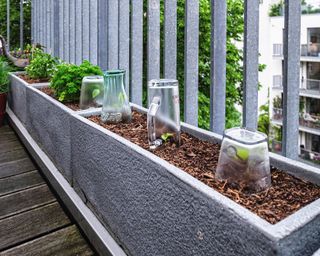
Protect plants from frost with old glassware
Need to fend off frost from fresh young leaves? Then a quick and cheap garden idea is to place an upturned glass over seedlings overnight. Heat emitted from the soil will be captured by the glass, creating a mini climate which will prevent leaves from shrivelling.
Jam jars, glass bowls and even redundant vases also make great emergency cloches. Pick them up cheaply in thrift and charity shops or buy in bulk from discount and catering stores.
8. Cover a small shelving unit for a simple greenhouse
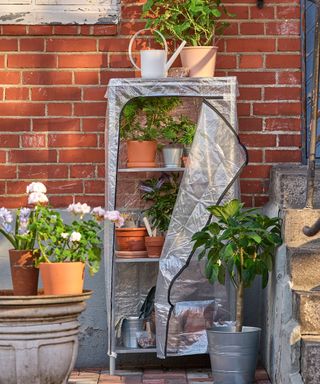
Adding a plastic cover to a shelving unit is a quick and easy way to create a small greenhouse space. Hyliss indoor/outdoor shelving unit with cover from Ikea
Short on outside space and own an open shelving unit? Then why not move it outside and turn it into greenhouse shelving to house your plants? A great way to add vertical interest, it will also enable you to store and raise many more plants than you could by covering the floor area, plus there’s no danger of tripping over them either.
There are plenty of inexpensive zip-up plastic covers available in all shapes and sizes that can fit over these handy storage units. Some come with their own vents built in – ideal for hot summer days when condensation may build up inside the cover – otherwise you can simply unzip the door section and peg open when needed.
Metal or plastic-coated shelving units tend to work best, as they naturally cope with the weather conditions better than soft, untreated wood such as pine, but you could always stain or paint a timber unit with the best exterior wood paint to keep it protected.
In windy, exposed sites be sure to secure the cover to the shelving unit or weigh it down with stones or lengths of heavy timber to prevent it from falling over or even blowing away.
9. Pop on a clear grow bag to protect plants
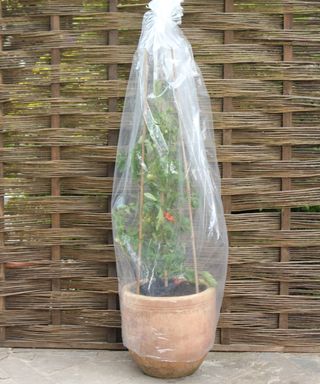
Taller plants such as tomatoes, peppers or even tender climbers such as morning glory and plumbago can be tricky to shelter without a larger walk-in greenhouse, but there are some practical options out there. This might not be the most attractive option for your kitchen garden, but creating a clear plastic sleeve for your plants is definitely a good option.
You can buy ready-made designs that simply slip over the plant, pot and all, or devise your own from inexpensive sheeting. Pushing tall bamboo canes into the soil around the plant will provide support for the plastic covering and prevent any collected rainwater from crushing the foliage or snapping off delicate branches. You may wish to secure the cover by placing it under the container.
10. Put mini plastic fruit boxes to good use
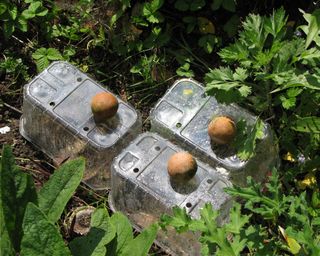
Put plastic fruit punnets to good use on your veg patch
Ever wondered what to do with those plastic punnets that supermarkets sell soft fruit in? Well, they make brilliant propagators or DIY mini greenhouses.
Whether you're growing vegetables in pots or in a small vegetable garden, they are ideal for starting off seedlings. Simply place them over the top of the young plants and hold in place with a stone or staple made from garden wire. Clear, free and readily available they even come with ready-made ventilation (the holes in the base) allowing the plants to breath. Slot them together and store neatly when no longer needed or just recycle and collect new for next season.
11. Shelter plants with a clear umbrella
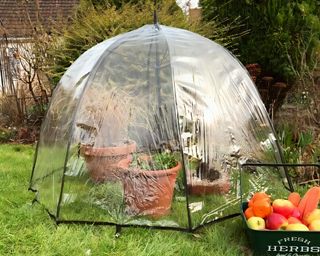
Group tender plants together under a clear plastic umbrella. Pop n Crop' Plant & Crop Protection Umbrella from Mano Mano
If you're looking for DIY mini greenhouses with a difference, then this might get your vote. Not just for keeping us dry, clear umbrellas can be super helpful for our plants too. With their taut clear plastic stretched over a rigid frame they will keep in warmth, repel rain and create the perfect conditions for growing plants under.
They’re also a great shape for accommodating circular pots – group several smaller garden planters together and pop the brolly over the top. You may wish to secure the umbrella in some way, to stop it lifting off and blowing away. Try tying the handle to a brick or, even easier, just push it into the soil if the pot is large and deep enough.
12. Make a small plant tunnel for raised beds
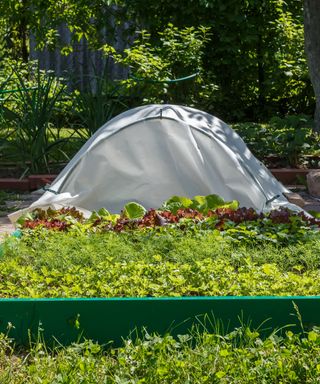
Add a protective cover to your raised beds for maximum growing potential
If you are planting into a raised garden bed or directly into the soil, warming the planting patch and protecting the plants from wind, rain and frost will pay dividends.
A quick and easy solution, loved by many allotmenteers, is to create a series of arches made from lengths of stiff garden hose or water pipe, that span the area at regular intervals. This then makes a basic but very effective framework to cover with clear plastic sheeting, keeping the covering well away from leaves and delicate stems.
Be sure to peg the covering down securely at the edges, not only to prevent it from blowing away, but also to keep out pests. A series of eyelets along each long side of the plastic sheeting are handy, as they can easily be slipped onto screws or nails fixed into timber bed edging.
13. Turn a wooden crate into a mini greenhouse
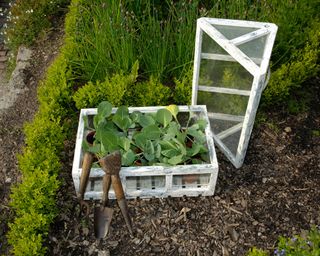
Old wooden crates can be used as the frame for an upcycled mini greenhouse
Slatted wooden fruit crates make fantastic DIY mini greenhouses for your potager garden and are perfect for protecting crops and blooms. Simply cover the sides with a transparent covering that will let the light in and retain any heat and moisture.
Glass offcuts, redundant windowpanes, sheets of clear acrylic, flexi plastic from packaging or even polythene sheeting pulled taut and stapled to the inside of the crate all work well. For a lid you may be lucky enough to have a pitched, Victorian style cloche that will sit neatly on top, or you may want to flex your DIY skills and make your own. For extra deep crates, a flat lid design will be fine – try an old sash window or picture frame for size.
Do DIY mini greenhouses need air holes?
Ventilation is important for any type of greenhouse. It will let the plants breath and ensure good air flow which can help reduce too much moisture, damp and algae from forming.
Punching a few small air holes into a plastic container or leaving the screw lid off a plastic bottle is sufficient. You can also prop glass and acrylic lids open on cold frames and box-style shelters for extra air flow, but do remember to shut them during cold or icy spells.
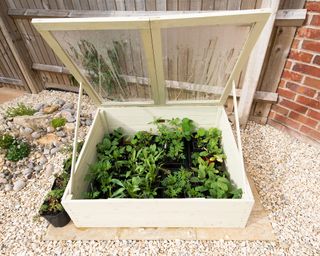
What's the cheapest way to make a DIY mini greenhouse?
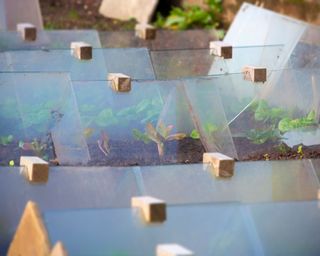
If you're a fan of free garden ideas, then the simplest DIY mini greenhouses can be made from leftover or inexpensive materials. Two sheets of clear acrylic, Perspex or glass can simply be placed over plants and angled together, tent-style, to create an extremely basic but effective growing space. To secure them in place, add a wooden block with a ‘V’ shape cutout that is then slotted over the top ridge.

Jill puts her love of plants and all things garden related down to the hours spent pottering around with her Nan and Grandad when she was little. Today she is lucky enough to have a garden of her own in Surrey, England, and spends much of her time writing about them too.
-
 An Update on Gardeningetc
A word from our publisher
By Beth Murton Published
-
 Do you need to chit potatoes? Find out what the experts say
Grow Your Own Learn how to chit potatoes before planting them in the ground and you’ll be on your way to getting an earlier and bigger harvest
By Drew Swainston Published
