How to grow peas: expert sowing, planting and care tips
Find out how to grow peas and enjoy the simple pleasures of tasty prolific crops that are always a kitchen favorite
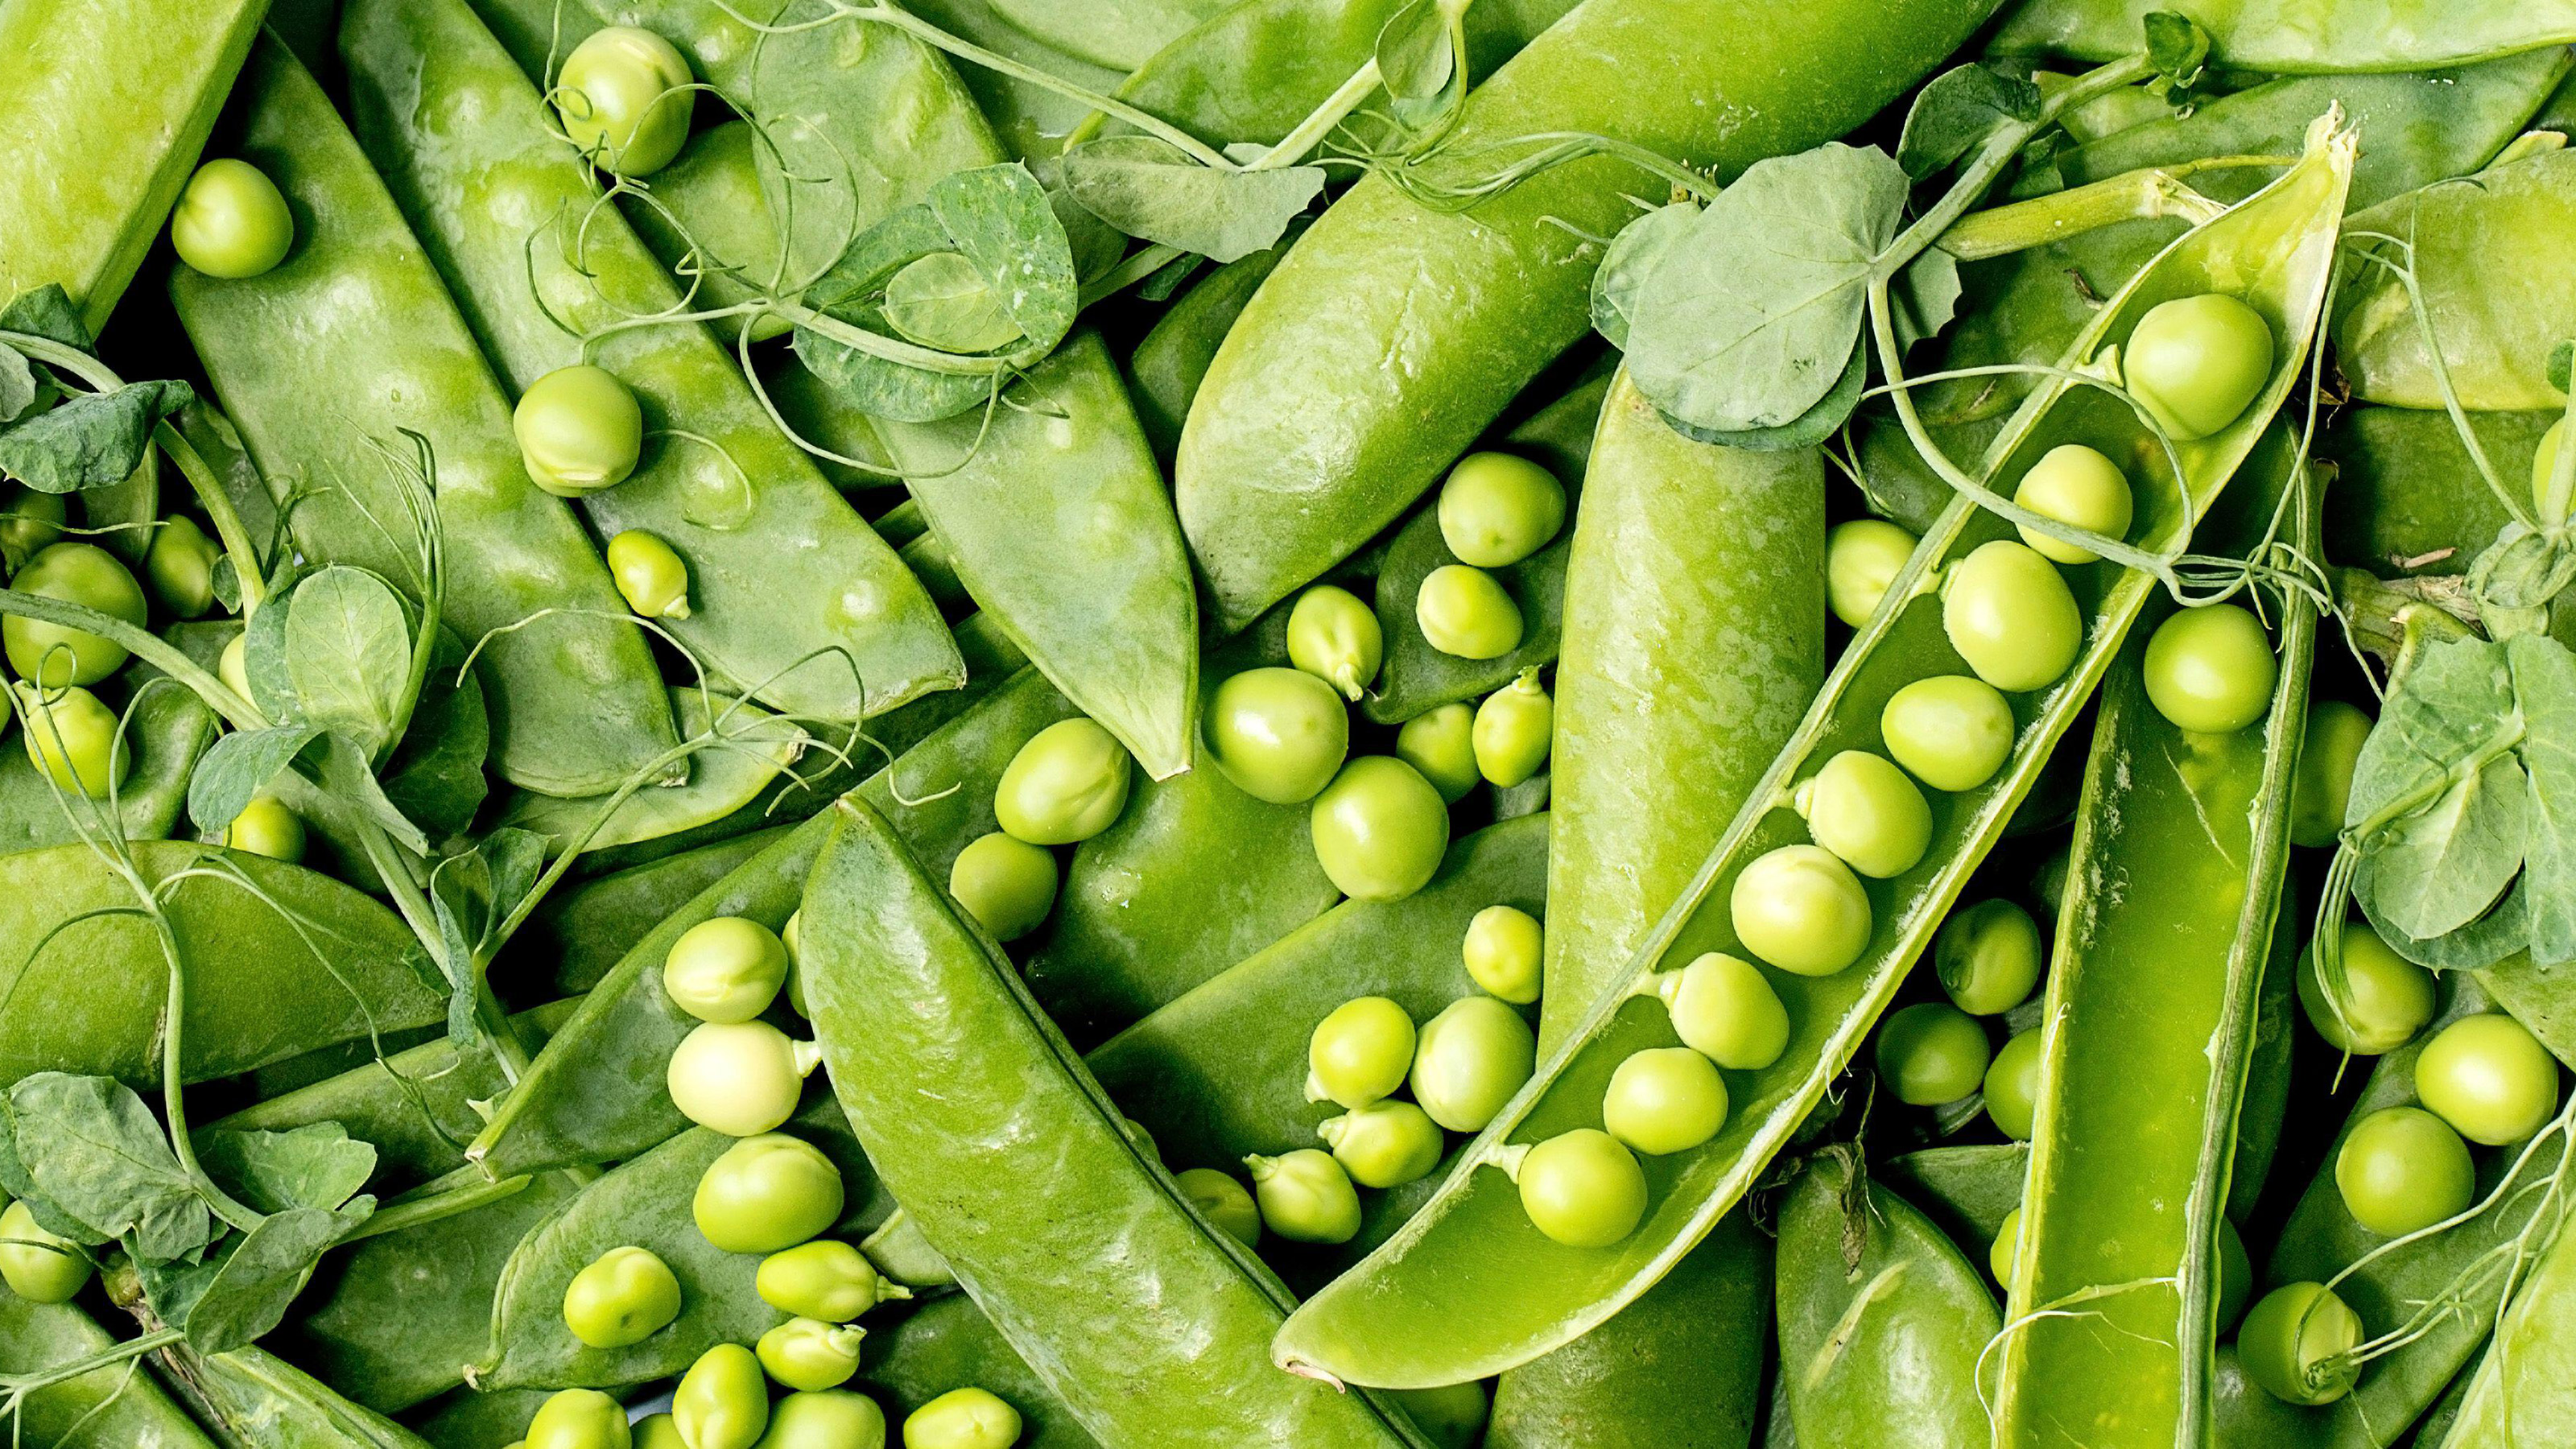

Knowing how to grow peas is one of the first planting projects many of us ever try. With their chunky seeds, quick germination periods, climbing habits and nibble-fresh harvests, peas rank highly as fun and educational projects for children wanting to know how vegetables grow. For many of us, this fascination only deepens as we learn more about gardening.
There’s a pea variety for every shape and size of plot, from meandering potagers and stacked veg beds to modest container-based kitchen garden ideas on balconies. Peas are easygoing, high achieving – and oh so tasty.
Peas are the unsung heroes of the garden, rustling up their leguminous treasures without fuss or drama. They’re so well behaved, one can miss how hard-working they are. What about their enormous capacity for extended harvests? Or how many vitamins, minerals and antioxidants are packed into each pod? Or how they deposit nitrogen into the ground to nourish future crops?
That said, there is plenty you can do to ensure the most poppable pods. This guide covers how to start, what to do for the best root systems and pod set, the right supports and pest protections, and when to harvest for the yummiest yields.
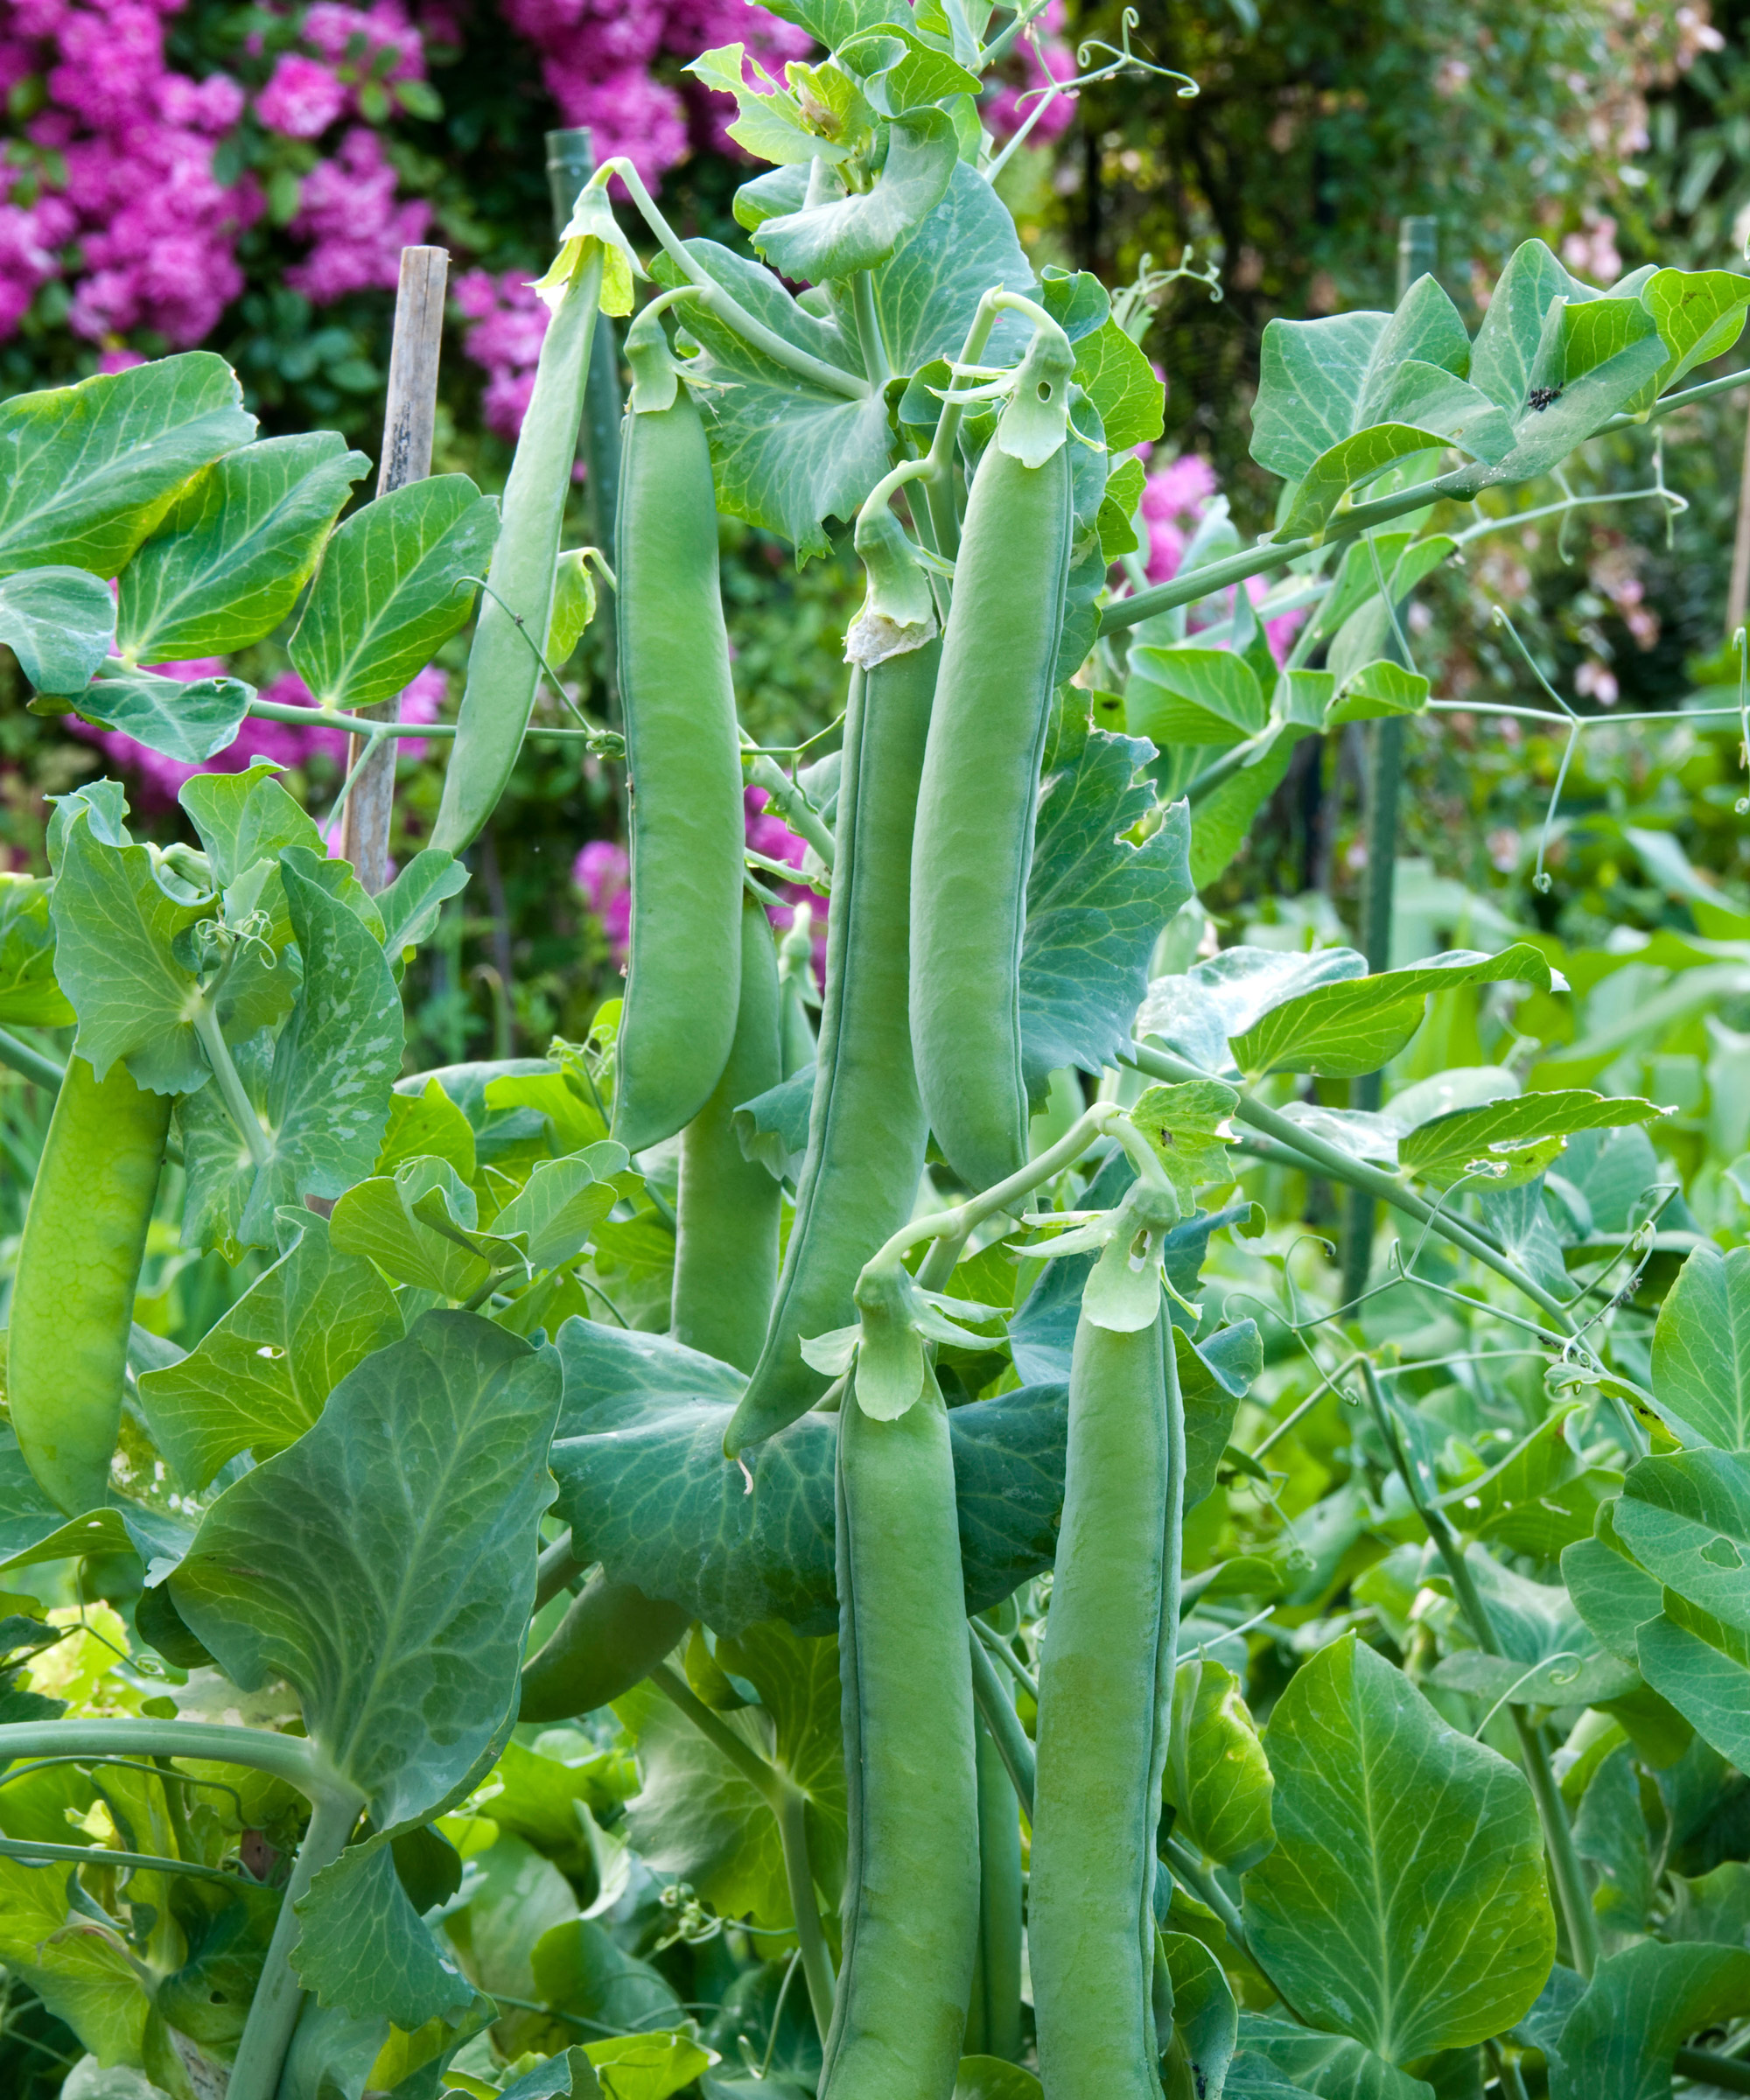
Fat sugar-sweet peas are guaranteed with ‘Dorian Mr Big’, the English garden pea that’s big on size and taste
How to grow peas – where to start
Knowing how to grow peas (Pisum sativum) is something everyone can master. They aren’t fussy garden growers and they don’t require much space. However, they appreciate sunshine in abundance. Peas are native to Middle Asia and Ethiopia – and while they have learned to adapt, that love of sunshine will keep your plants performing at their best.
Regular sun does not mean peas crave heat. Confused? Peas are cool-season crops, a fact that favors early season growing. It’s part of the reason why they thrive in UK and maritime climates and US hardiness zones 3-7 (although with care they can do well in zones 8-11). The optimum temperature range for peas is 60-75˚F (15-24˚C), but they can crop between 45-80˚F (7-27˚C).
Peas appreciate well-draining soil with a neutral or slightly alkaline soil (pH 6-8). Check your soil types and adjust where necessary, adding lime to very acidic soils before sowing. As Amateur Gardening’s Lucy Chamberlain points out, when growing peas, success relies on healthy roots. ‘The larger the root system, the bigger and healthier the crop,' she says. ‘To get this, provide an open, moist and warm (not hot) soil.’
Depending on the variety, solid fence types, trellises and frames will support your peas. If space is limited, pick a dwarf variety (like ‘Bingo’) and make the most of a grow bag and a sunny balcony rail. And give thought to nearby crops. Peas do well with sweet corn, beans, carrots, nasturtiums, turnips, basil and radishes. Avoid growing onions, garlic and chives nearby, which stunt growth.
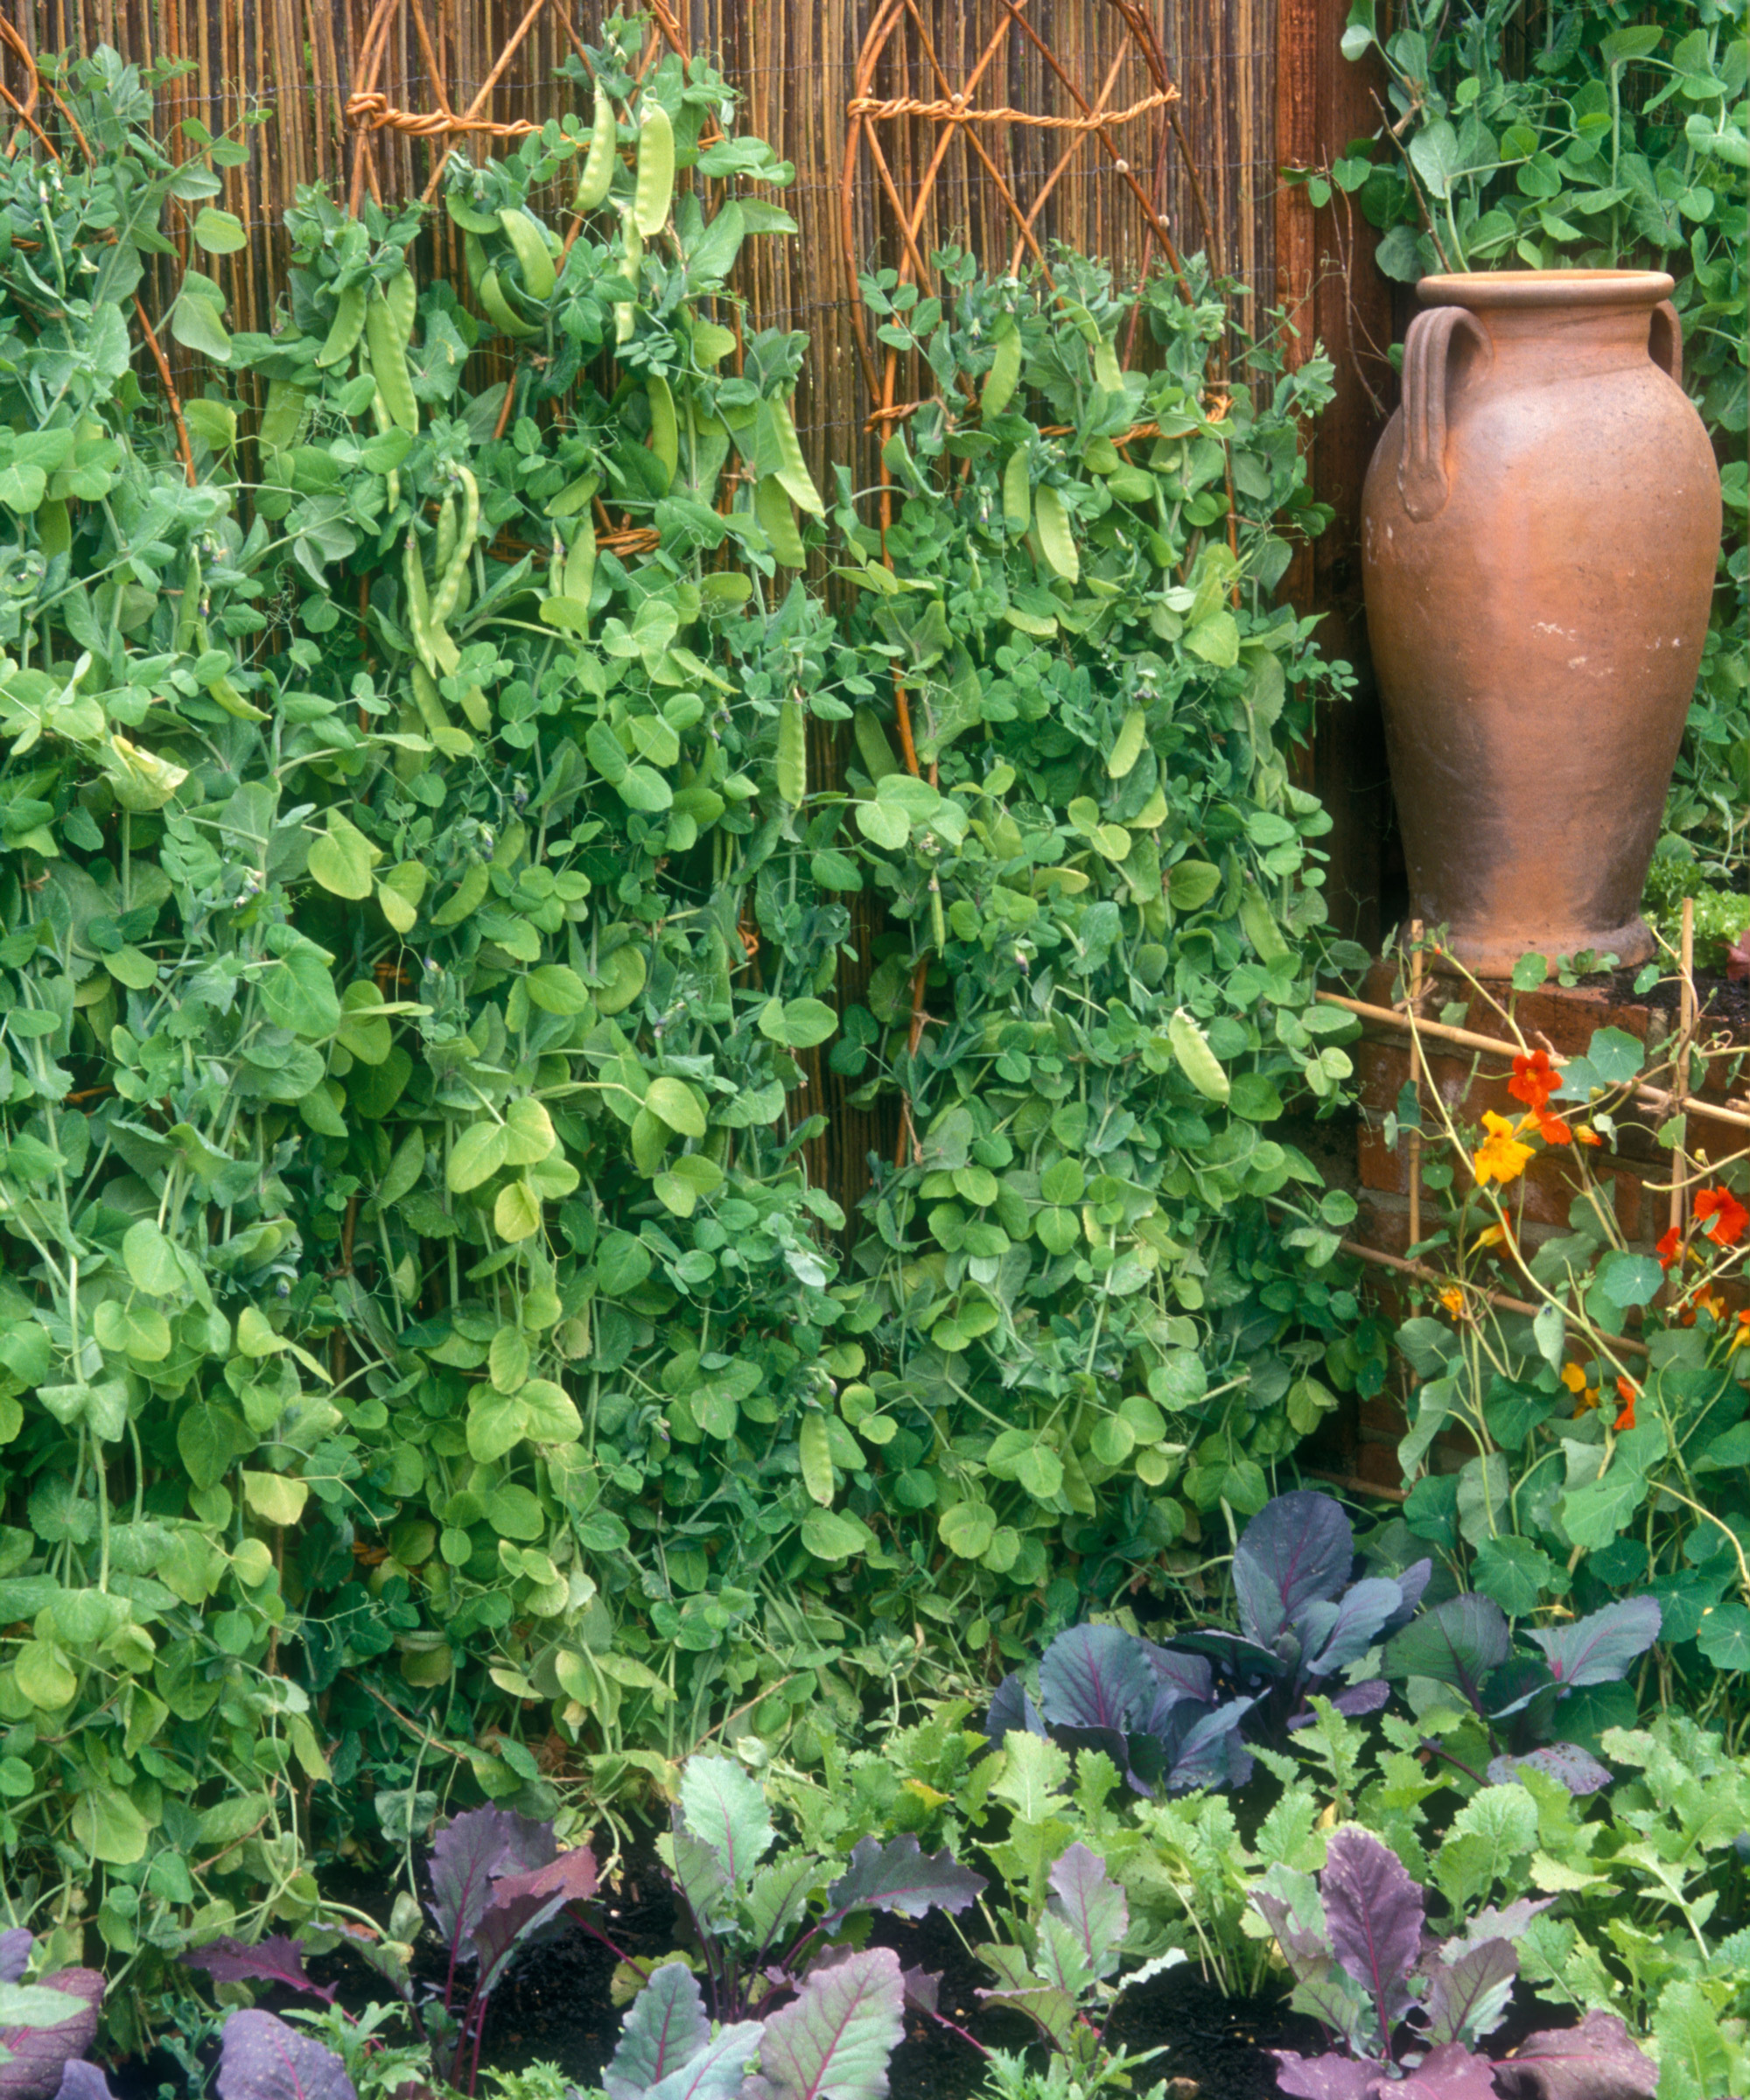
Peas enjoy sunshine and a well draining spot, as with these plants growing on wicker supports against a woven fence
When to plant peas
Peas are cool season crops, so they prefer to grow in spring and early summer. That said, variety and cropping intention has some bearing when deciding how to grow peas. Check your seed packets and decide if you are growing earlies (12 week turnaround) or main crops (16 week turnaround).
You can start as early as mid winter or as late as early summer. Depending on variety, you can even start later for harvests the following year. If you want to plant in a greenhouse, you can start many varieties under glass in late winter. As long as you use a greenhouse that is not too hot, early sowings favor stronger root systems. You can also sow under cloches or polytunnels if the soil is not cold. To pre-warm soil, put cloches in place two weeks before sowing or lay black plastic on the ground.
Direct sowing is encouraged from early spring, while temperatures are cool out. If you expect a lot of rain, grow in raised beds to work with the weather. The earlier the better to give root systems the best chance. Later sowings can run the risk of pea moth or powdery mildew, but there are powdery mildew-resistant varieties like ‘Ambassador’, ‘Lusaka’ and ‘Shiraz’.
Depending on the types of greenhouse and garden you own, try indoor and outdoor sowings to maximize your harvest potential.
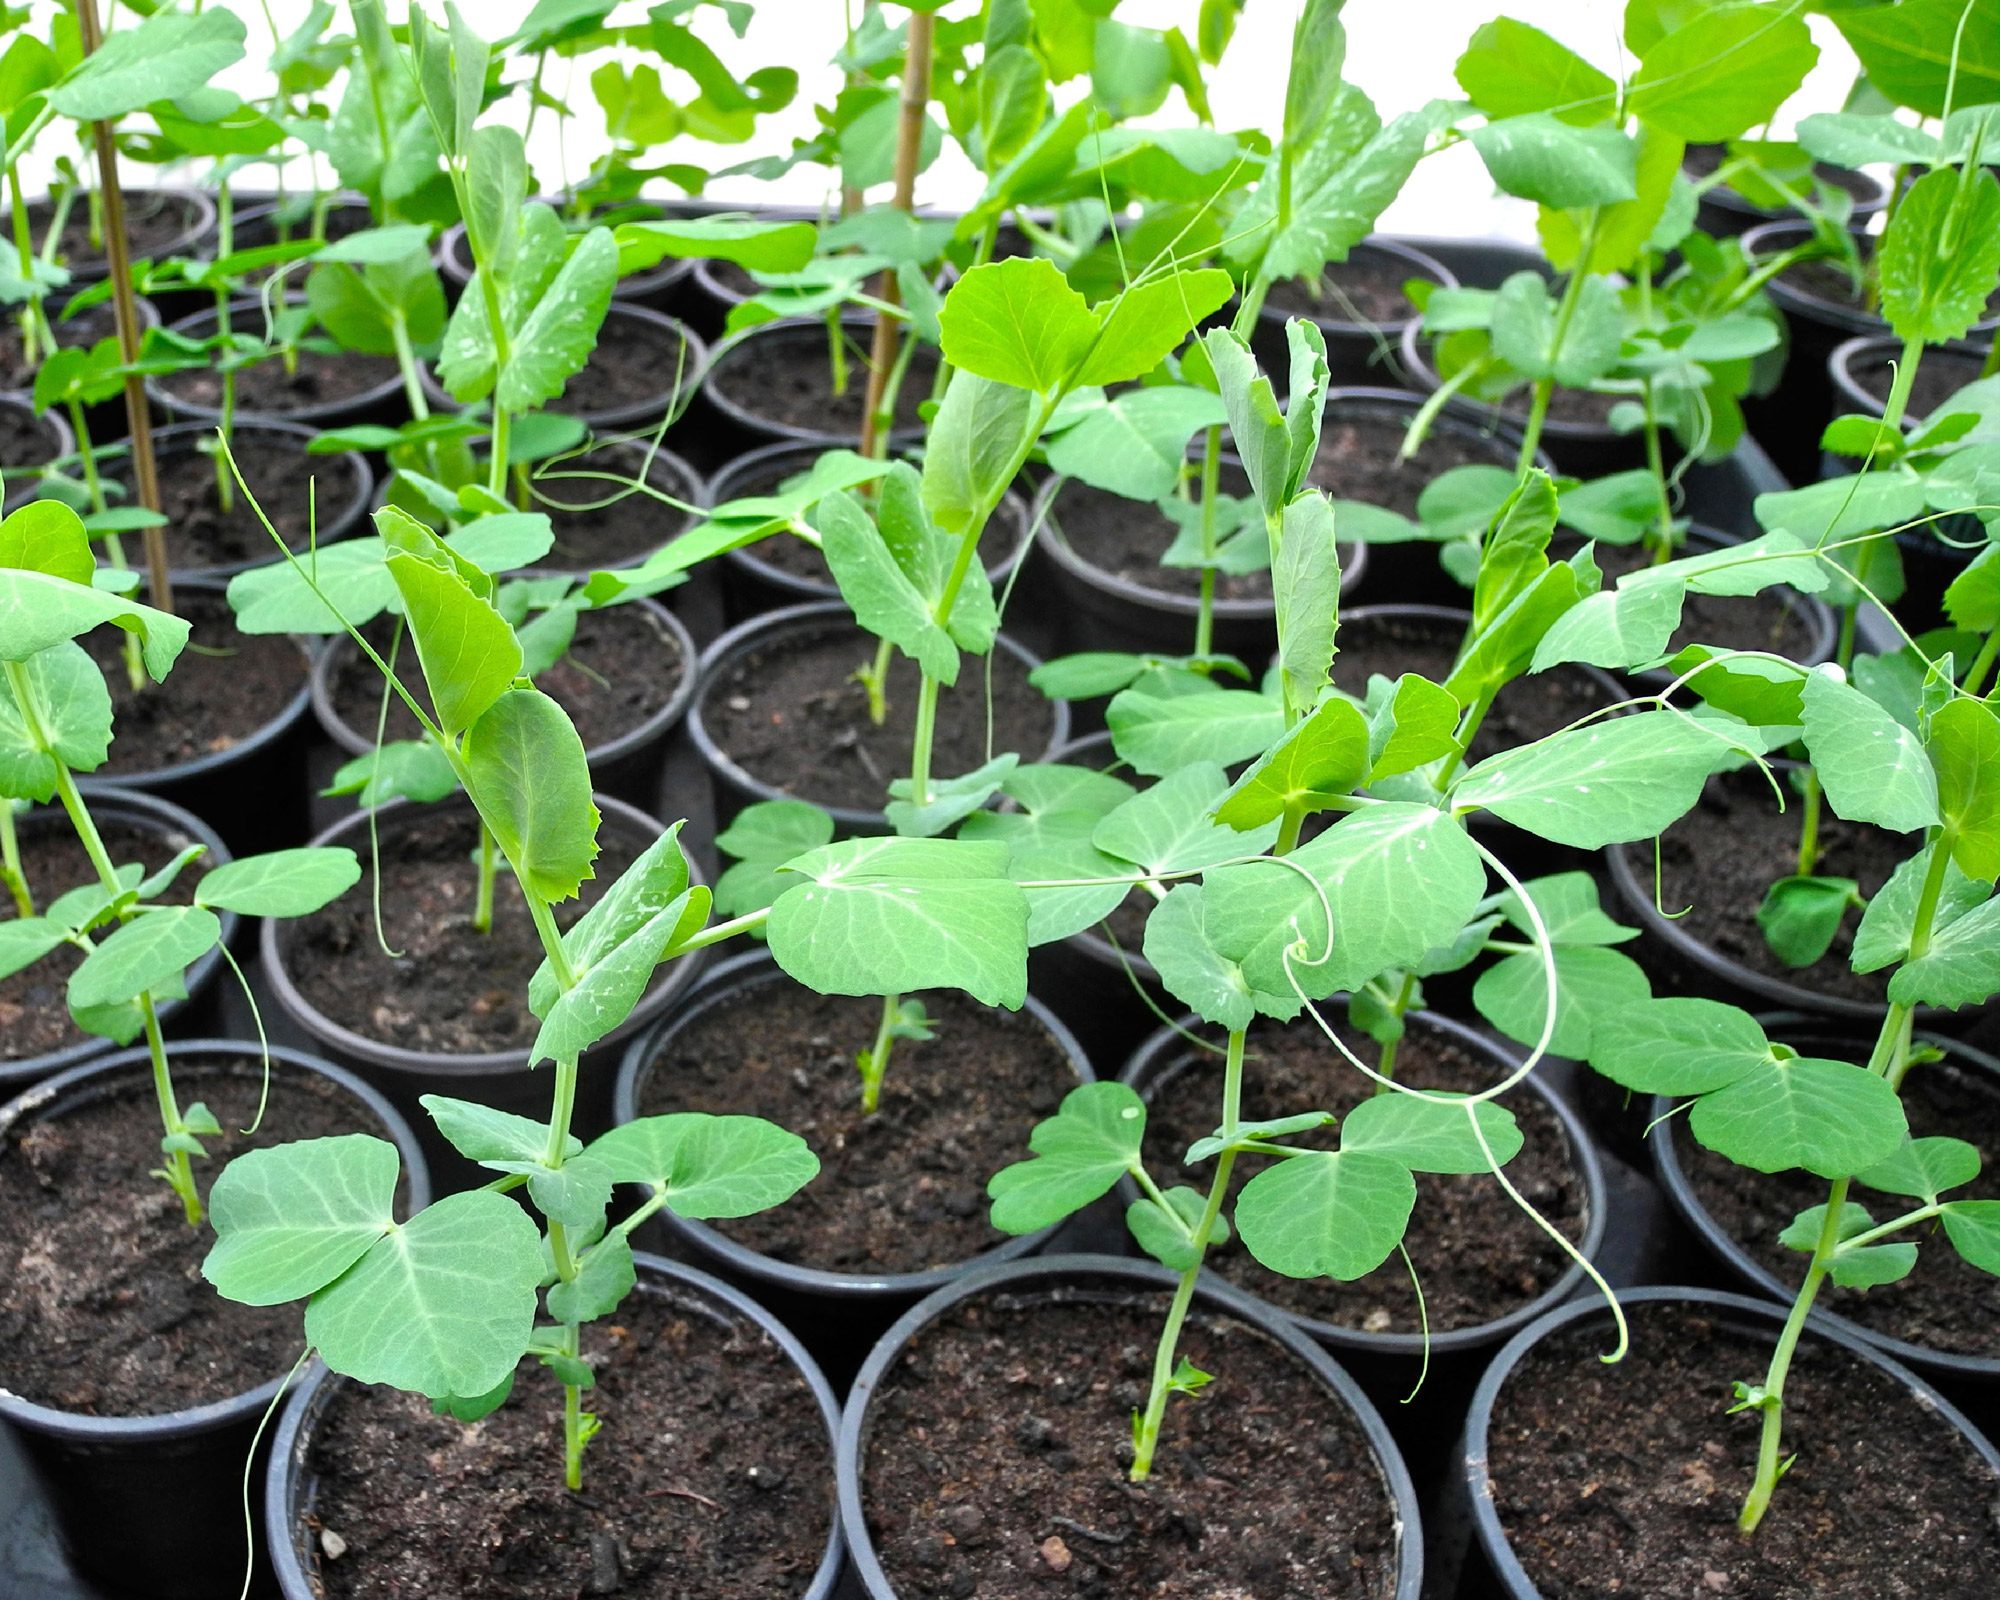
These young pea plants started under glass in late winter will be ready for planting out in mid spring after hardening off
How to grow peas from seed
The trick with learning how to grow peas is to make sure the air is cool and the soil is warm (at least 60˚F). Add plenty of sunshine, and there’s little else to worry about. Aim to grow 25-30 plants for weeks of family feasts.
Make sure the ground is preconditioned with compost or aged manure. Covering the planting site with cloches a week before planting is good for soil temperature, pests and weather extremes.
- Sowing peas under glass Use deep seed modules or biodegradable containers for young root systems. Alternatively, sow into guttering so that when you transplant seedlings outside, you can slide them into place. Sow two seeds per module cell or root trainer, or every three inches (8cm) with guttering. Sow 2in (5cm) deep, then water well and place in a cool spot. After seedlings show, move to a light position. Grow until plants are 5in (12cm) high. A fine mesh will protect seedlings from mice.
- Plant out your peas Once pea plants have two sets of true leaves, harden off plants for a week before planting out. If seedlings were sown in guttering, slide into their final positions. If sown in root trainers or deep modules, plant into a raised garden bed or vegetable bed. Place each plant into a dibbed hole an inch (3cm) deep. Seedlings started in modules or toilet roll tubes are best planted at least 3in (8cm) apart. Amateur Gardening’s Anne Swithinbank suggests 4-5in (10-13cm) spacing so they compete less for nutrients. A layer of well-rotted compost or mulch will maintain moisture levels.
- Direct sow your peas In early spring, you can direct sow if the ground is protected with cloches, diy cold frames or similar. Amateur Gardening’s Bob Flowerdew recommends that shortly before you sow, you pour boiling water along the rows or drills. Sow two seeds an inch deep, spaced every 3in (8cm). It’s a good idea with climbing pea varieties to prep the planting area with individual supports (and labels). Water, then cover with cloches. Add a light mulch of well-rotted compost to retain moisture. For multiple rows, space at a distance equal to the anticipated height. Add netting to protect young plants from birds and mice.
Some experts advise using an inoculant in areas where you have never grown peas before; this is a nitrogen-fixing bacteria that helps plants grow. Also, a word about seeds: pea seeds remain viable for three years. Bear in mind that round pea seeds are hardier than wrinkled seed varieties (which tend to be sweeter).
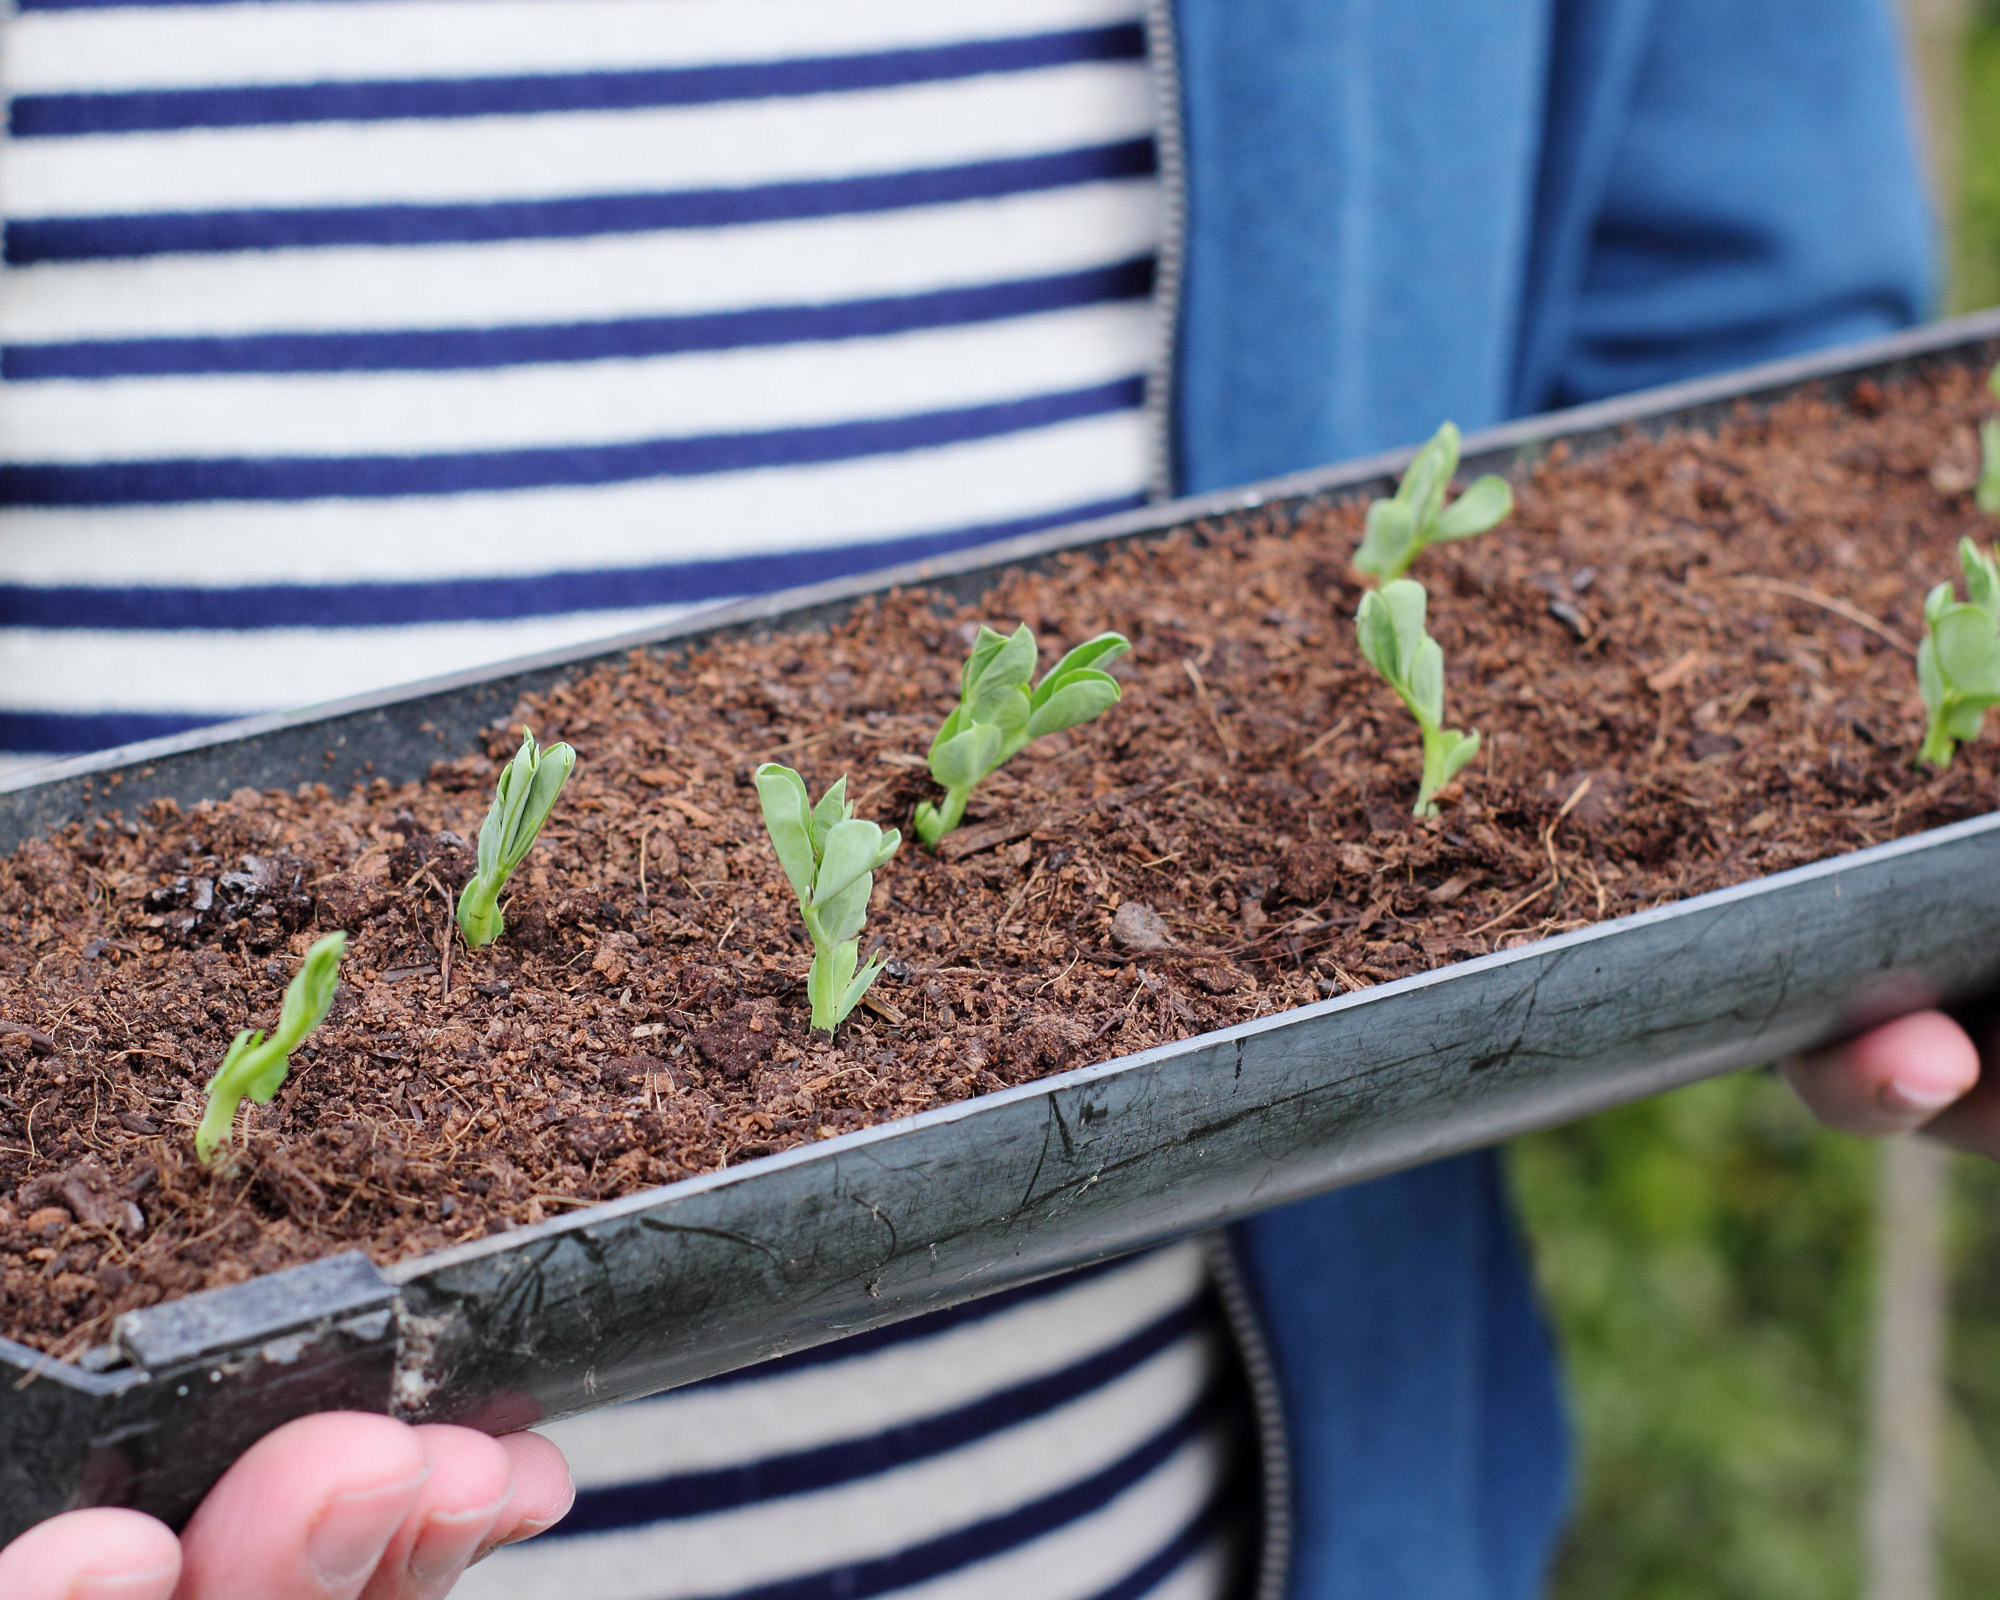
These 'Heraut' mangetout (snow pea) seedlings have been grown from seed in guttering for ease of planting out
How do you support peas?
Depending on the variety, some peas will need support after planting. Climbing varieties such as heirloom ‘Alderman’ or ‘Victorian Colossal Climbing’ can reach 8ft (2.4m) tall, and plants quickly grow tendrils to cling to the nearest sturdy surface. So make the most of vertical opportunities. This can be creative trellis ideas to add height, conveniently situated fences or garden screening for shelter and support, or rows of posts with connecting twine to hold peas in place.
For compact or mid-height breeds, a few well positioned raspberry canes can be sufficient, but for climbers think about height. Mangetout ‘Carouby de Maussane’ and heirloom ‘Telephone’ can grow over 5ft (1.5m), while compact ‘Half Pint’ reaches only 8in (20cm). Meanwhile mid-height varieties such as ‘Hurst Green Shaft’ (30in/75cm) are fine with 4ft (1.2m) pea sticks, says Lucy Chamberlain.
As well as supporting the weight of the pods, you need to allow good airflow, let the plant develop freely and give easy access for harvesting. Two rows of sticks tied at the top with a vertical cane provide uniformity. Arches, A-frames, wigwams and teepee styles give centralised balance. Miniature or pop-up pergolas can give peas ornamental interest as well as sturdy balance.
Even netting held firmly in place with sticks at 6in (15cm) intervals does the job. Twiggy sticks like hazel and willow are better than smooth canes to help tendrils grip. If you aren’t sure which climbing plant support ideas are best, keep it simple. Make sure supports go into the ground before you plant or sow your peas so root systems are disturbed as little as possible.
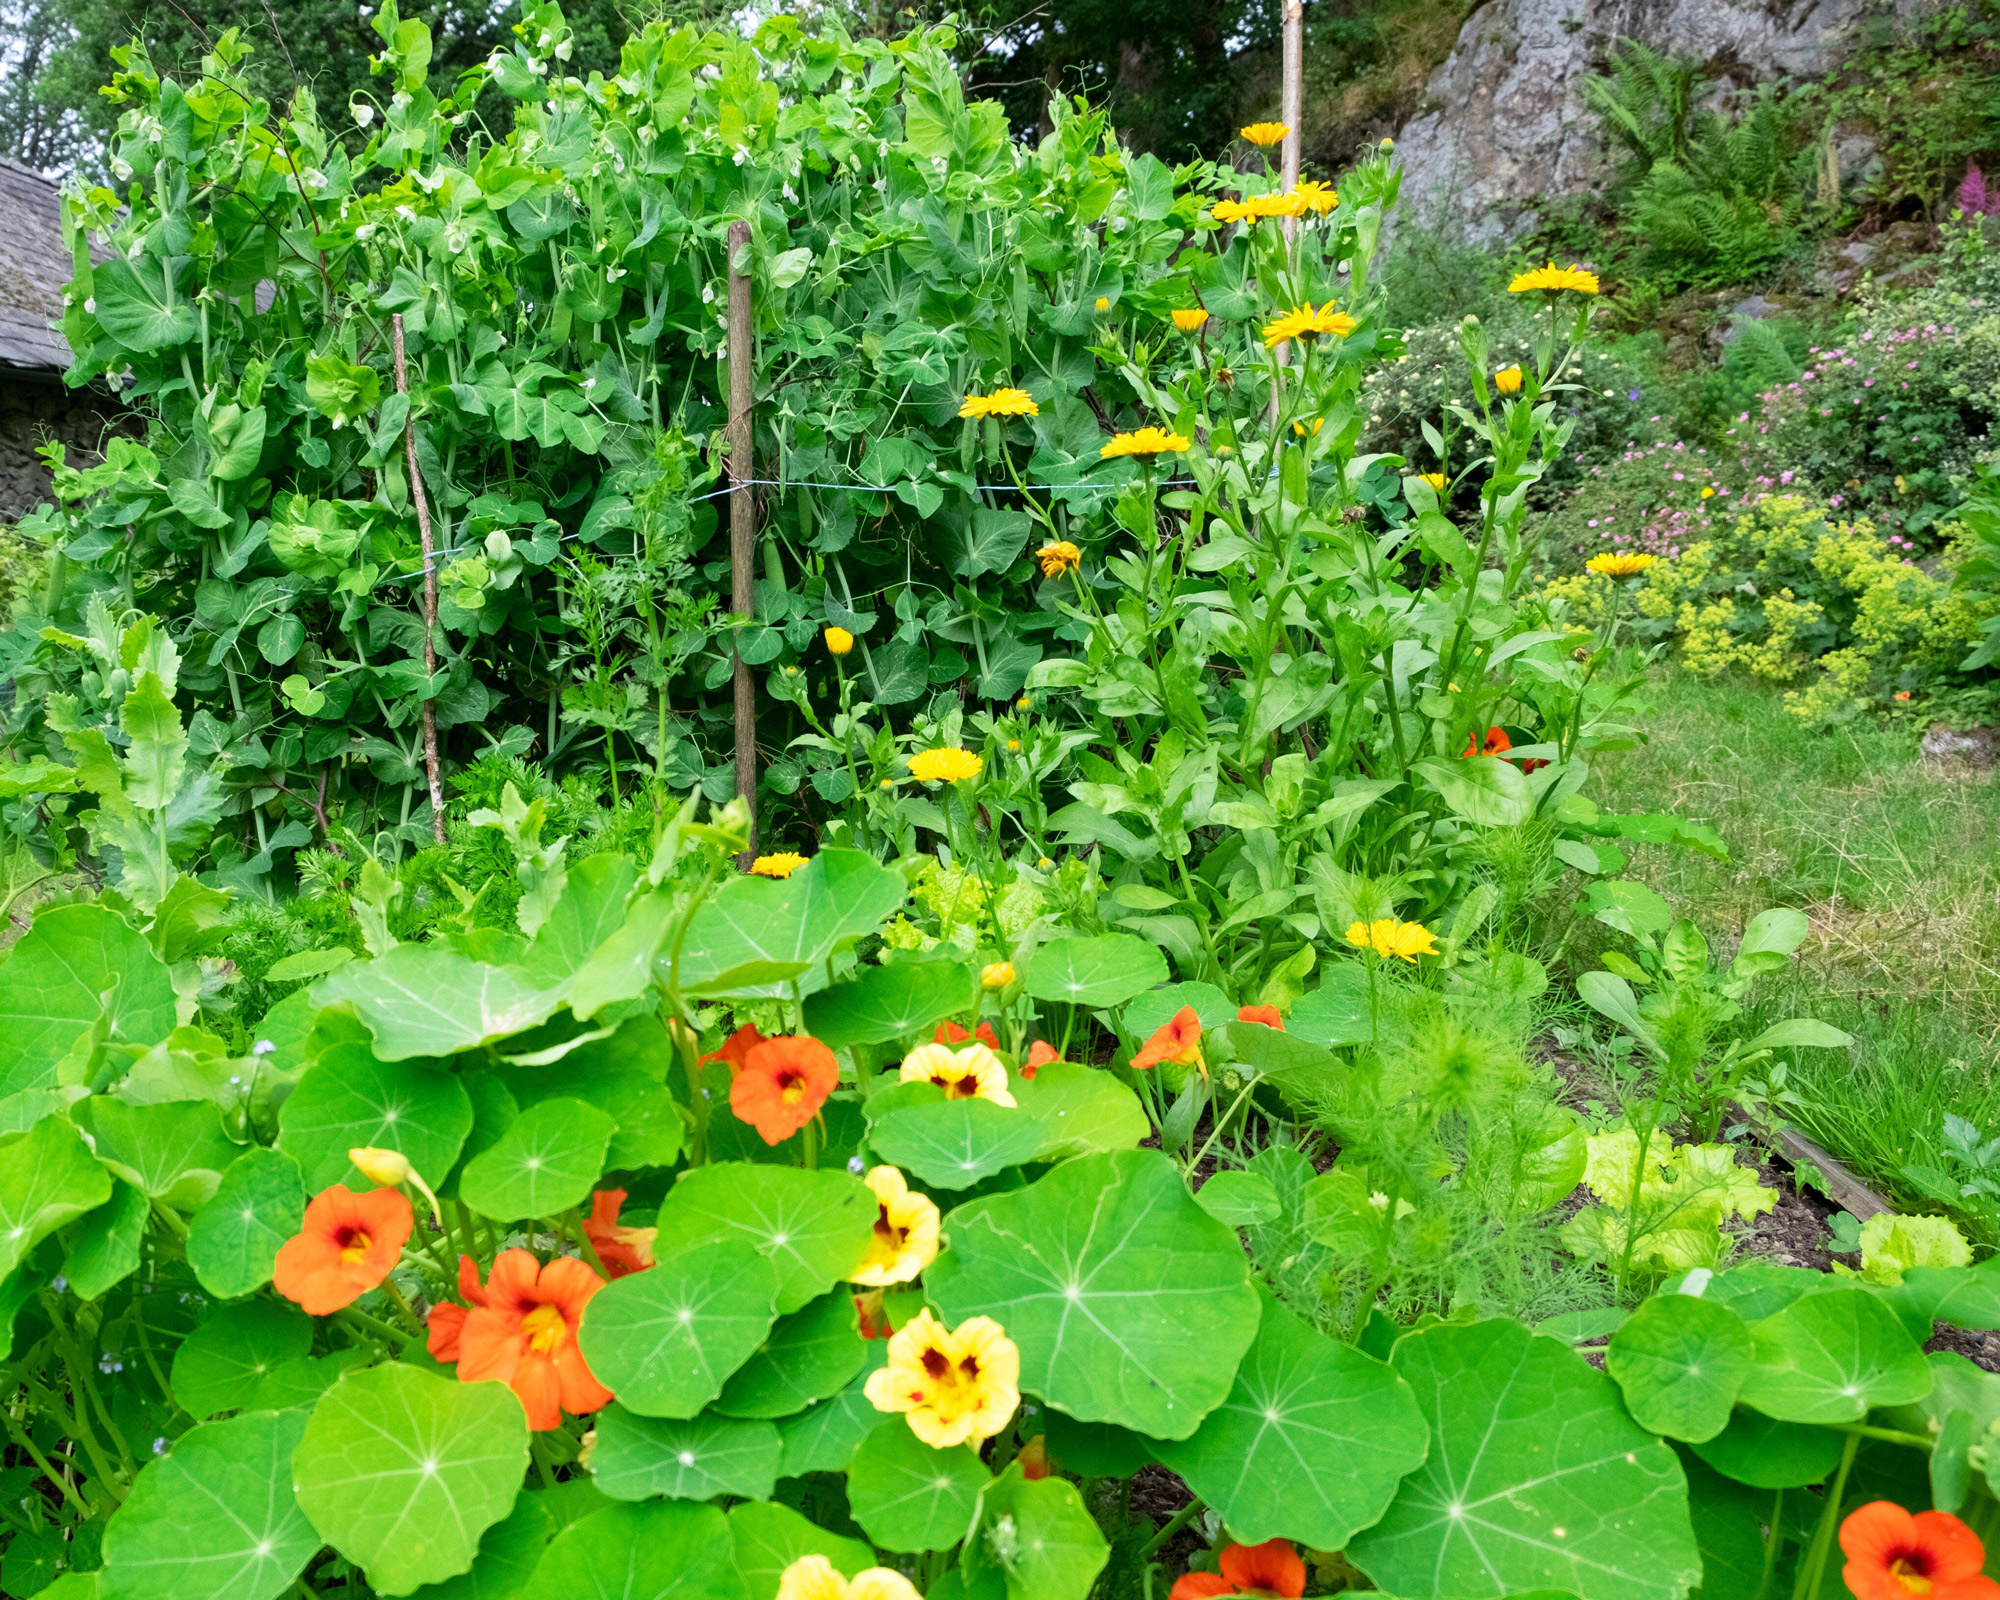
Climbing peas in rows need supports like pea sticks and connecting twine, as with these in a veg patch in summer
Can you grow peas in pots?
If you are short of space and want to know how to grow peas, the good news is that crops are happy in pots. If you are exploring container gardening ideas, many of the same rules apply: plenty of sunshine, ample watering and good drainage (check for holes in the base of containers). Even if space is restricted, twiggy sticks or pea brush will keep peas growing upright. Select suitable varieties for growing in pots. Excellent pea selections for pots are compact breeds like ‘Maestro’, ‘Tom Thumb’, ‘Sugar Bon’, ‘Patriot’, ‘Kelvedon Wonder’, ‘Early Onward’ and ‘Green Arrow’.
Dwarf pea varieties like ‘Bingo’ and ‘Misty’ are also excellent for pot culture, cropping prolifically. Bush peas reach 18-30in (45-75cm) high, putting fewer strains on the resources available. When growing vegetables in pots, just remember compost will dry out quicker, so keep a close eye on moisture levels; this is make-or-break for root systems, plant health and pod set. Also, try not to overload containers; stick to three-five plants per pot so peas don’t get cramped.
Along with drainage, ensure roots have ample room to develop. Choose something as deep as possible (12in/30cm), and ideally as wide (three-five gallons). Use a moisture-retentive, well-draining compost and don’t allow it to dry out, ever. Avoid exposed sites and make sure your patio is well sheltered as well as sunny, while allowing for good airflow. Plastic planters are ideal for mobility (especially on hot days), while terracotta and ceramics are great for compost warmth and stability.
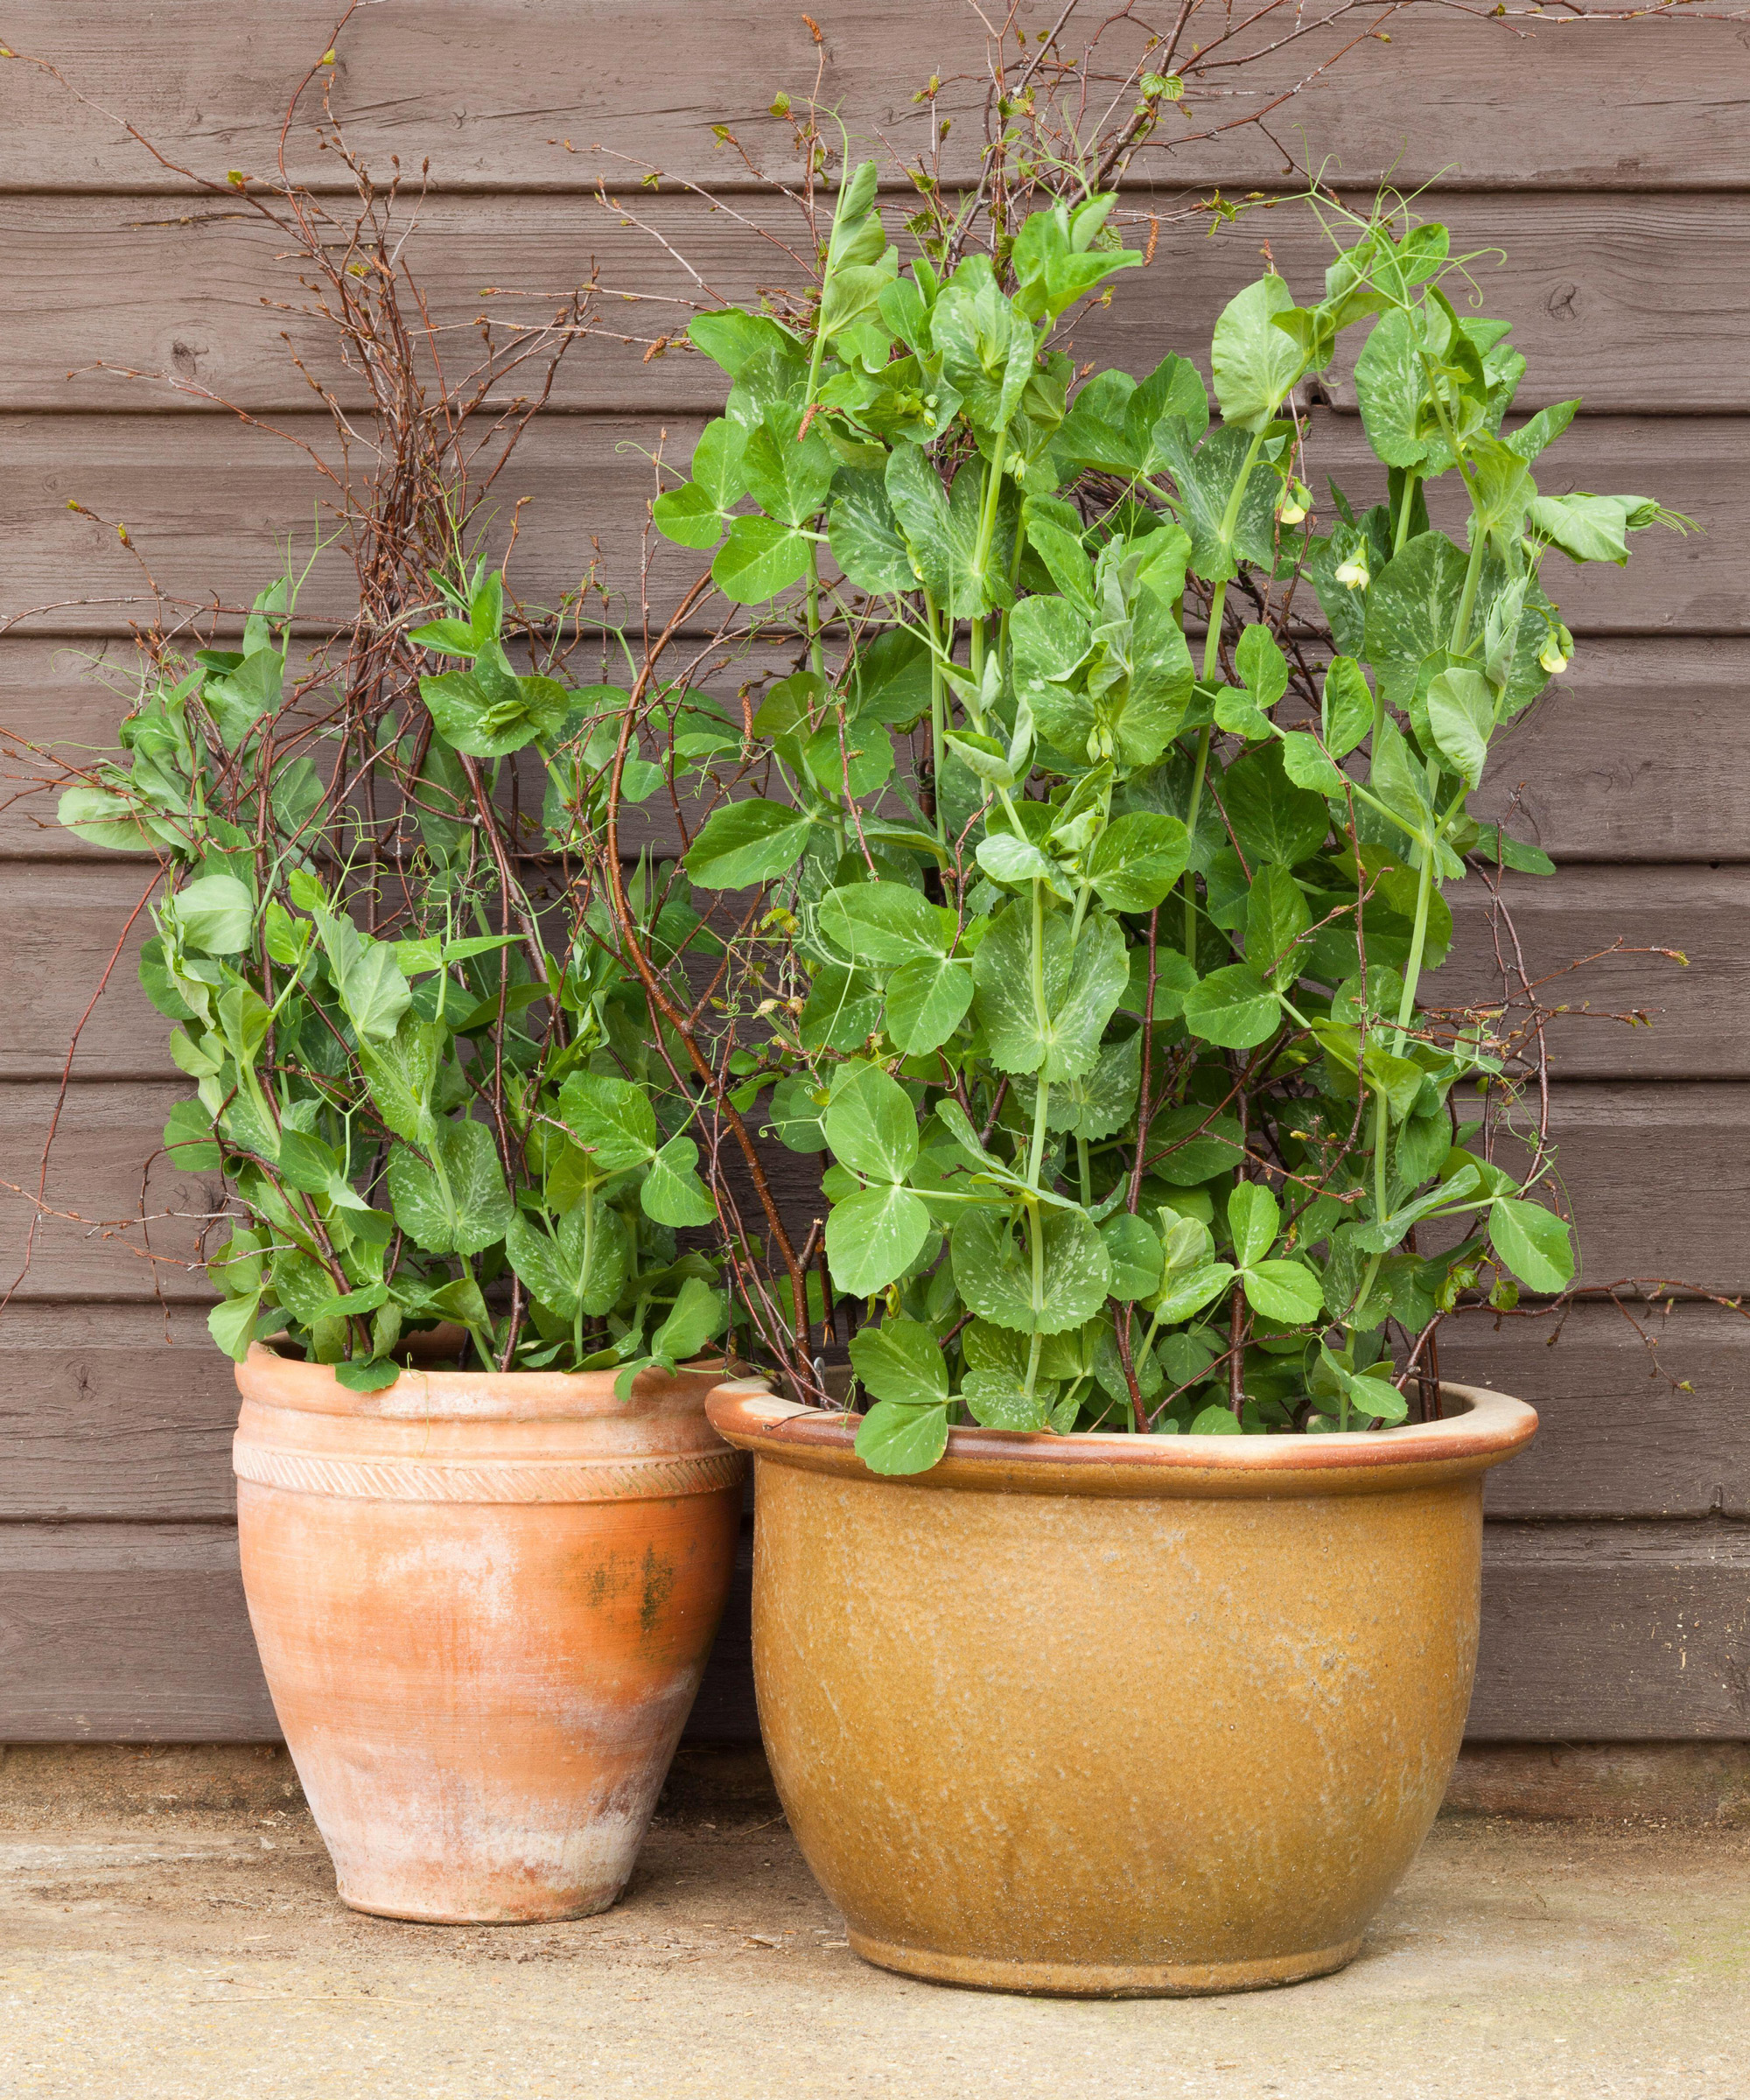
Generous terracotta and heavy ceramic pots will keep compost levels warm as long as your peas enjoy a sunny spot
How to care for peas
Unlike some other crops, caring for peas won’t take up much of your daily routine. There are only a few things to check as the weeks progress, and watering plants is the key element. Peas like moist (not waterlogged) compost so don’t let this dry out; it can prevent individual pea seeds or even whole pods from getting started.
An inch of rainwater a week is fine for healthy peas. Any less, and you need to step in. Water well in dry periods, especially as plants flower and pods swell. Make time for a thorough drenching once or twice a week, directing water at the base of plants to prevent rot. Lucy Chamberlain suggests irrigation gullies for summer months to alleviate plant stress in dry spells. These gullies soak water to the roots where it is needed most.
Check spacings so there is good airflow between plants, and shade in hot spells. If you need to get rid of weeds, gently remove but take care not to disturb the roots of crops. A thick mulching with shredded leaves, wood chips or clippings will retain moisture levels below ground and also keep weeds at bay. Once you see flowers, a weekly high potash liquid feed (like comfrey or tomato feed) is a helpful boost.
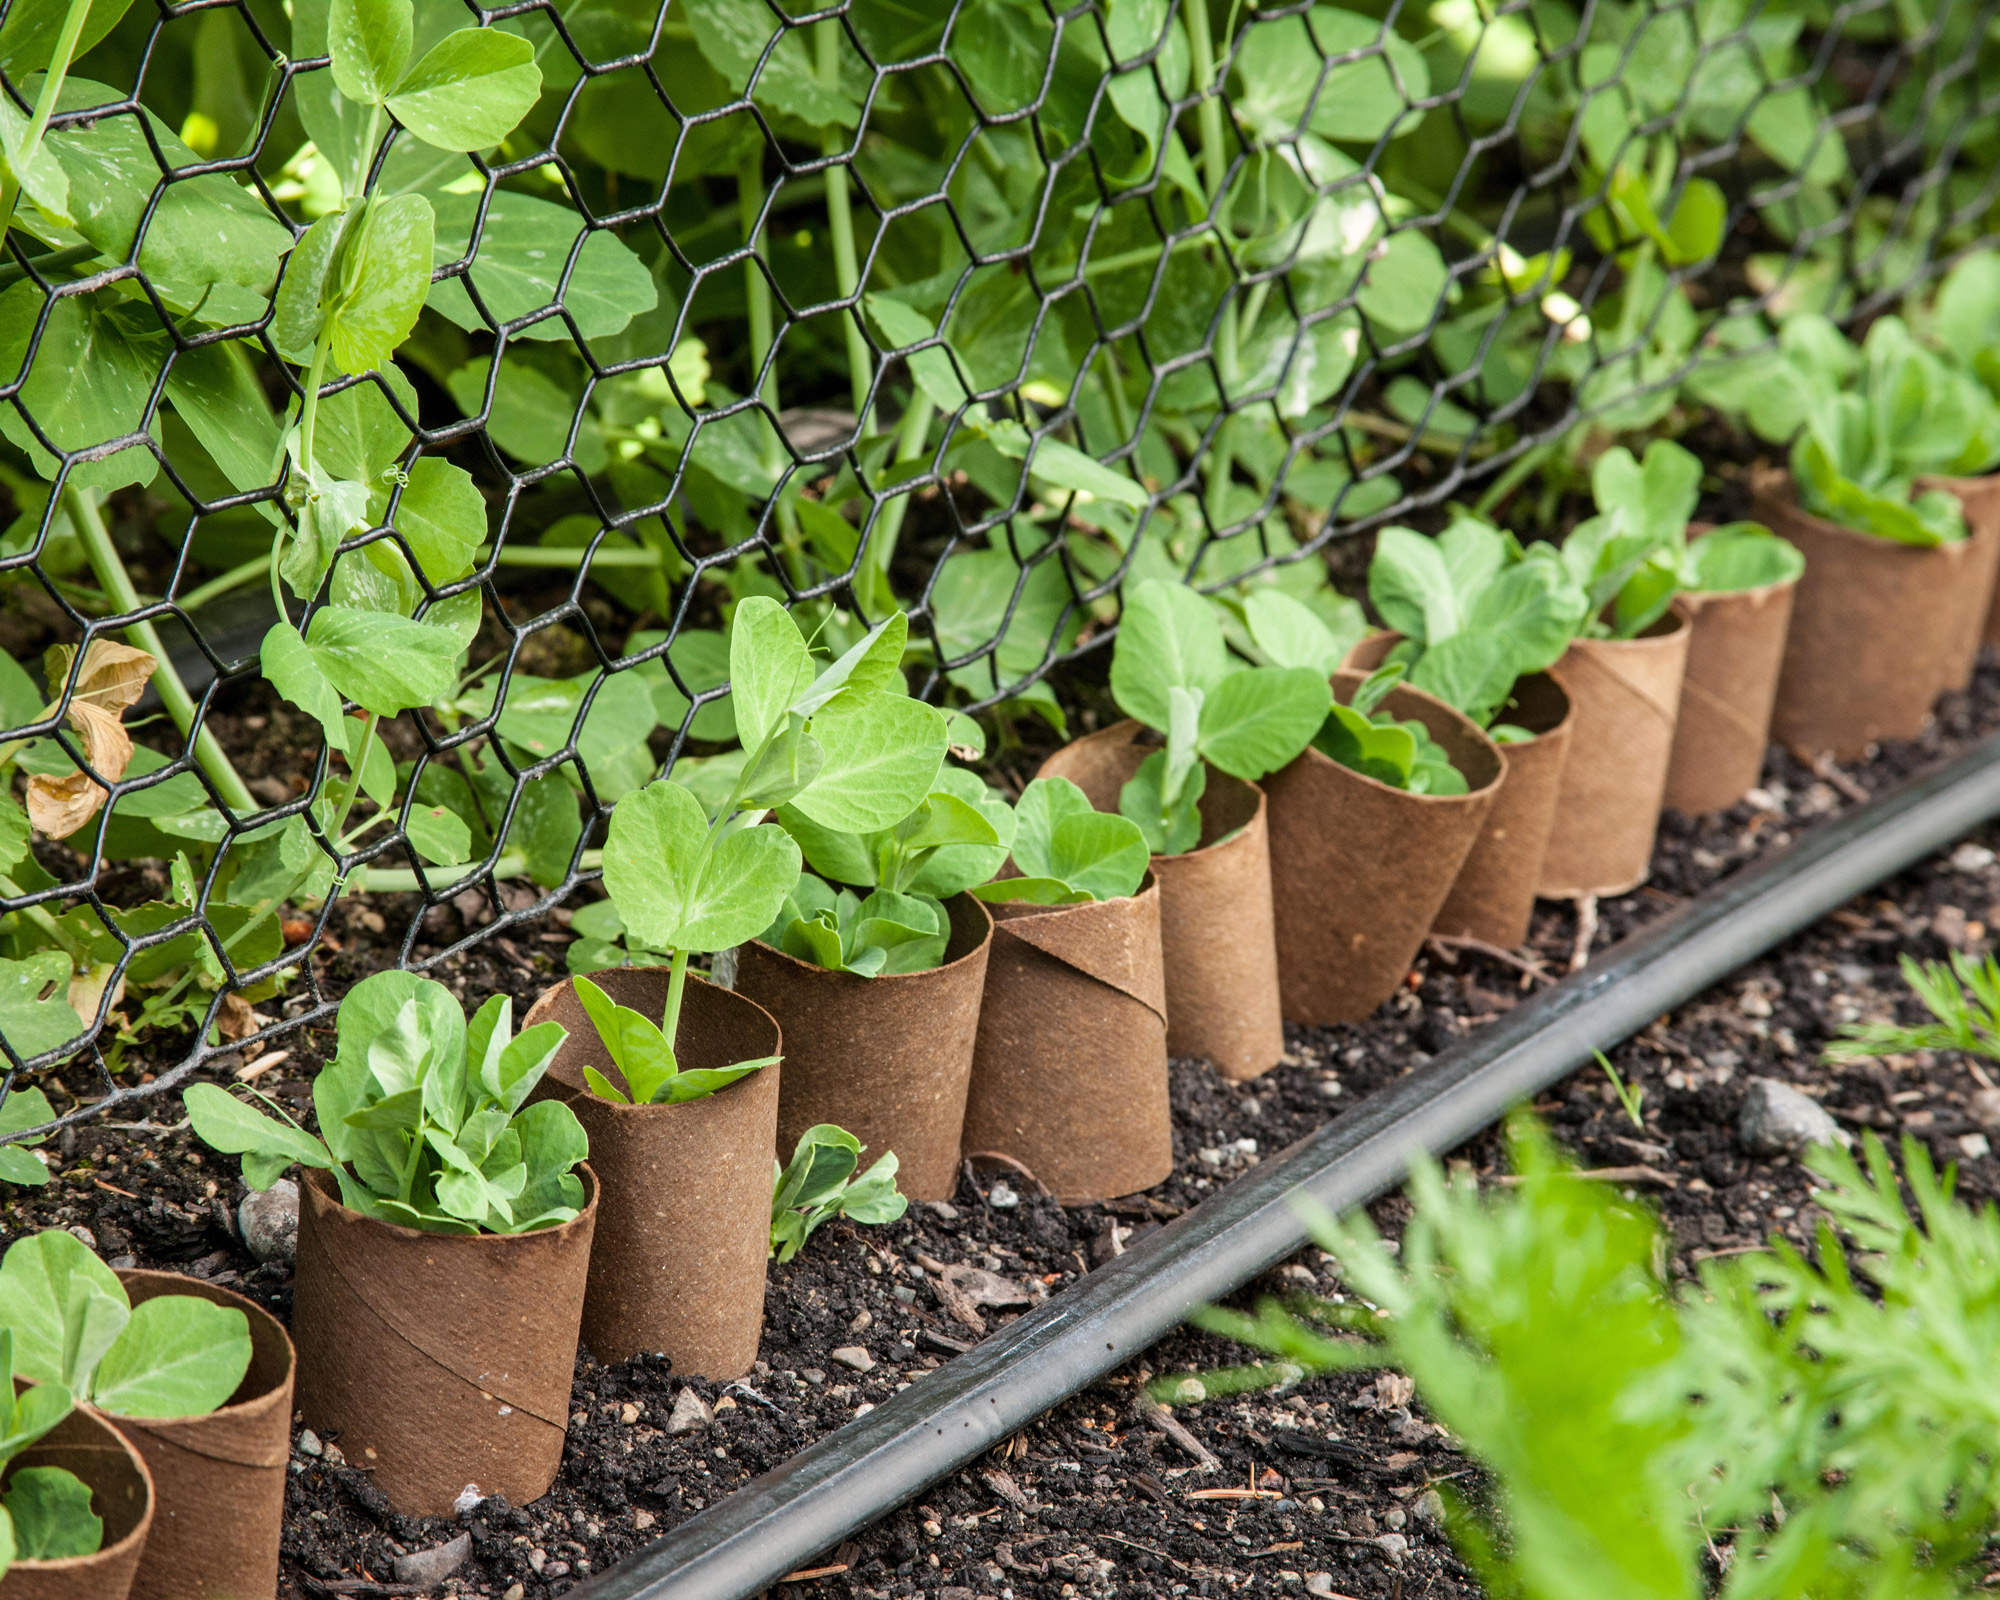
Toilet roll tubes make great ‘shields’ for young pea plants, protecting from the elements and pest intervention
Problems growing peas and how to solve them
Foes from pea aphids to pigeons will be gearing up to make a dent in your precious pods. So even if you only have a small vegetable garden, plan ahead. Here are some of the key pests:
- Pea moth: Often spotted at harvest when opening the pods and finding caterpillars chomping inside. Female pea moths lay eggs on peas in flower and the larvae live inside pods. Prevent this pest by growing your peas under insect-proof mesh. Make early spring and early summer sowings to dodge the pea moth flying season.
- Mice and voles: Direct-sown seedlings are vulnerable, but these pests can scale greenhouse staging and burrow under tunnel cloches. Try hanging modules from greenhouse bars, and layering your sowings with holly leaves.
- Pigeons: You’ll know if pigeons have got to your peas as they will be stripped bare. The only surefire way to dodge this pest is to grow peas under mesh or a fruit cage. Bird-scaring ploys such as CDs can also serve as a decoy.
- Powdery mildew: This appears as a white floury fungus, causing leaves to shrivel and resulting in stunted growth. Drought-stressed plants are especially prone. Make sure yours have free-draining soil and mulch and are well spaced, and water well. Remove decayed leaves. Some pea breeds (such as ‘Terrain’) have resistance to this disease.
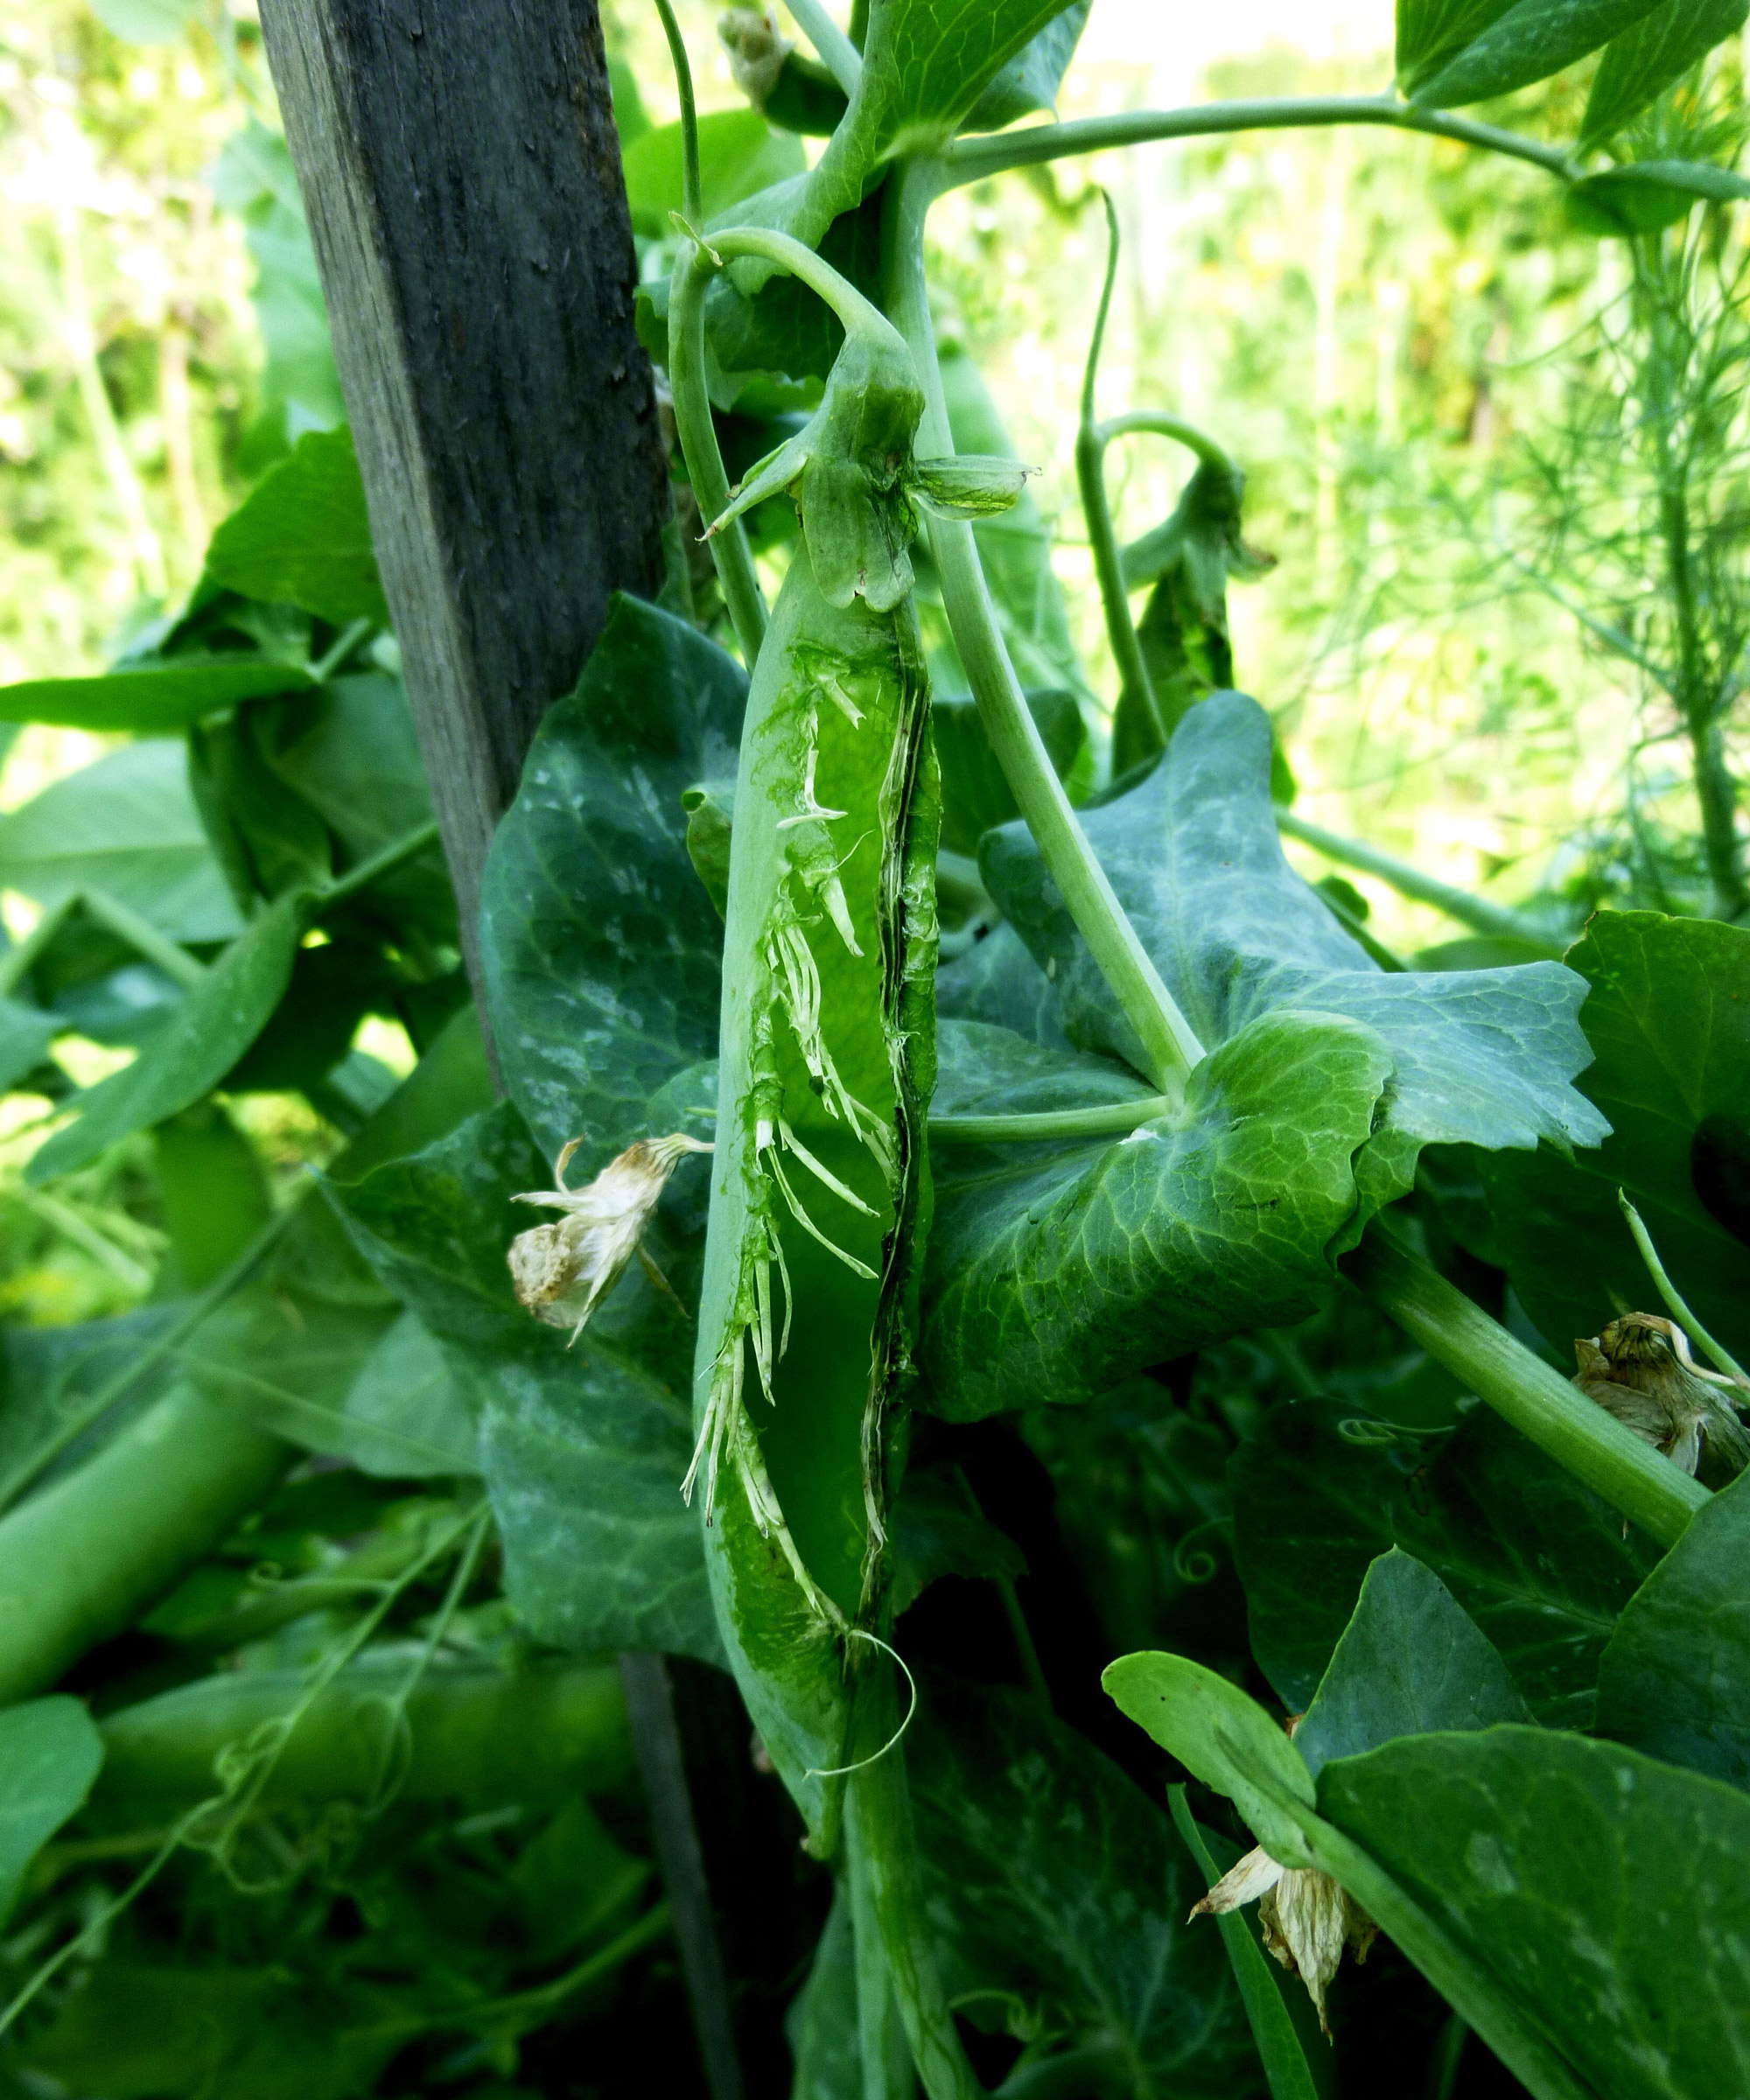
The contents of these pods have been hollowed out by pigeons – make sure yours are protected with nets
When to harvest peas
One of the tricks with knowing how to grow peas is harvesting quickly and often. Harvest when peas are young and fresh: those delicious sugars quickly turn to starches if not enjoyed straight away. The only things to bear in mind are whether you are growing earlies, which need less time than maincrops – and whether you are growing shelling peas (ie ‘fat’ pods) or flatter mangetout types.
One of the most common vegetable harvesting mistakes is picking too late. Start checking 11 weeks from sowing (up to 16 for maincrop types). Make time every day to check your rows or containers. With shelling peas, look for pods to swell and shine, then assess a good ratio of swelling to weight. Lucy recommends a pod width of 1cm for picking, as long as the pod doesn’t feel hollow. For ‘skinny’ pea types like mangetout and snow peas, base your picks on lustre and pod size (3in/8cm long).
Pick in the morning, working from the base of the plants upwards, and use both hands to avoid wrenching plants. With care, you can be harvesting until mid fall. And don’t despair at the odd dry pea – they are excellent in soups!
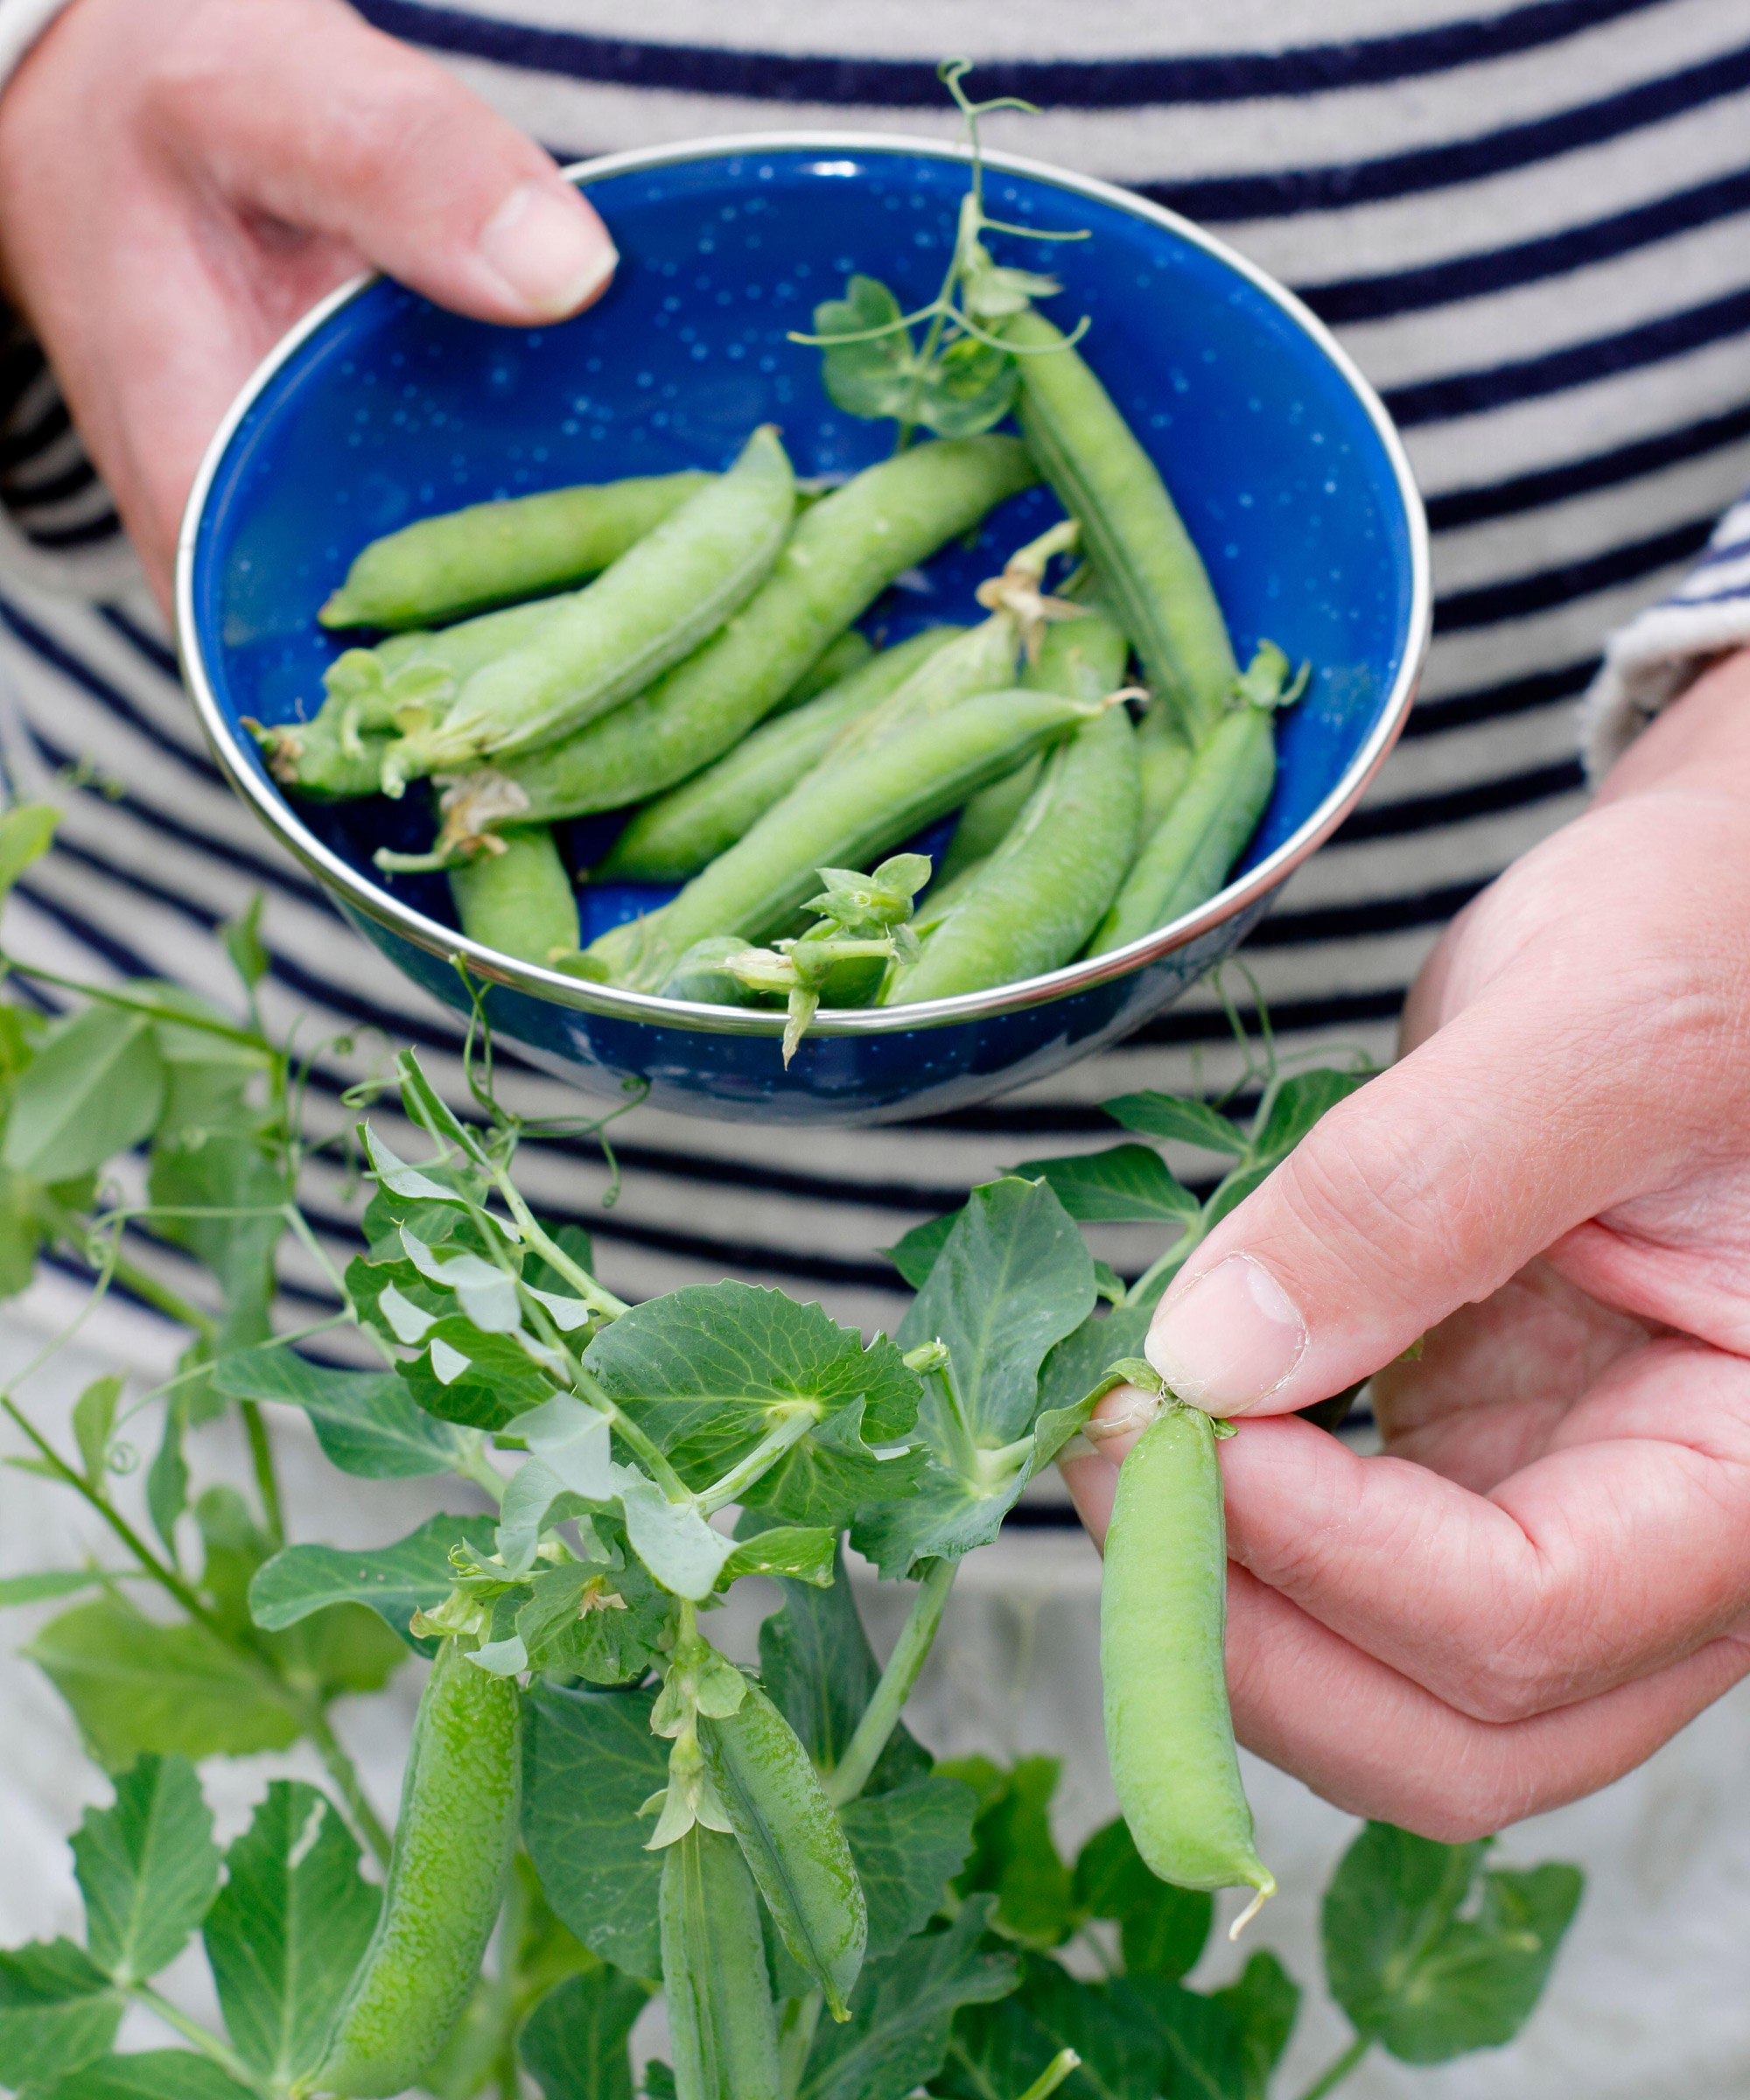
The most important advice when harvesting shelling peas is to pick as quick as you can, as often as you can
Are all parts of peas edible?
When growing peas, it isn’t just the peas you can eat. Some varieties like snow peas (or mangetout - literally, ‘eat everything’) can be consumed in their entirety. If you want to know how to grow peas you can eat for their pods as well as their seeds, check the seed packets: they can usually direct you as to whether the pods for a given cultivar are edible.
Pea gourmands are also encouraged to eat the plant tendrils (and flowers, if you can spare a few from developing into pods!). This fragrant, curly young growth is just as tasty as the main crop, and equally nutritious. If you enjoy fresh healthy shoots and know how to grow cress and broccoli sprouts, pea shoots are a must in summer salads. And a few snips will encourage bushier growth.
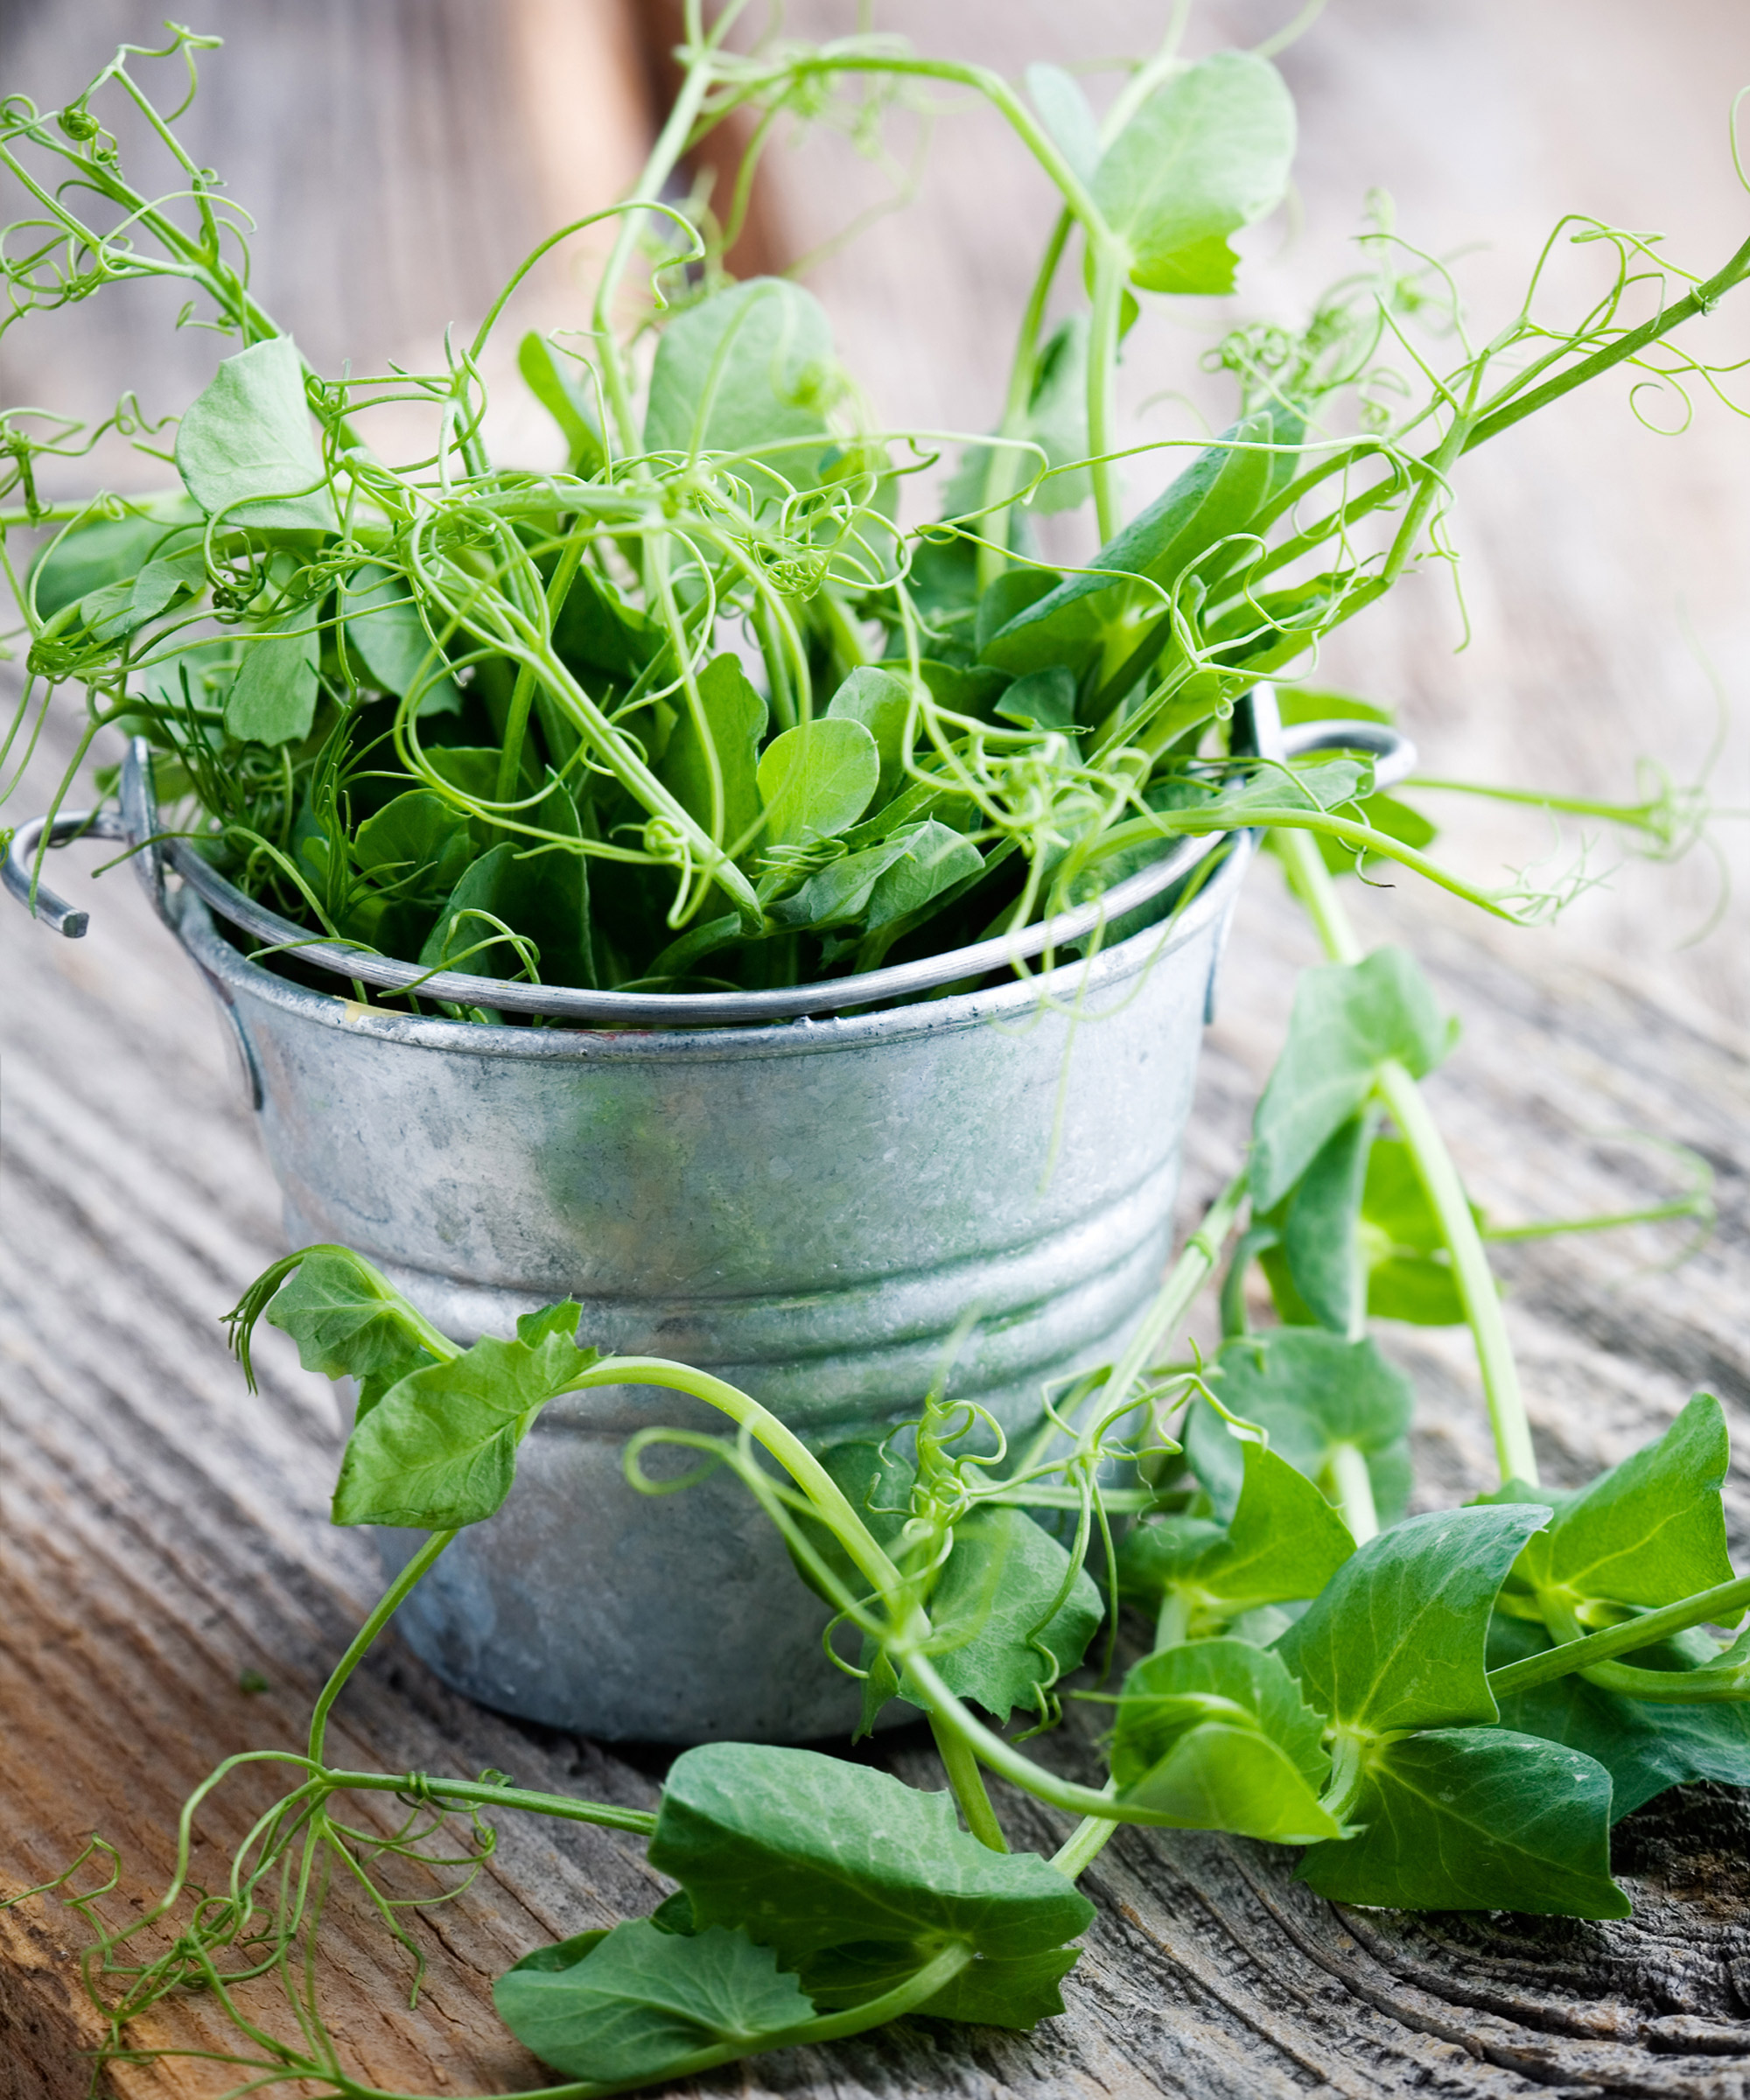
‘Anubis’ is a Suttons pea variety that crops in three weeks so you can quickly enjoy edible returns from shoots
Can you grow peas in winter?
If you want to know how to grow peas you can start as early as possible, there is a way to beat the rush. Choose the right varieties and you can also start the previous year. Sow in early winter, and you can overwinter peas for early spring plantings and early harvests. It’s a great way to outsmart the obvious demands of the vegetable planting calendar and give root systems a boost, especially if you have room under glass. Late-season sowings of peas are a great accompaniment to growing lettuce in winter if you are stuck for inspiration at the tail end of the year.
‘Gardeners in milder regions can sow hardy dwarf varieties in mid or late autumn with the aim of stocky but well-established plants going into winter,' says Anne Swithinbank. Great varieties to sow for overwintering are hardy round-seeded ‘Douce Provenance’, ‘Meteor’ and ‘Feltham First’. On light, sandy soils you can try sowing direct. Otherwise, sow in deep pots under glass for planting out in March. Just be minded that germination rates can be a bit less predictable.
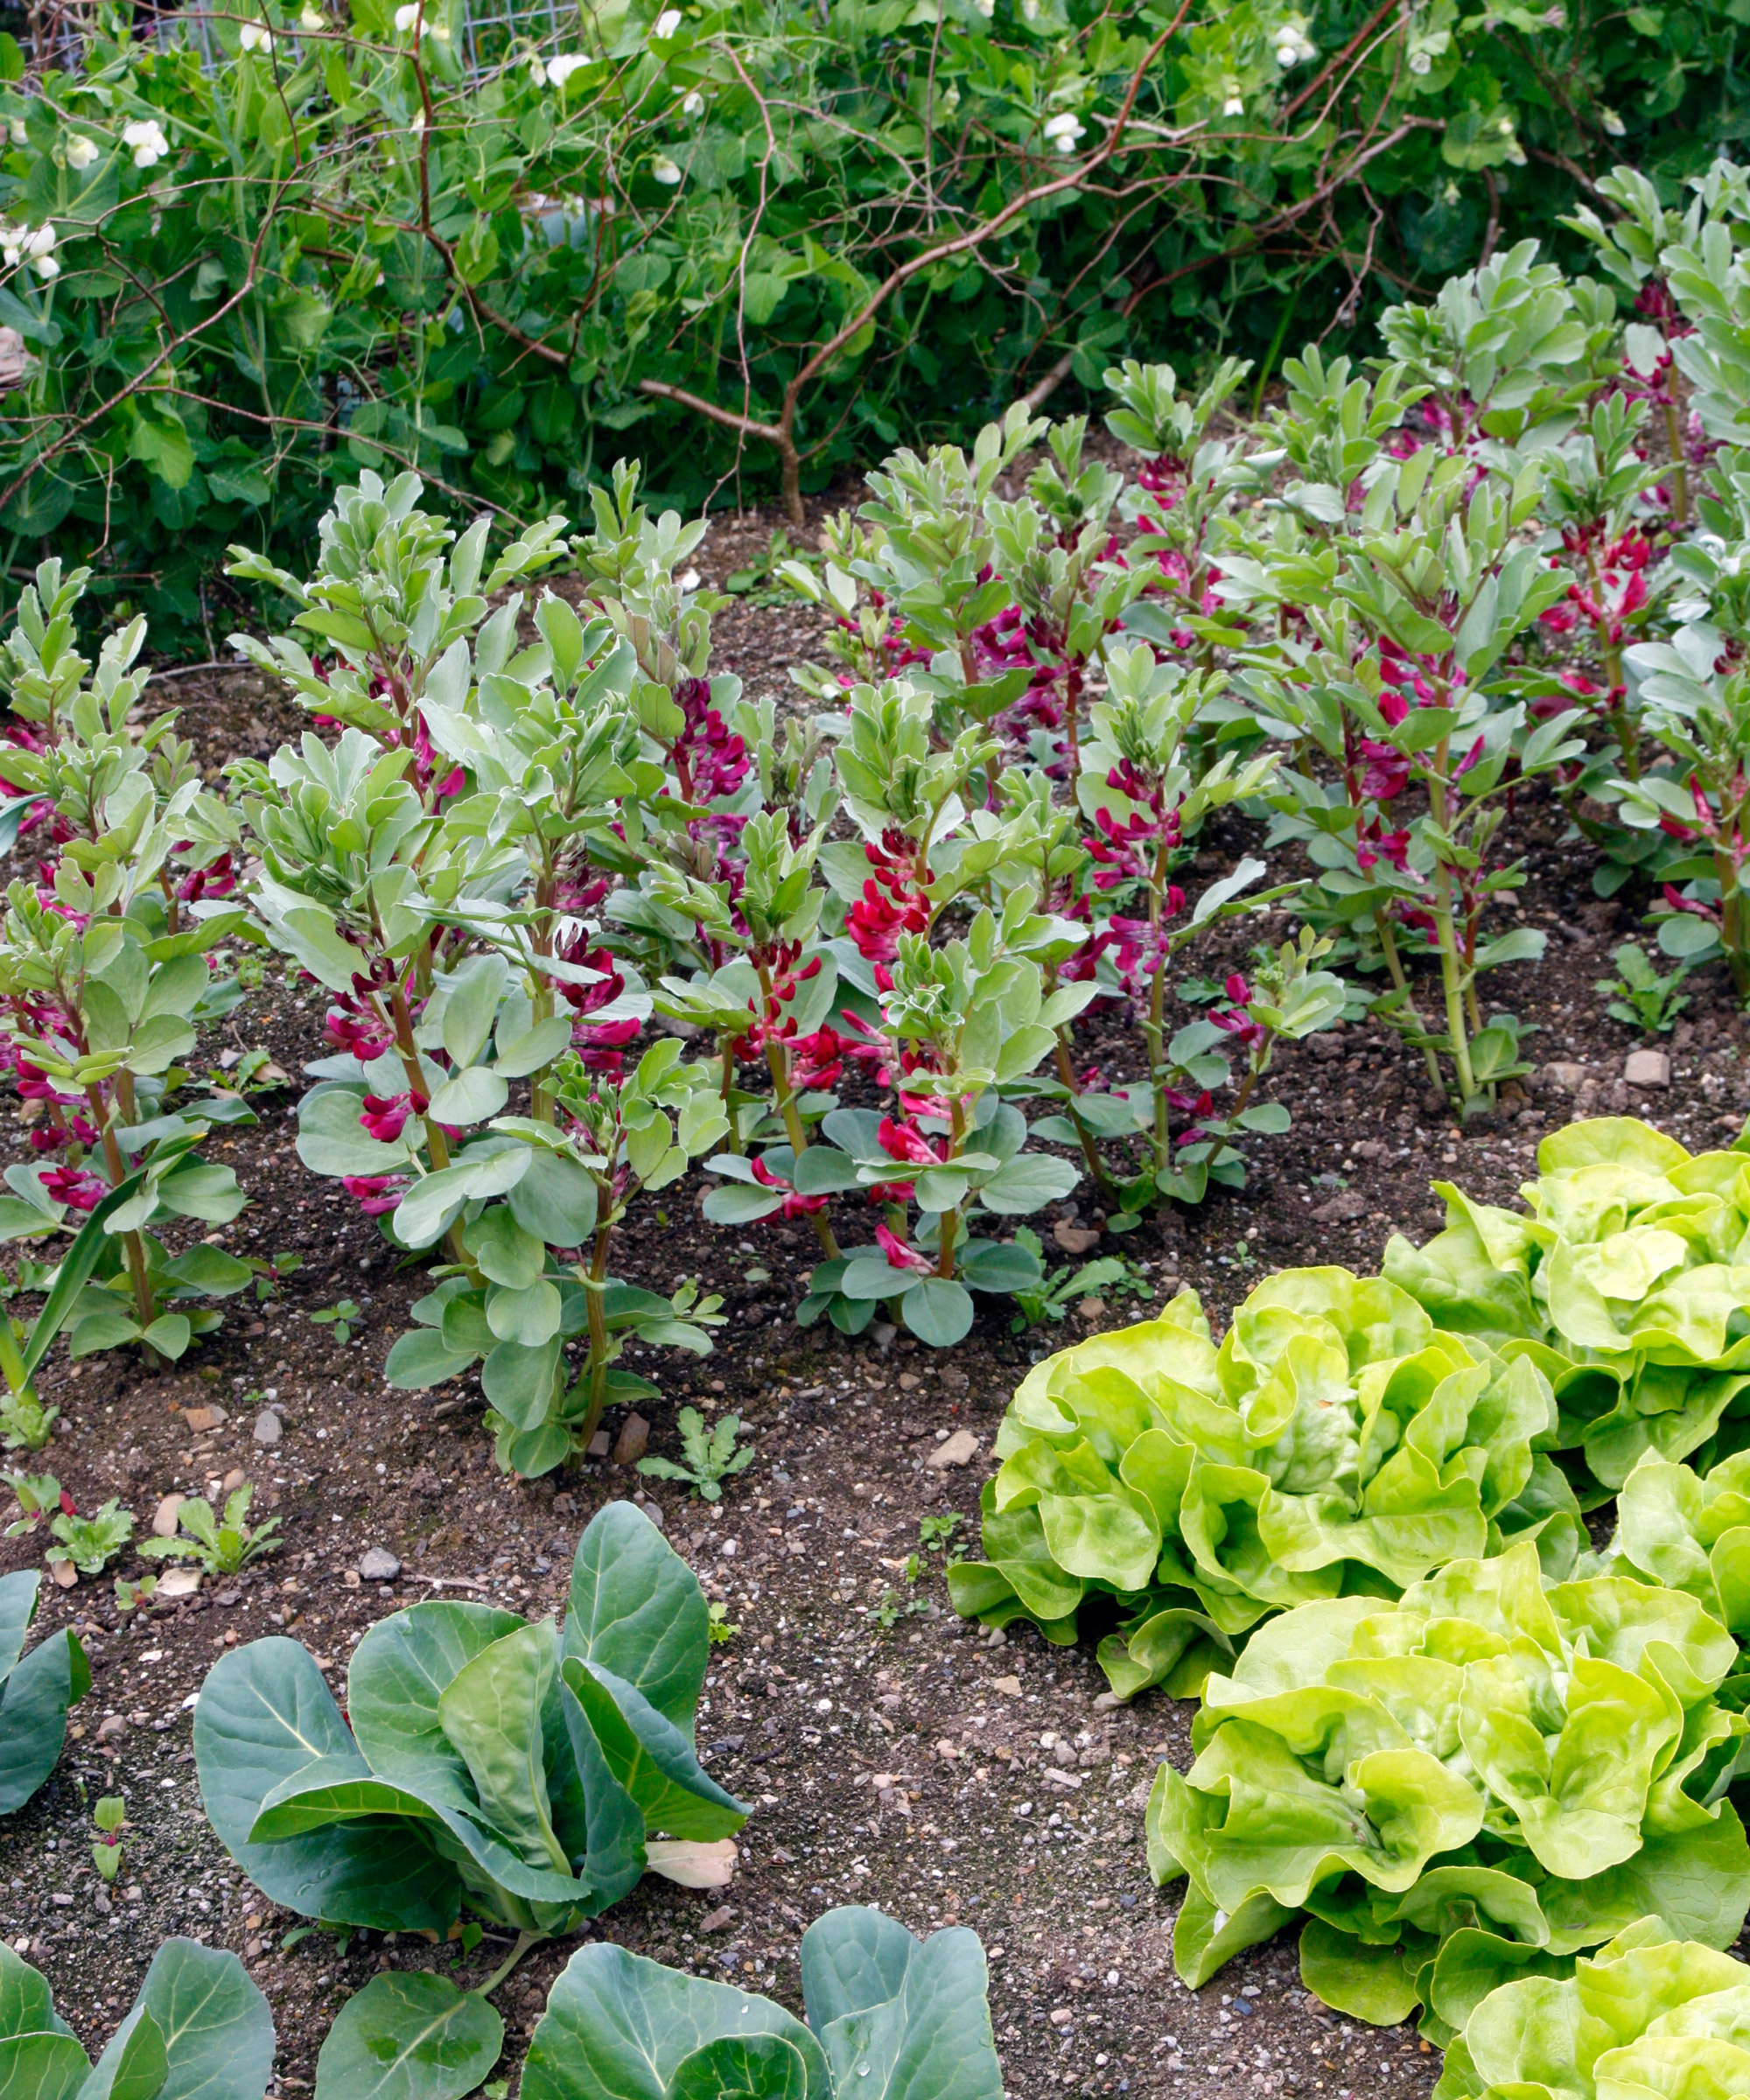
From winter sowings, this potager in early May is showing healthy 'Feltham First' peas alongside lettuce, cabbage and broad beans
How many types of peas are there?
There are so many varieties of peas to choose from, you could spend the rest of your life growing them in a mix of raised bed, potager garden, containers and teepees!
Beyond climbing and dwarf varieties, there are three main groups to choose from: shelling (or garden), snow peas (or mange tout), and sugar snaps. Here’s what to expect and enjoy with each of the main types:
- Shelling (garden) peas: fat-podded types with edible peas (but not edible pods). Sweetness varies, but these types tend to be best for popping and snacking. Includes: ‘Kelvedon Wonder’, ‘Feltham First’, ‘Hurst Green Shaft’, ‘Douce Provenance’.
- Snow peas (mangetout): flat-podded varieties with edible stringless pods. Especially good in stir-fries. Includes: ‘Oregon Sugar Pod’, ‘Shiraz’, ‘Snow Wind’, ‘Delikata’, ‘Spring Blush’.
- Sugar snap peas: these are somewhere between, with rounder (edible) pods and sweet plump peas that can be shelled. Includes: ‘Delikett’, ‘Sugar Lace’, ‘Sugar Ann’.
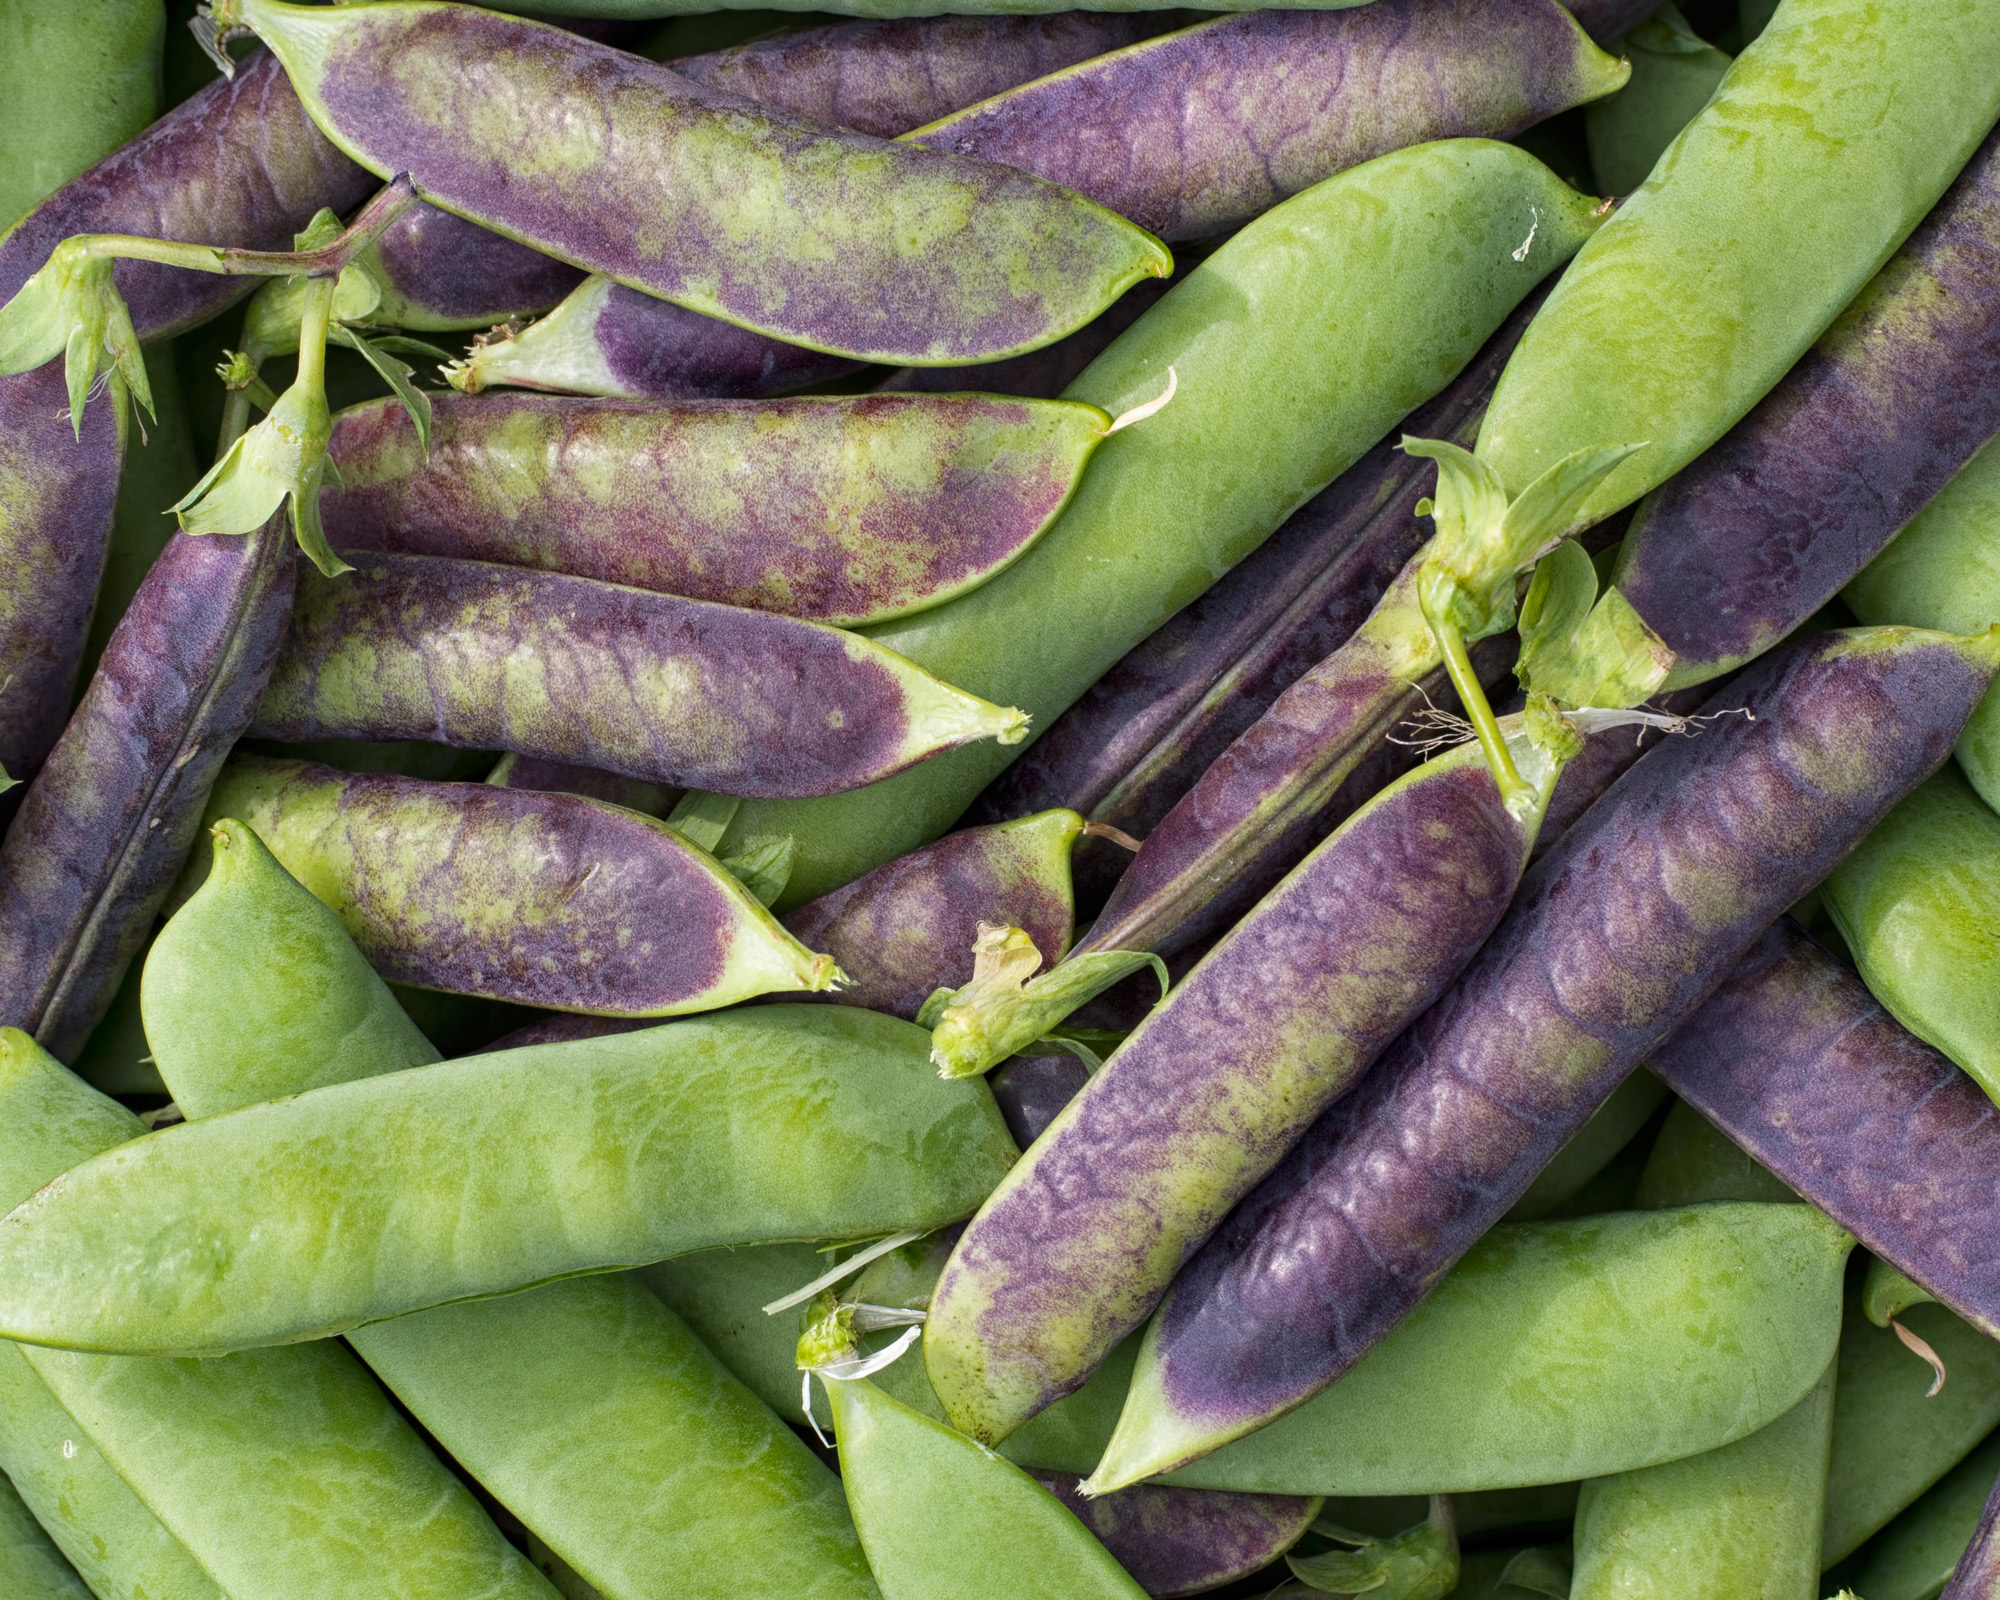
Colorful ‘Purple Podded’ shelling peas and slender ‘Sugar Lace’ sugar snaps
Where to buy peas as seeds
If you’d like to know how to grow peas, here are our suggestions for the best places to buy seeds. There’s a huge range online, with selections for early and maincrop sowings. You’ll find sugar snap and mangetout options alongside a host of shelling peas.
Dwarf varieties are perfect for container growing, while climbing and vining breeds prefer to clamber up trellises, compact pergola ideas, canes and fences. Some retail outlets also sell plugs, which can claw you back some time if you start later. Use our quick links for an easy way to start.
Where to buy peas as seeds in the US:
- Shop pea seeds at Amazon
- Shop pea seeds at Burpee
- Shop pea seeds at Home Depot
- Shop pea seeds at Select Seeds
- Shop pea seeds at Walmart
Where to buy peas as seeds in the UK:

As assistant editor of Amateur Gardening magazine, Janey's gardening passion was fostered from an early age, when her amazing mum had her deadheading hydrangeas, mulching roses, and propagating strawberry plants from runners for school open days. She's also taken part in lots of conservation and rewilding projects for the RHS and TCV as a way of exploring her horticultural horizons.
