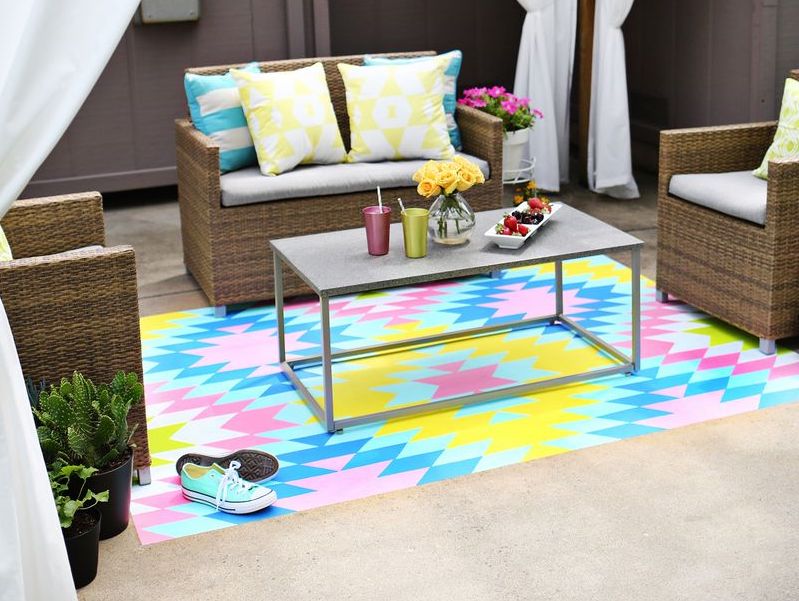
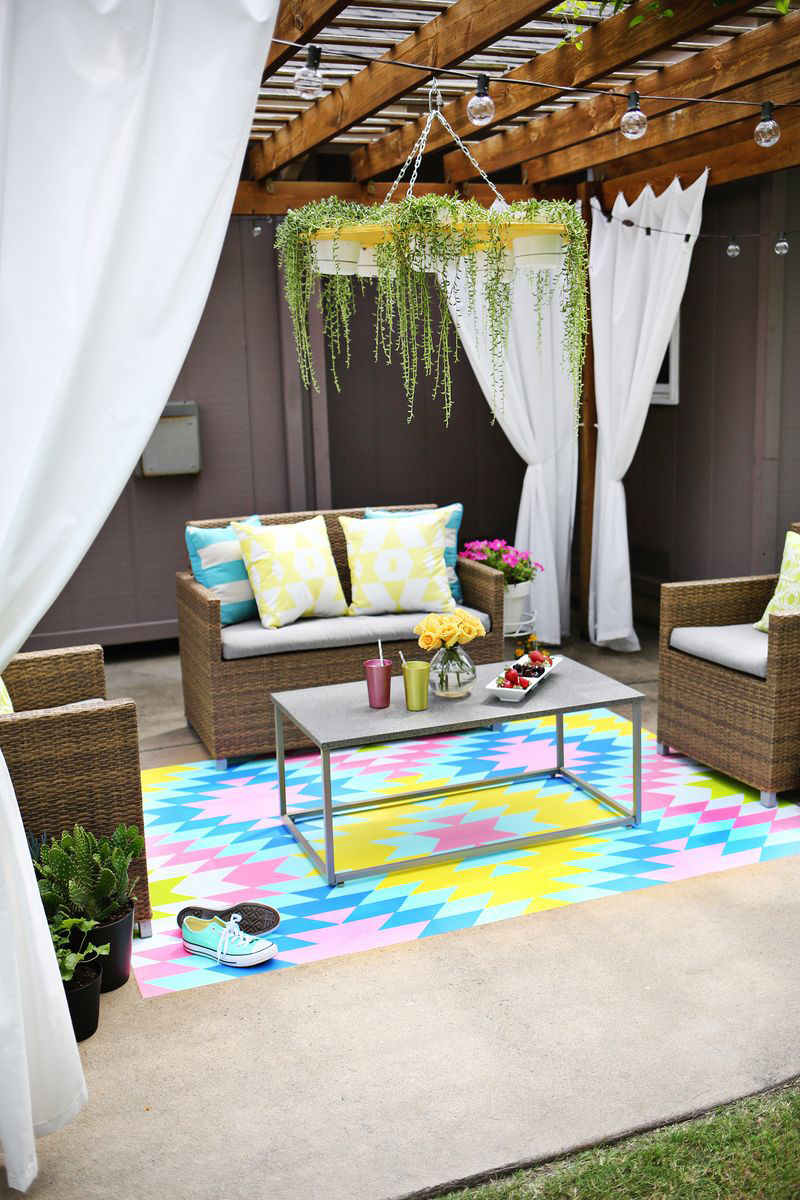
This painted outdoor rug idea will transform a plain patio in just seven easy steps!
Can't find an outdoor rug you love? Paint one on your patio instead – it's the perfect weekend DIY project


Outdoor rugs are the garden accessory of 2020. As proof that we're blurring the boundaries between inside and out, we're even bringing all the decorative detailed designs once reserved for our interiors, outside into the garden, too.
The perfect way to add an instant splash of colour, outdoor rugs create a focal point for the rest of your garden scheme to work around. Whether you're jazzing up your dull concrete patio or dressing your bare balcony, a rug can completely transform the look and feel of your space.
One drawback of an outdoor rug is that, while many are water resistant, it's best to bring them inside throughout the winter months to keep them looking their best. So if you want an outdoor space that's colourful and welcoming all year long, why not paint one directly onto your floor?
This stunning design by A Beautiful Mess gives the look and cosy-lounge feel of an outdoor rug, without the faff that goes with bringing your rug inside and out, or having to let it dry through after a downpour. What better opportunity for letting your imagination run wild and designing a bespoke rug you love. Just follow these simple steps and enjoy!
Want even more inspiration to transform your outside space? Check out our favourite garden ideas in our gallery.
You will need:

- Concrete cleaner
- Broom
- Concrete primer
- Outdoor paint (in various colours)
- Paintbrush
- Masking tape
- Measuring tape
- Stencil, or a craft paper and a craft knife to create your own
- Pencil
- Roller (optional)
- Paint sealant (optional)
Step 1: Clean your patio thoroughly
Use a concrete cleaner and broom to thoroughly clean your patio. Any dirt or stains will not only prevent the painted rug from looking smooth and neat, but it will prevent the paint from sticking so you could end up with patches. Allow your concrete to dry out completely.
Step 2: Mark the outline of your rug
Work out the perfect rug size for your space. Use a measuring tape to ensure straight and equal lines and mark the shape out with masking tape. The design shown here is 5 foot by 7 foot, but you could go much smaller if you need, or you could even choose a square or circular shape, too.
Step 3: Paint on your concrete primer
Paint your concrete primer inside your masking tape with a brush to seal the concrete and create a smooth base for the paint colours to follow. Allow to dry fully.
Step 4: Paint all of your rug in your lightest colour
Choose your lightest paint colour, such as pale blue here, and paint over your primer within the masking tape to fill the area. Allow to dry.
Step 5: Create your stencil (psst...or buy one online)
The creators of this stunning design at A Beautiful Mess used craft paper, a craft pen and lots of measuring to create their own stencils and build up this rug pattern. While we can all agree that it was seriously worth it, they suggest choosing a simpler pattern, such as spots or stripes, if you're a painting novice.
If you don't trust yourself with a pencil (we hear you) there are many pre-made stencil designs that you can buy online to create a repeated pattern – check out Dizzy Duck Designs.
Step 6: Get stencilling
If you've crafted your own stencil, draw around this in pencil and paint carefully between the lines. Use a smaller brush for accuracy. Begin painting with your lightest colour, and paint on your darkest colour last. This means that if you make a mistake with a lighter colour, you can cover it up with a darker colour later on.
If you've bought a stencil online, place the stencil in position and attach with masking tape. Use a roller to paint over the stencil. Remove the masking tape, reposition the stencil, and repeat. Allow to dry.
For similar paint colours, try Bees Knees, So Twee, Icy Fresh, and Picasso Blue, all from Valspar.
Step 7: Apply a sealant
Protect your masterpiece by brushing on a coat of sealant. This is dependant upon the specific paint you use, and for some paints this may not be necessary. But it might provide some peace of mind to know that your artwork is as protected as possible. Allow to dry fully.
And that's it! Sit back and admire your colourful, bespoke outdoor rug and prepare for even the cloudiest of days to be brightened. And if you notice that it's raining, the mad dash to gather your outdoor cushions and accessories will be a whole lot quicker knowing your rug can stay outside.
More to read:
- Discover stunning decking ideas to revamp your space
- How to create an outdoor living space perfect for relaxing and entertaining
- Find the best garden furniture for your outdoor space
Amelia has worked on Real Homes magazine since 2016 and is now Deputy Style Editor. She's a flower lover, and her dining table is never without a bright and blousy bunch of blooms. She loves the excitement of planting seeds in her container garden, and watching beautiful flowers appear from nothing. This year she’s on a mission to enhance her new rented garden with a colourful bistro set, a patterned outdoor rug and plenty of fairy lights. Her favourite houseplant is a Calathea, as she loves how they lift their leaves at night, as if tucking themselves into bed!
