How to plant flowers in pots: step-by-step guide to stunning patio containers
Learn how to plant flowers in pots with our easy-to-follow container planting guides, including a cottage garden style and a modern design with succulents
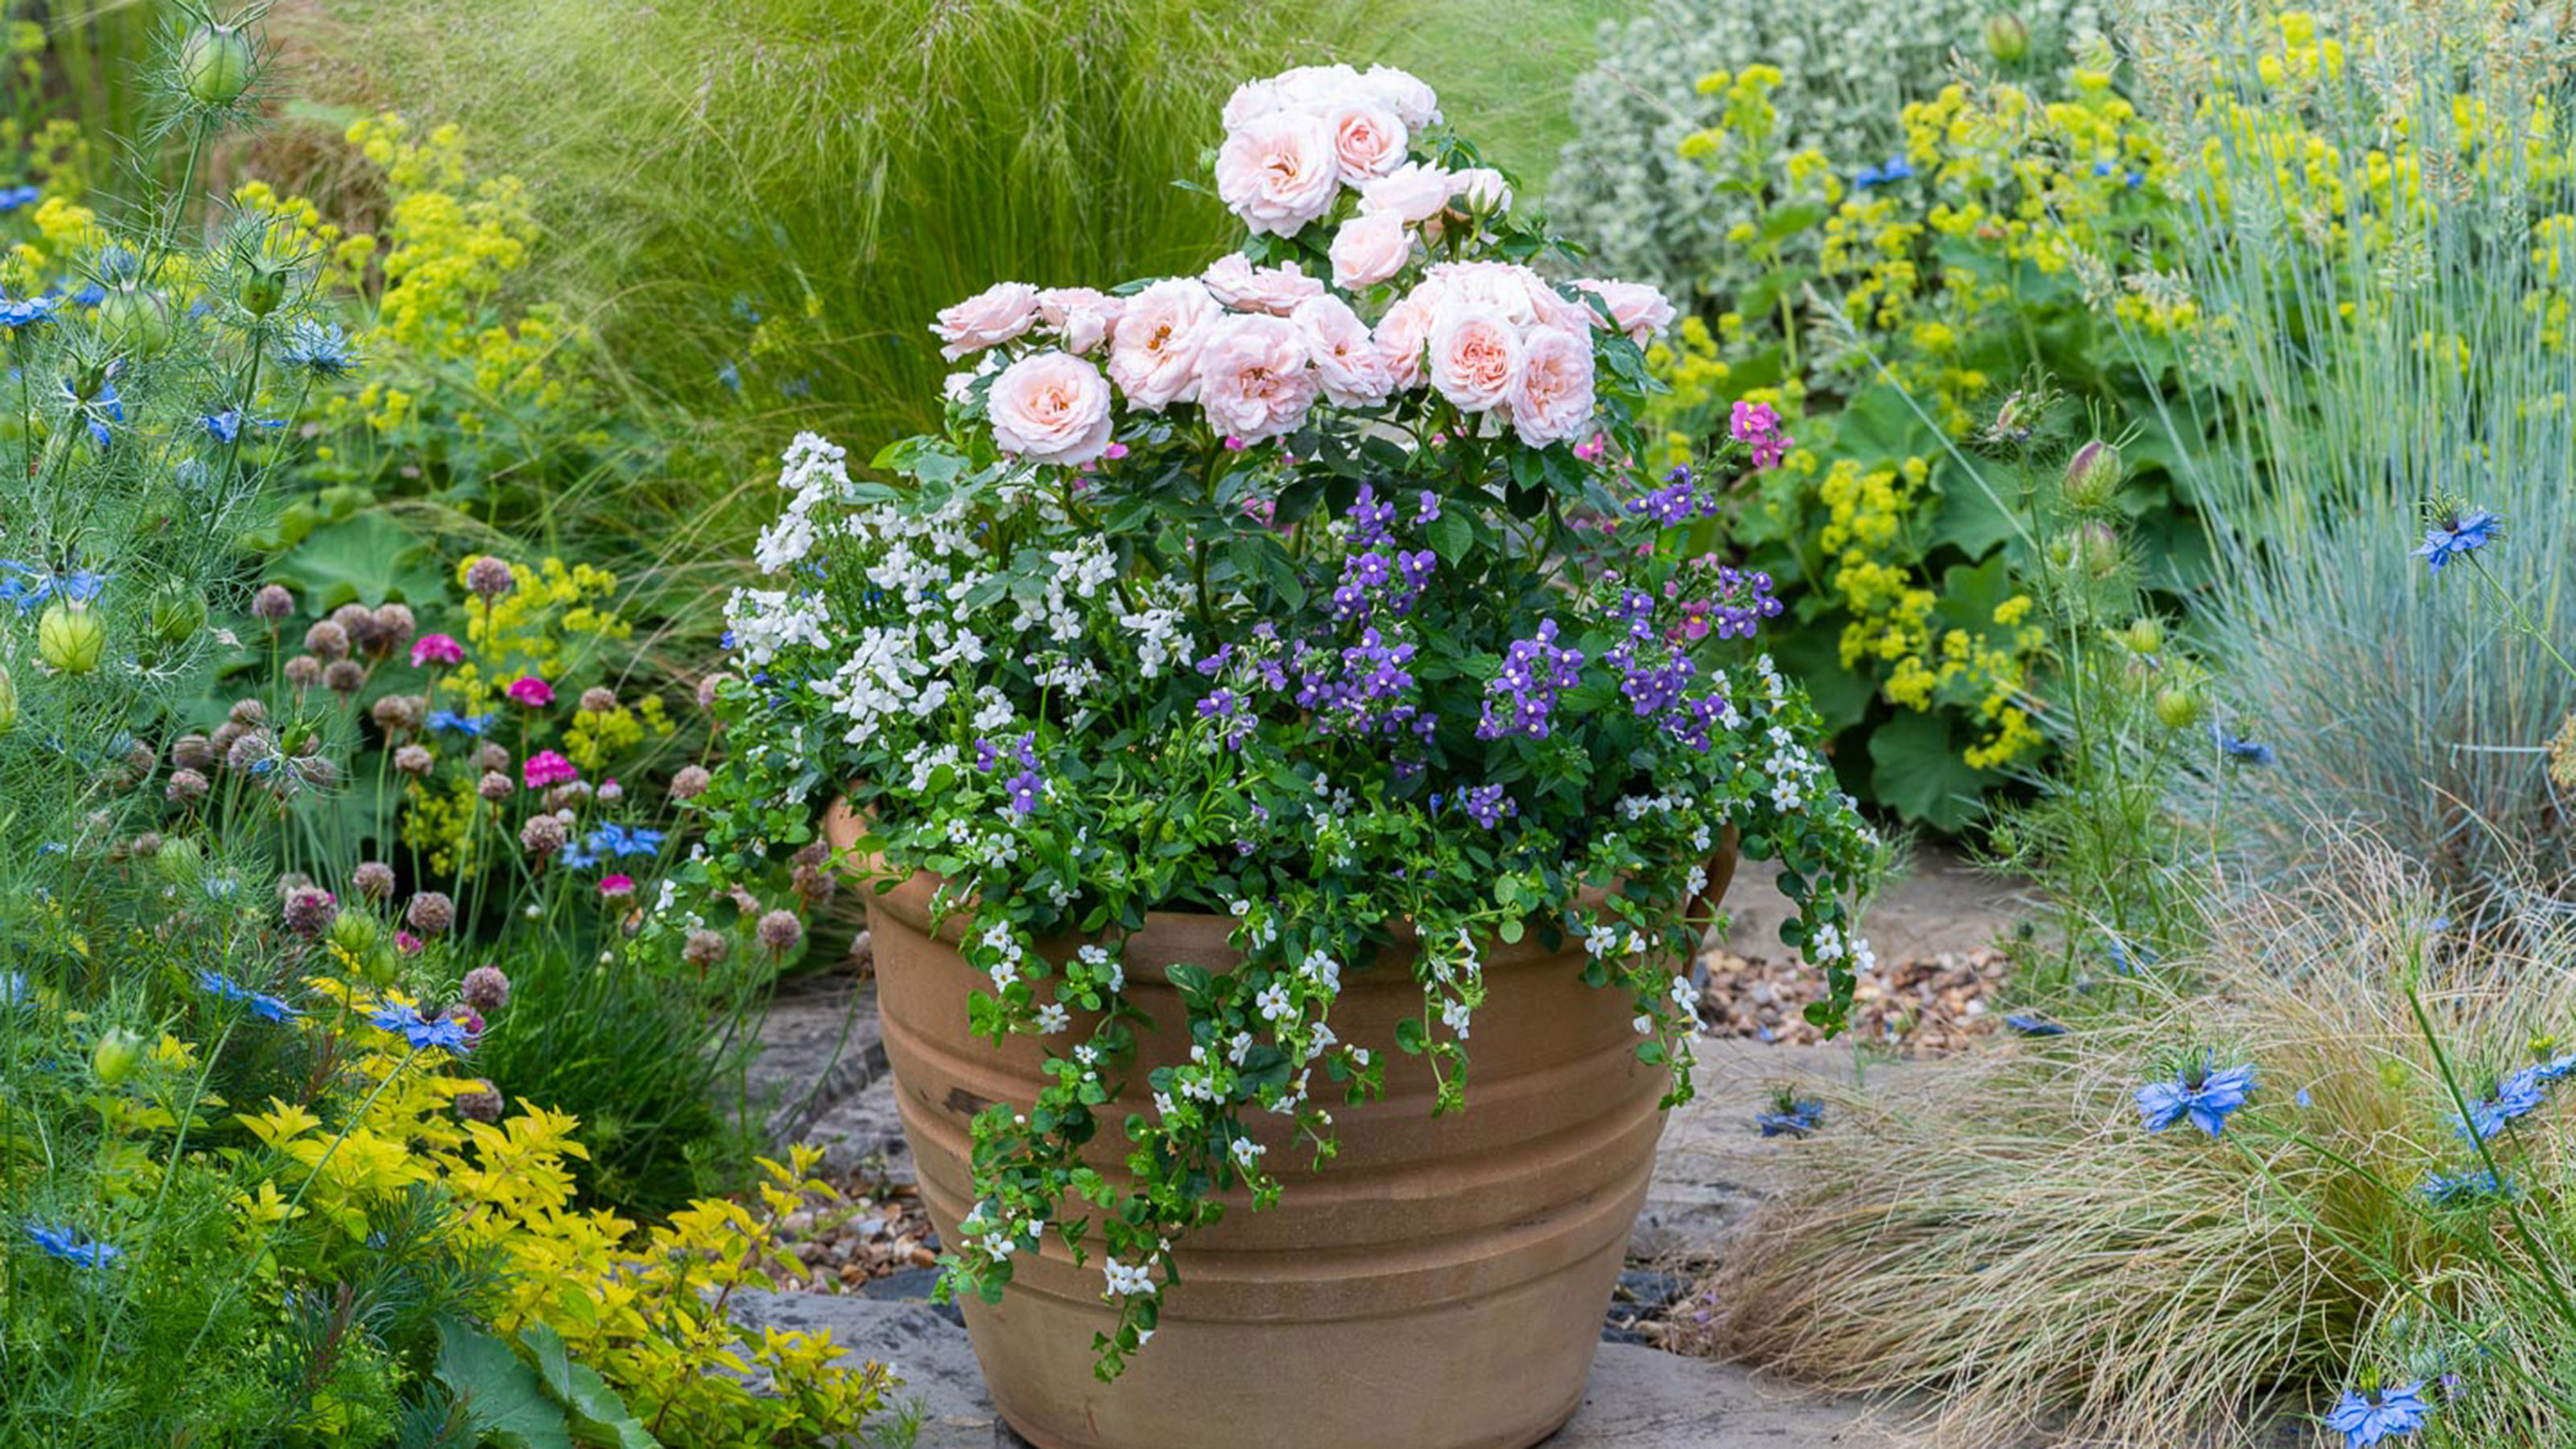

When learning how to plant flowers in pots, success relies upon following a few key guidelines. First, balancing the size of a container with the spread of the plants once fully grown is important. You also need to ensure that no single plant grows too big to overwhelm the others. Checking plant labels when making a selection will help as these will give you the height and spread the plant will grow to.
For good container gardening ideas you'll also need to select plants which favor similar growing conditions. As they will all be growing together in the same soil and sun conditions. Unless the plants require special mixtures, such as succulents who need soil with extra drainage properties, a multi purpose compost is often sufficient. You can add water retentive gel to help retain moisture in hot spells if you wish.
Whether you prefer a pretty mix of flowers to suit a cottage garden scheme or a more contemporary look for a modern patio, our step-by-step guides will show you how to plant flowers in pots and create beautiful arrangements you'll love.
How to plant flowers in pots: easy tips
- Your plant choices will determine how often you need to water your container. But it’s important to remember that container grown plants always require slightly more watering than those in garden borders and beds.
- Think about choosing the right garden planter ideas to work with the desired area. Neutral or grey shades are ideal for modern homes, whereas terracotta might work better with traditional vistas. If using wooden containers make sure you line them with plastic first, to prevent rot.
- Drainage is key when it learning how to plant flowers in pots. It's important that all containers you use have drainage holes at the base. If using salvaged vessels like crates or metal pots, an electric drill is the easiest way to add the holes. A layer of crocks and/or gravel at the base will improve the drainage properties of the soil.
Container 1: pretty cottage garden planter
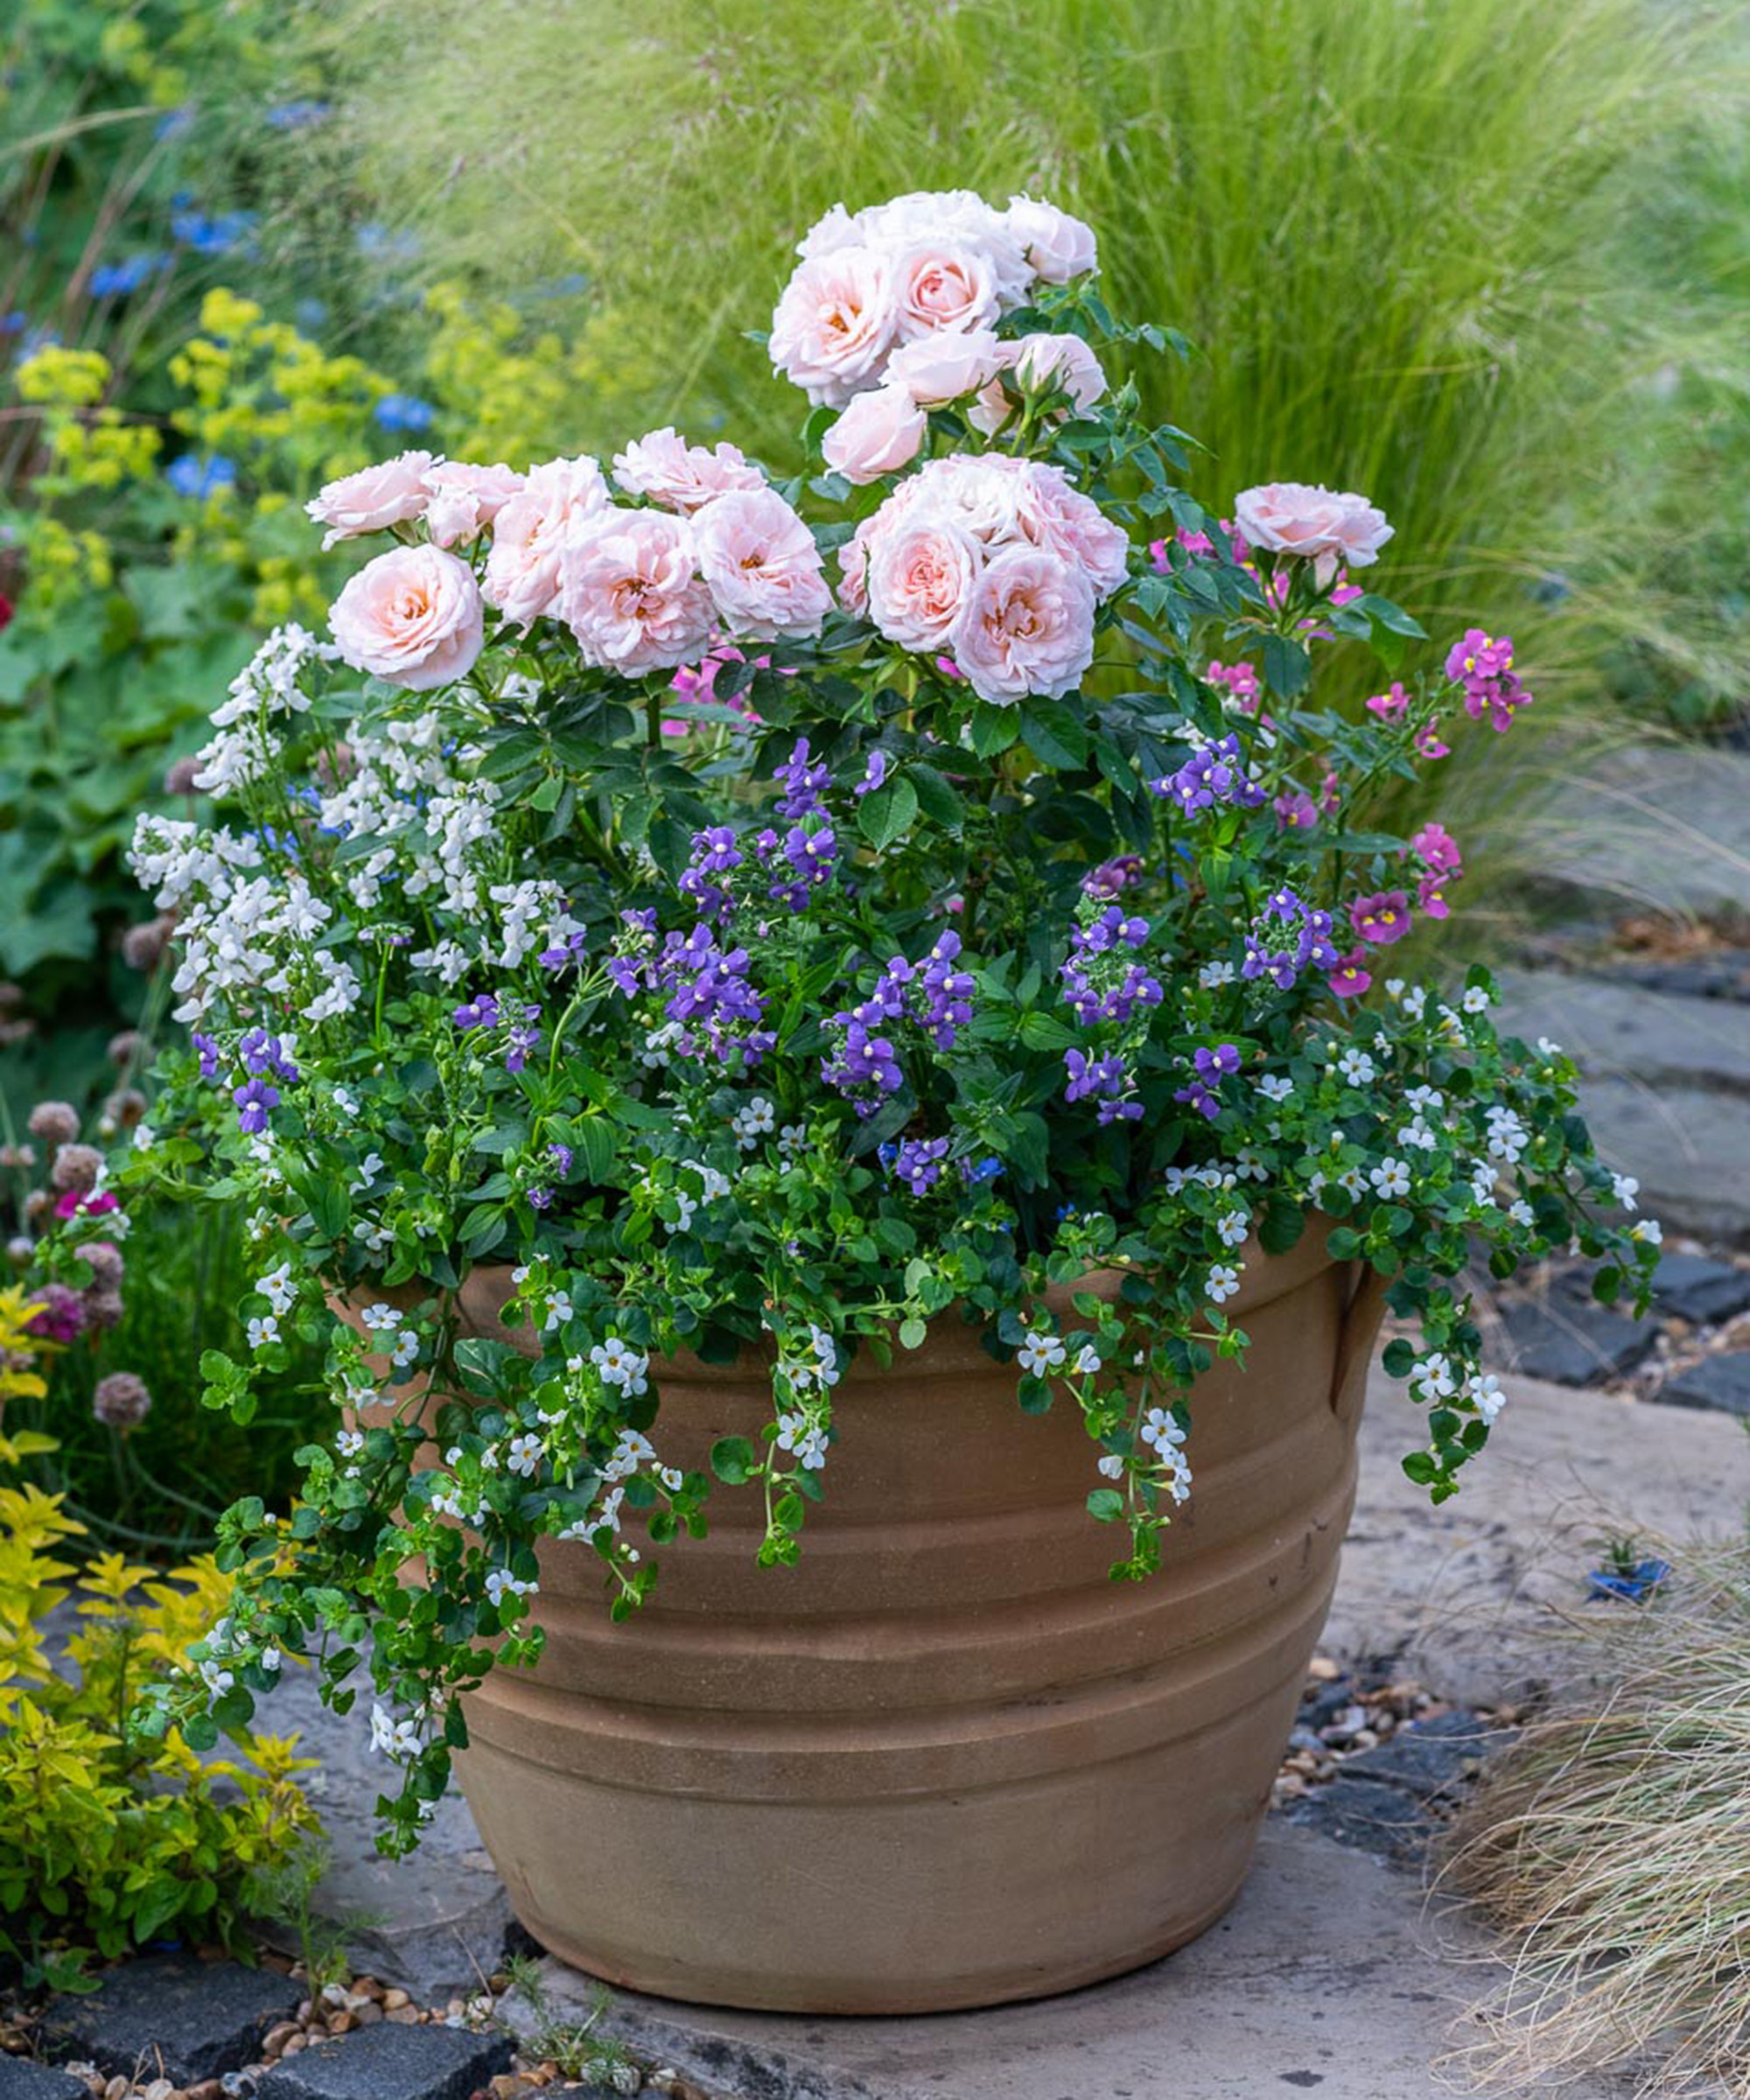
You will need:
- Lobelia 'Cambridge Blue'
- Patio rose 'Lovely Bride'
- White bacopa
- Lobelia 'Cambridge Blue'
- Mixed Nemesias
- Terracotta pot
- Crocks
- Gravel
- Compost
Step 1: prep your pot
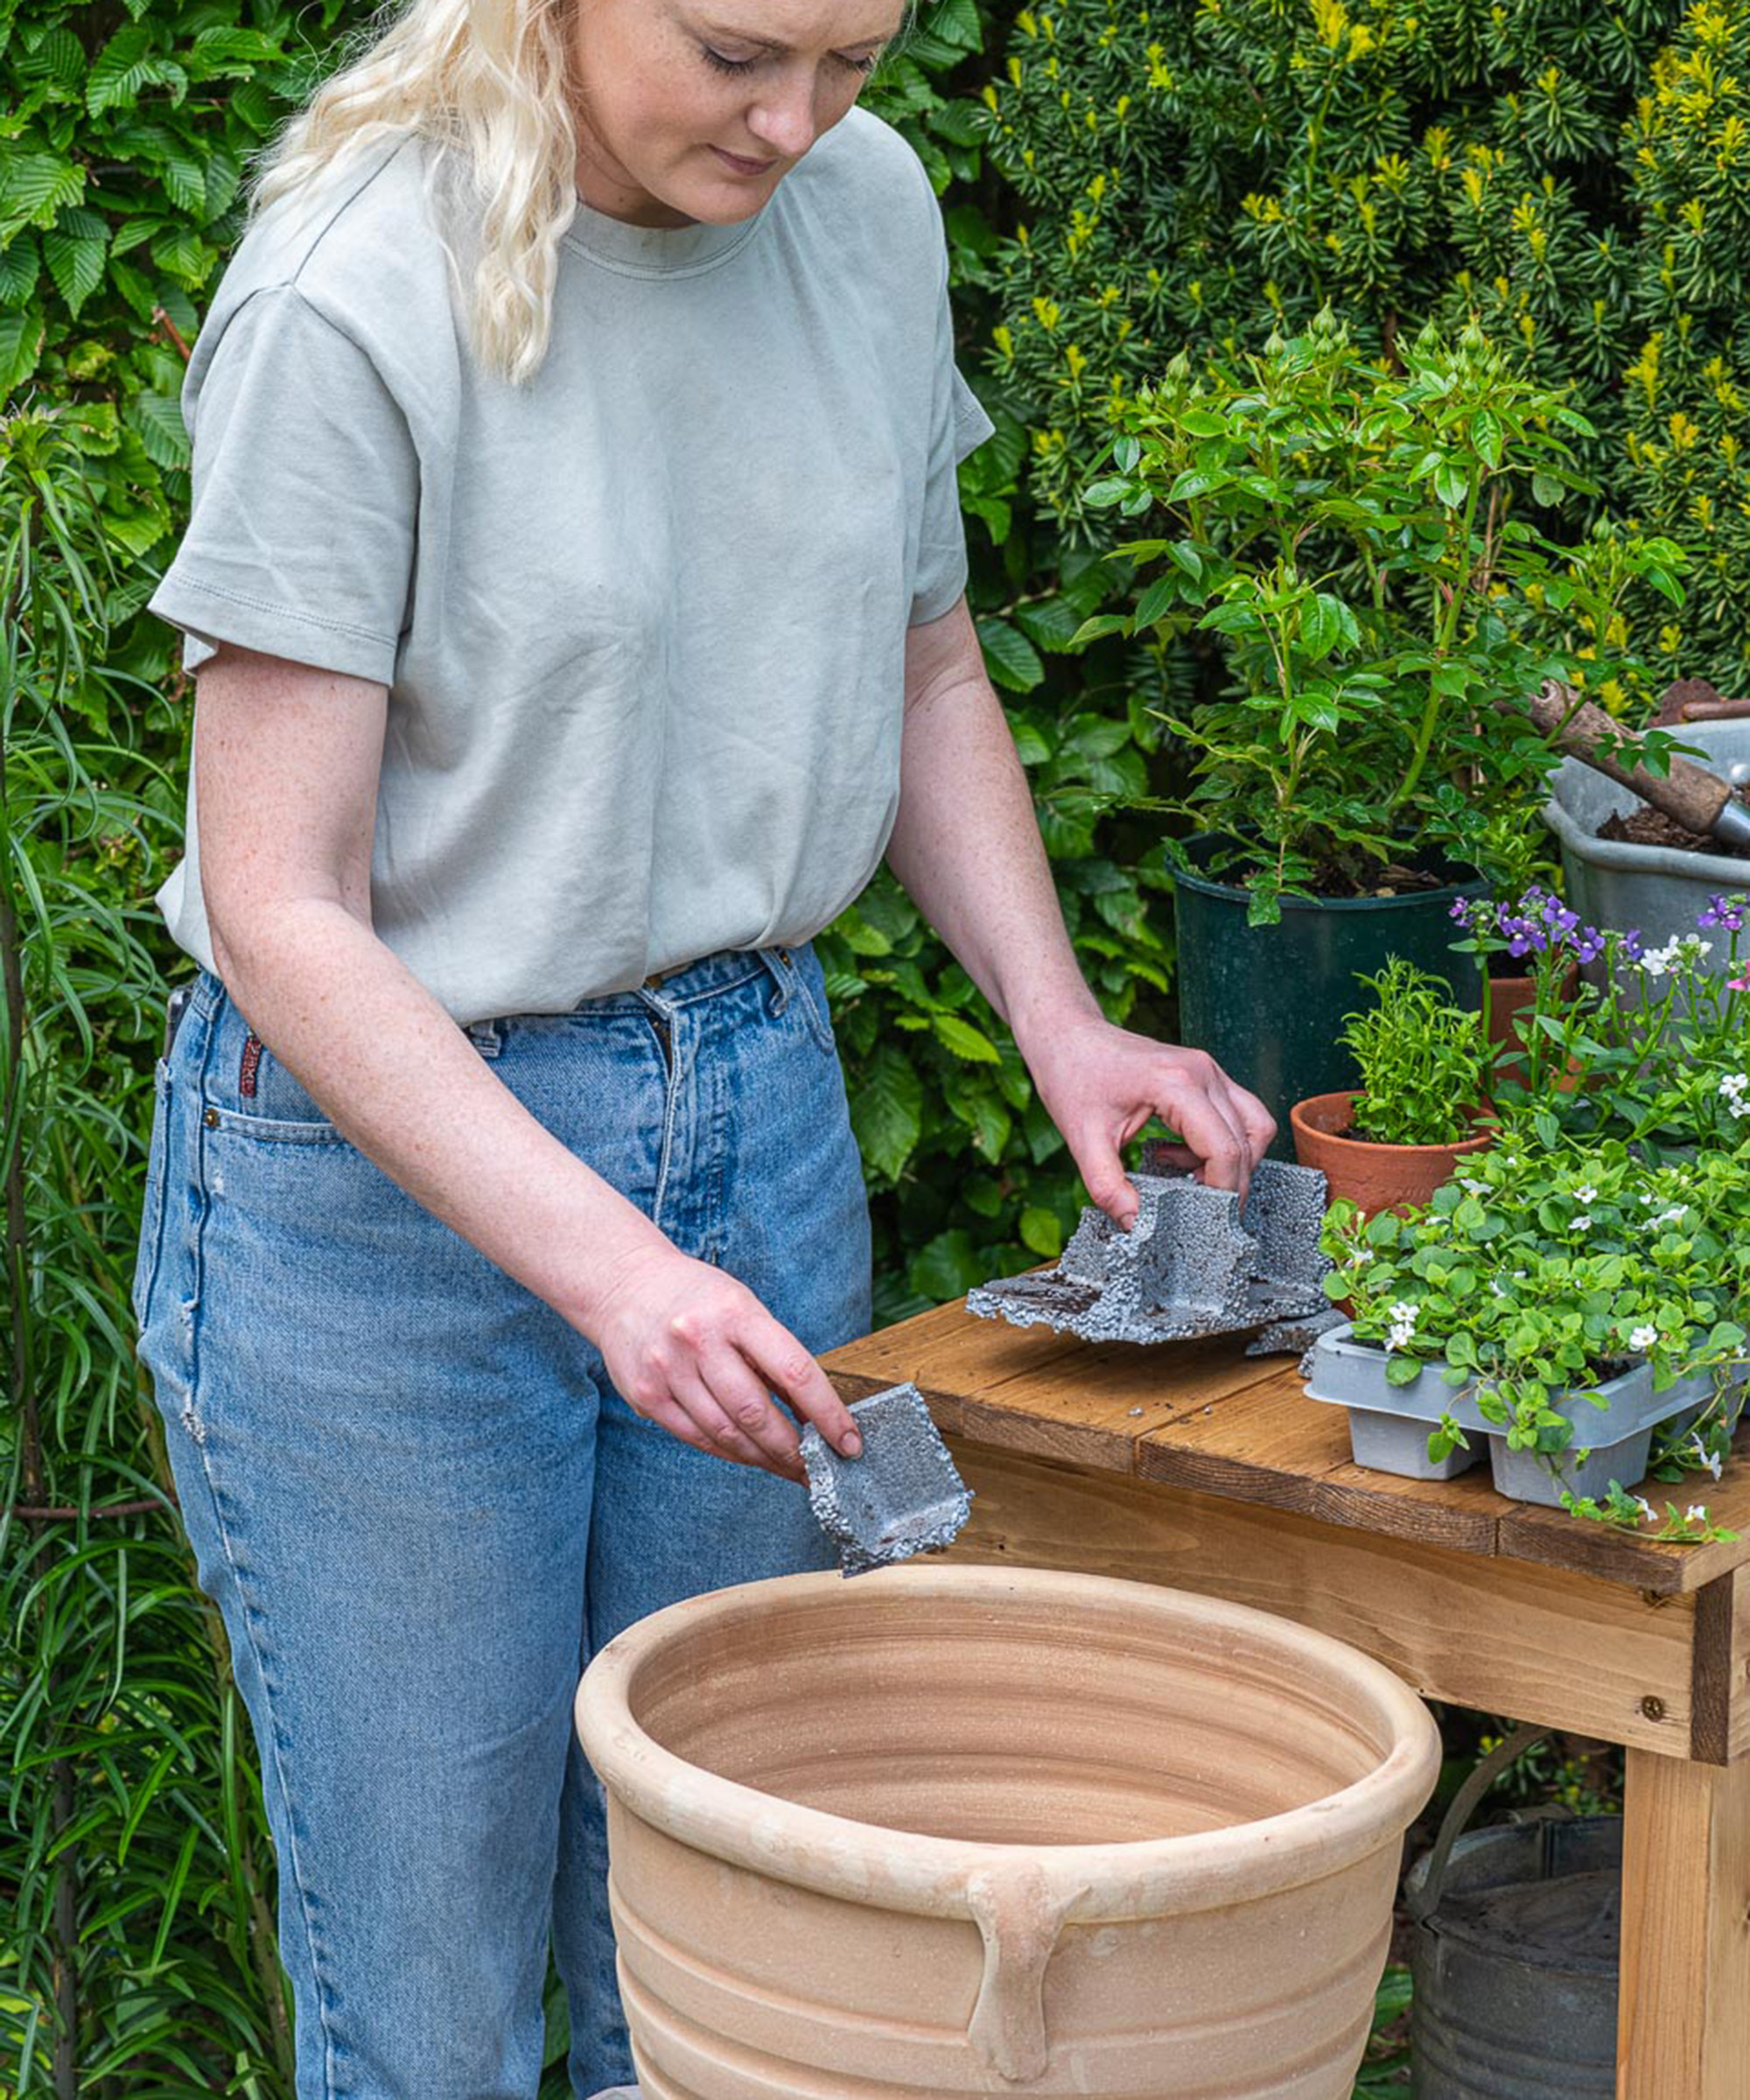
Choose a good-sized pot that’s big enough to take a rose and some smaller plants around the edge. We've gone for a traditional look with a terracotta pot, which would suit classic cottage garden ideas. Cover the bottom with some crocks for drainage - we’re using some broken-up polystyrene plug plant trays to line our pot.
Step 2: add gravel for drainage
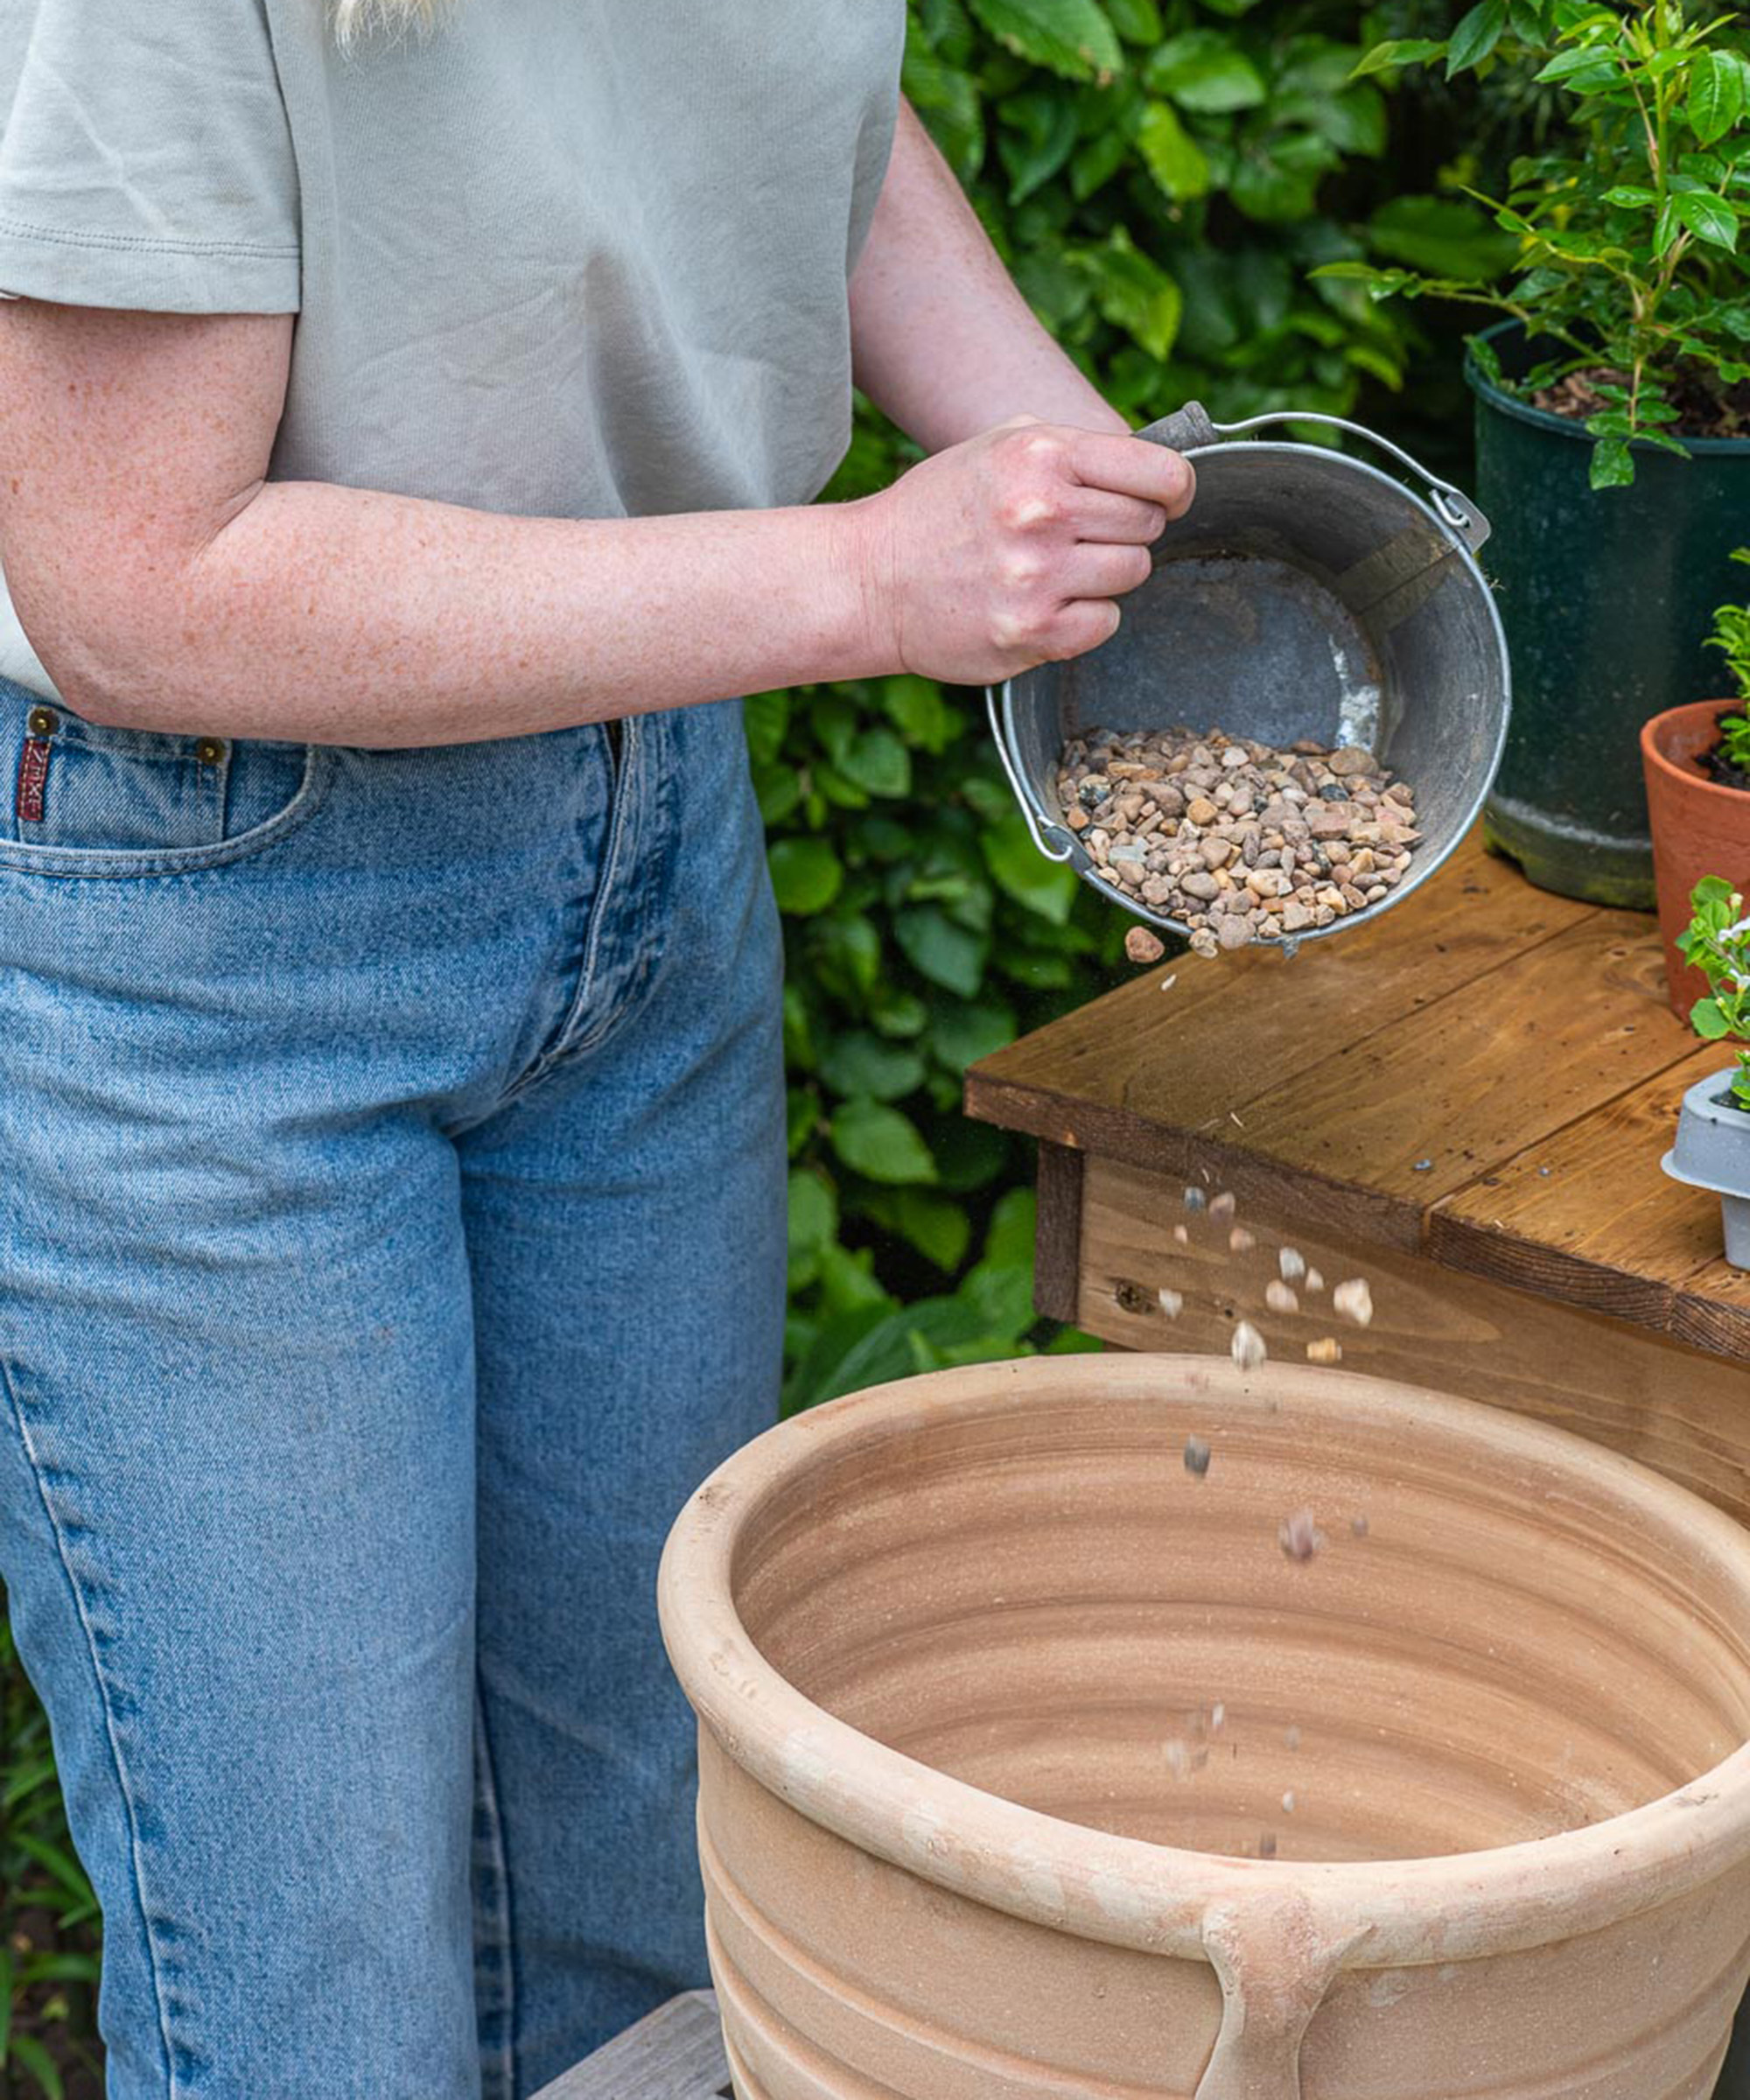
The plants we have chosen will thrive better in well-drained soil. The crocks will help drainage as well as a sprinkling a layer of gravel on top. Add enough to cover the base and some of the crocks.
Step 3: add the soil for your plants
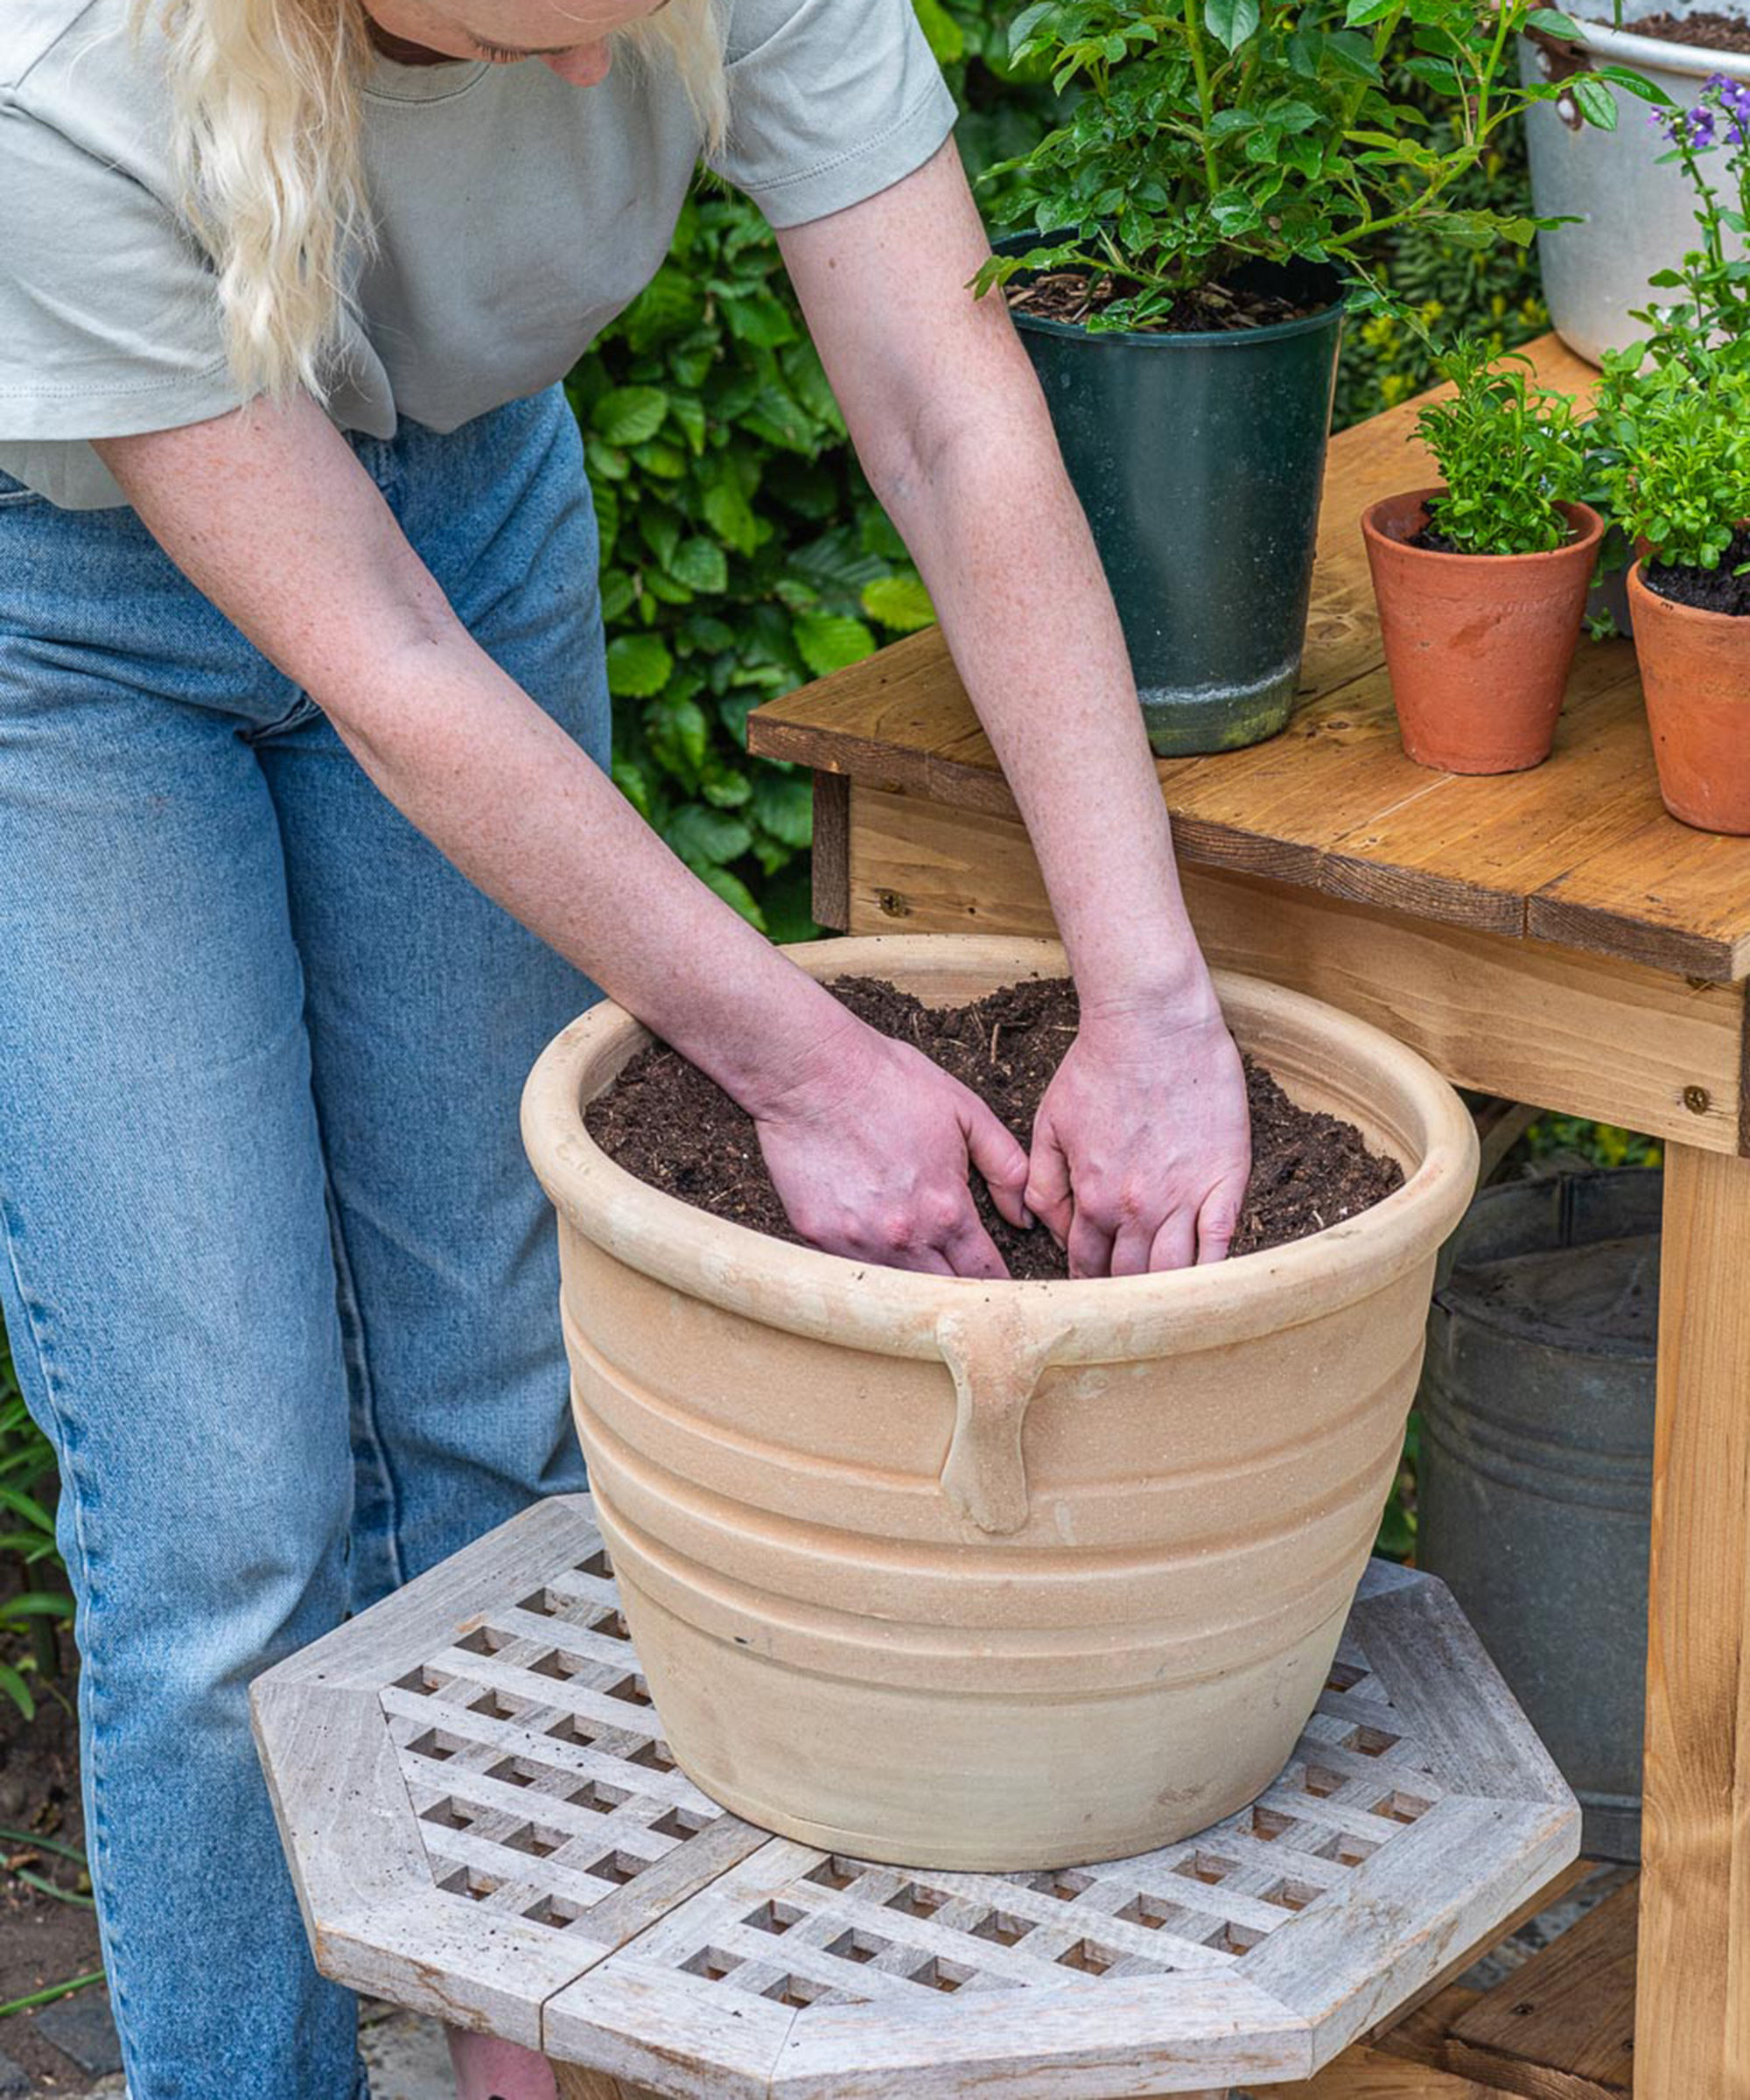
Next you need to fill the pot to around ¾ full with a good all-purpose peat-free compost. Then, using your hands, dig a hole in the centre of the pot, packing the soil firmly to the outside so that it stays in place. This will be where the central rose will be placed
Step 4: position your central rose
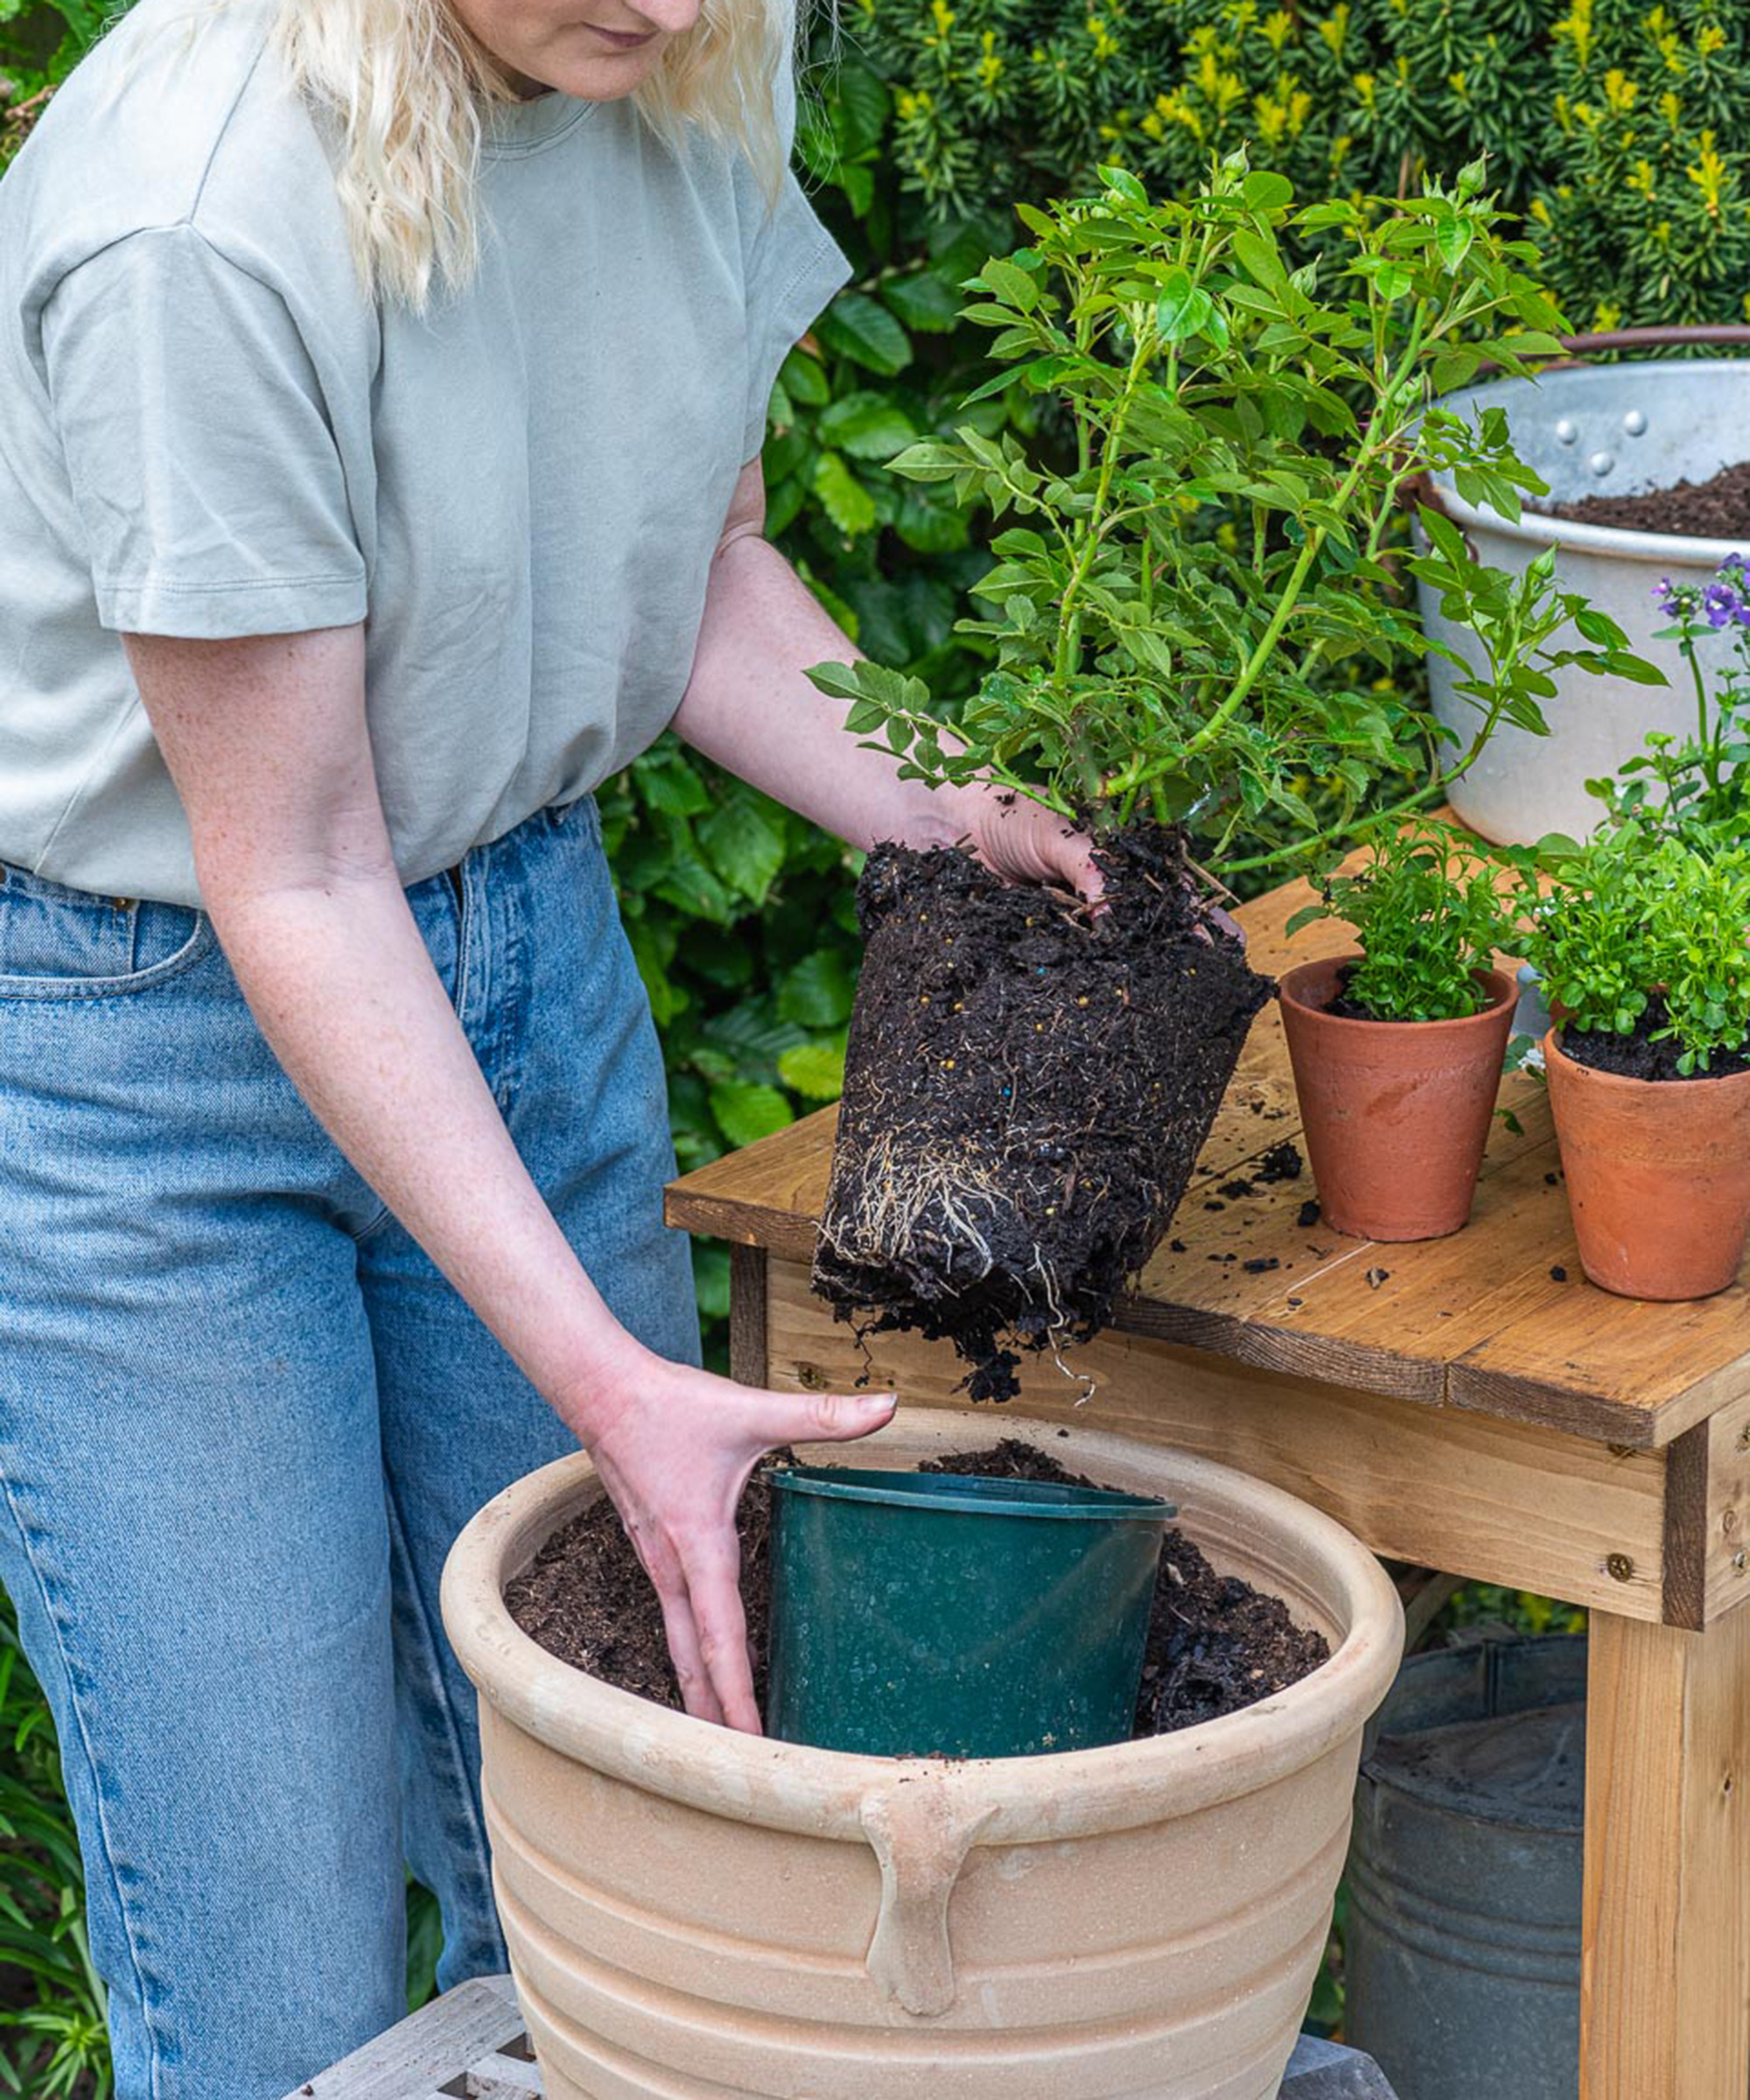
Check the hole is sufficiently deep for the patio rose. Then carefully inch out the patio rose from its pot, leaving just the pot in the hole. Now you can plant around it ensuring you leave enough space at the end. But without fear of being scratched by the rose's thorns! Build up and firm the soil around the pot, ready to plant annuals around the edge.
Step 5: place your plants at the edges of the pot
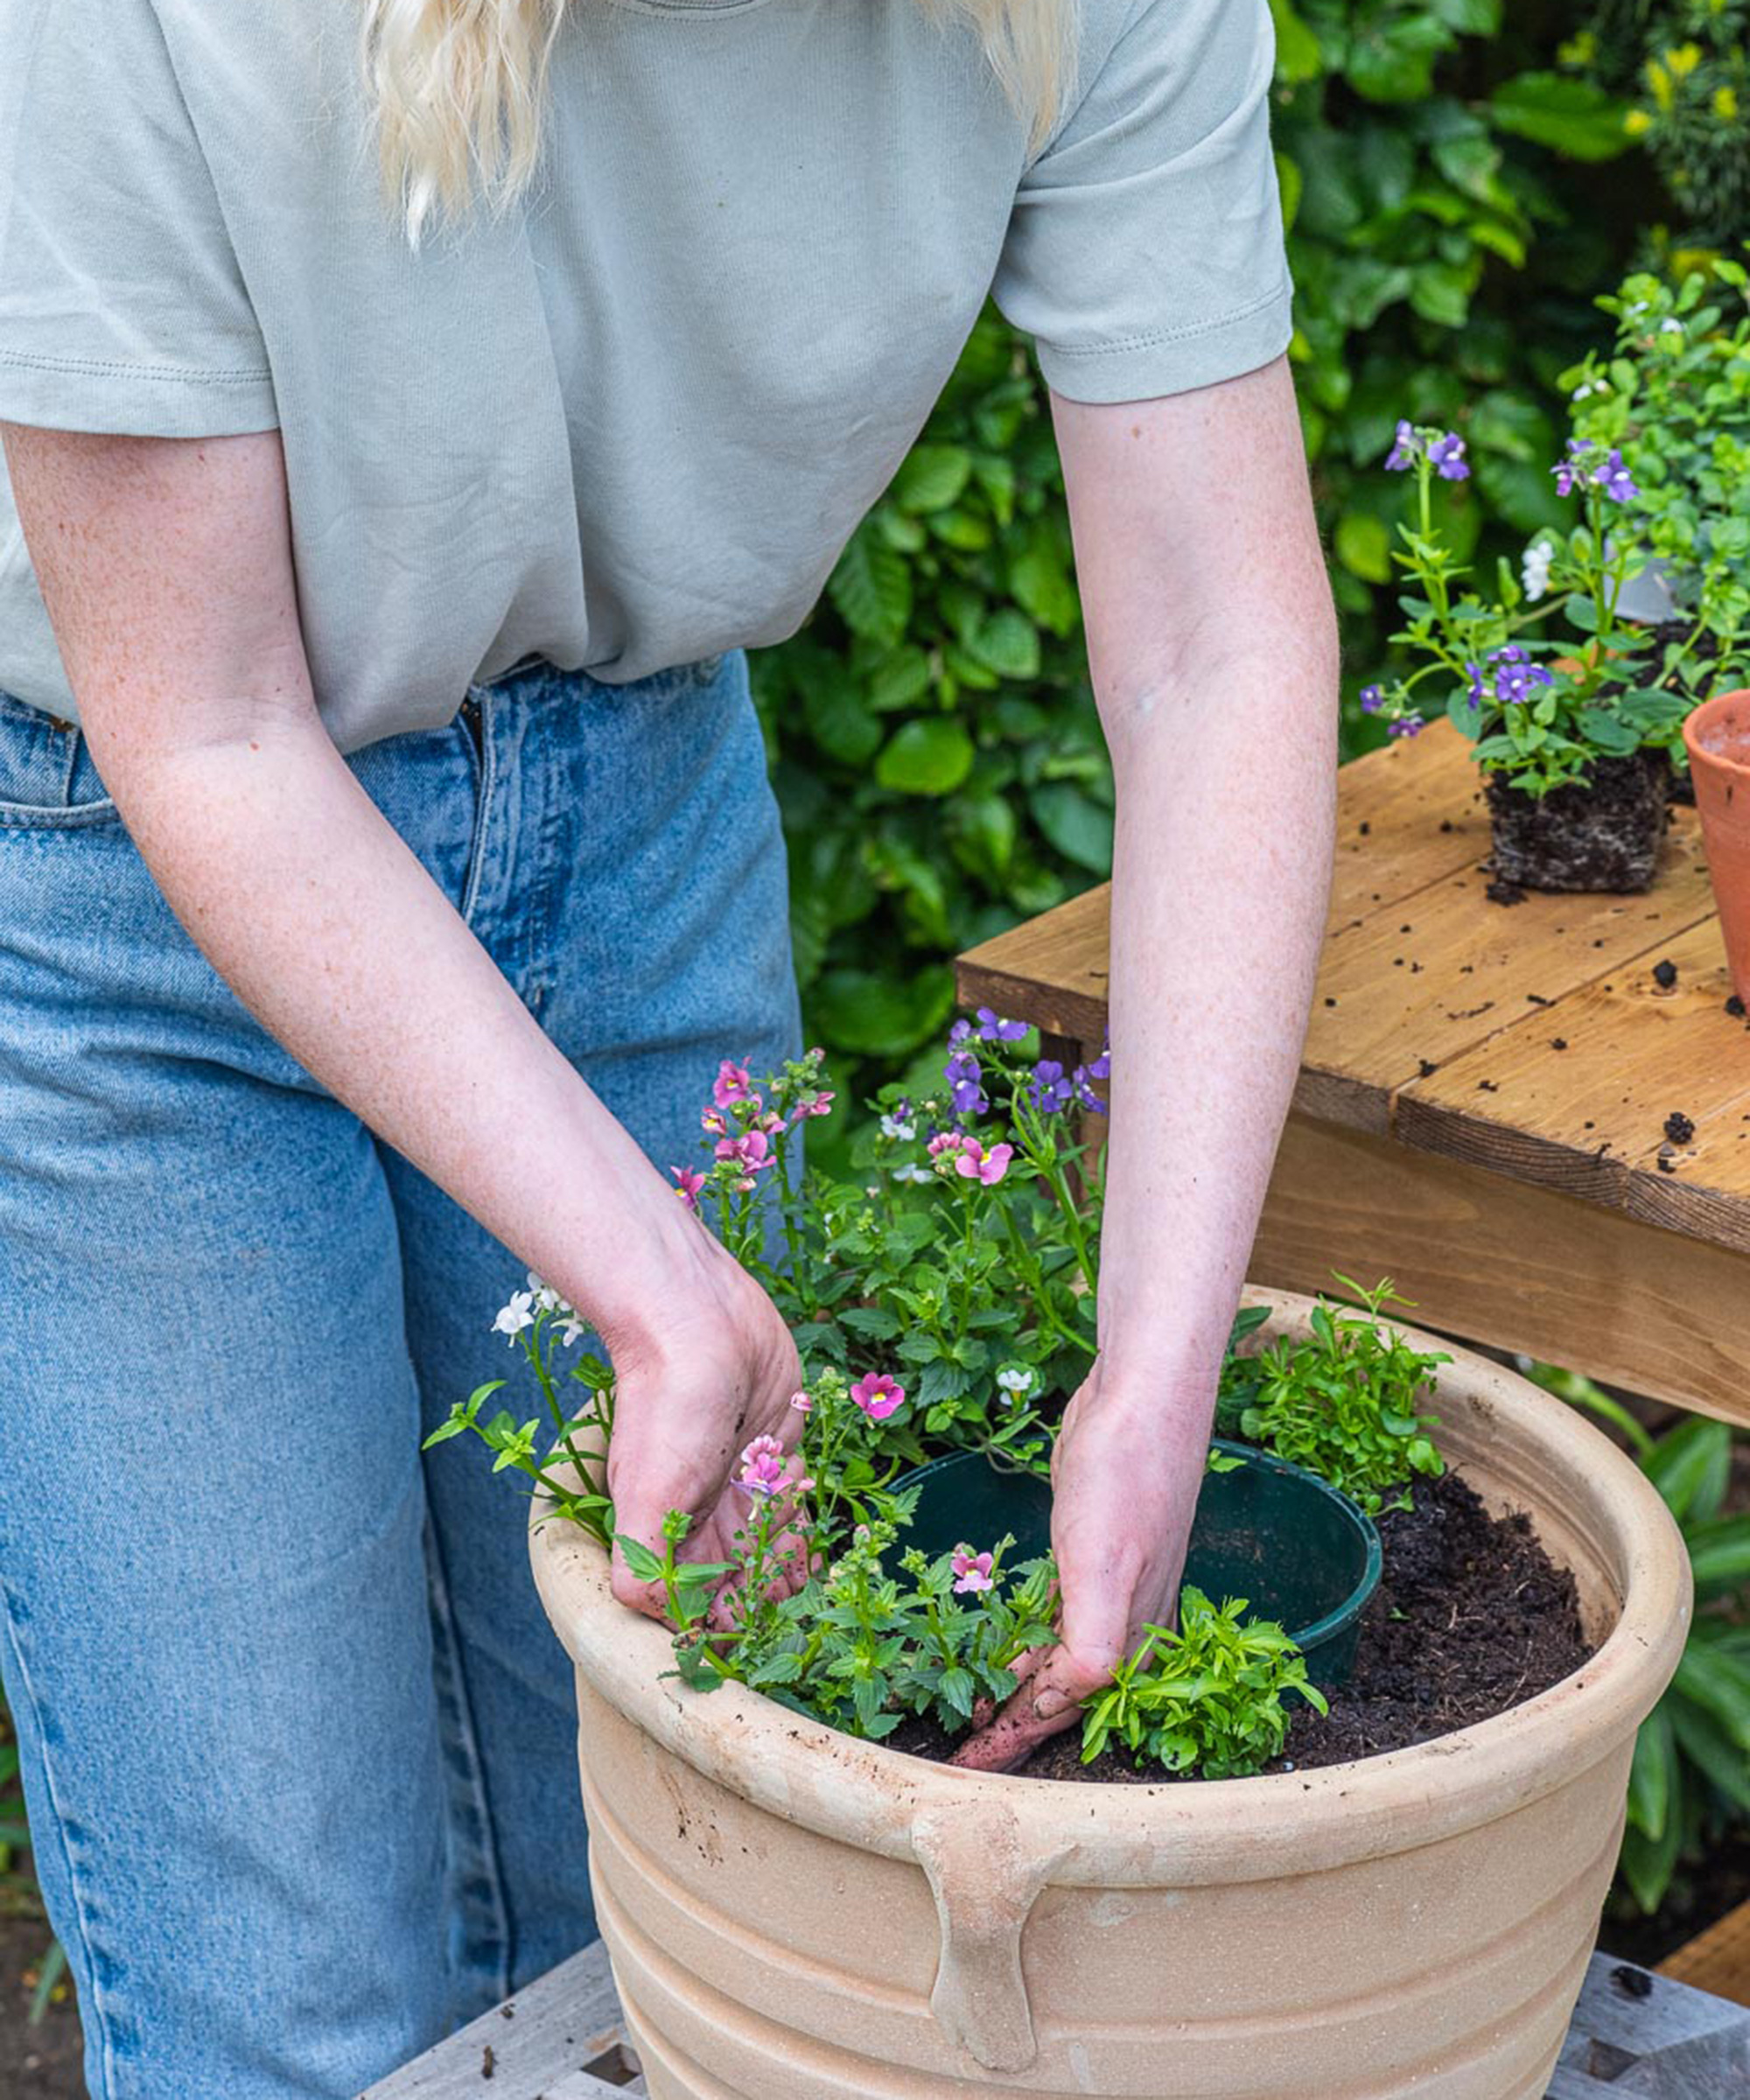
Plant lobelia tight around the sides of the pot. Space the nemesias evenly around the pot. Intersperse with white bacopa to tumble over the edges. Fill any remaining gaps with additional nemesias.
Step 6: secure the plants with soil
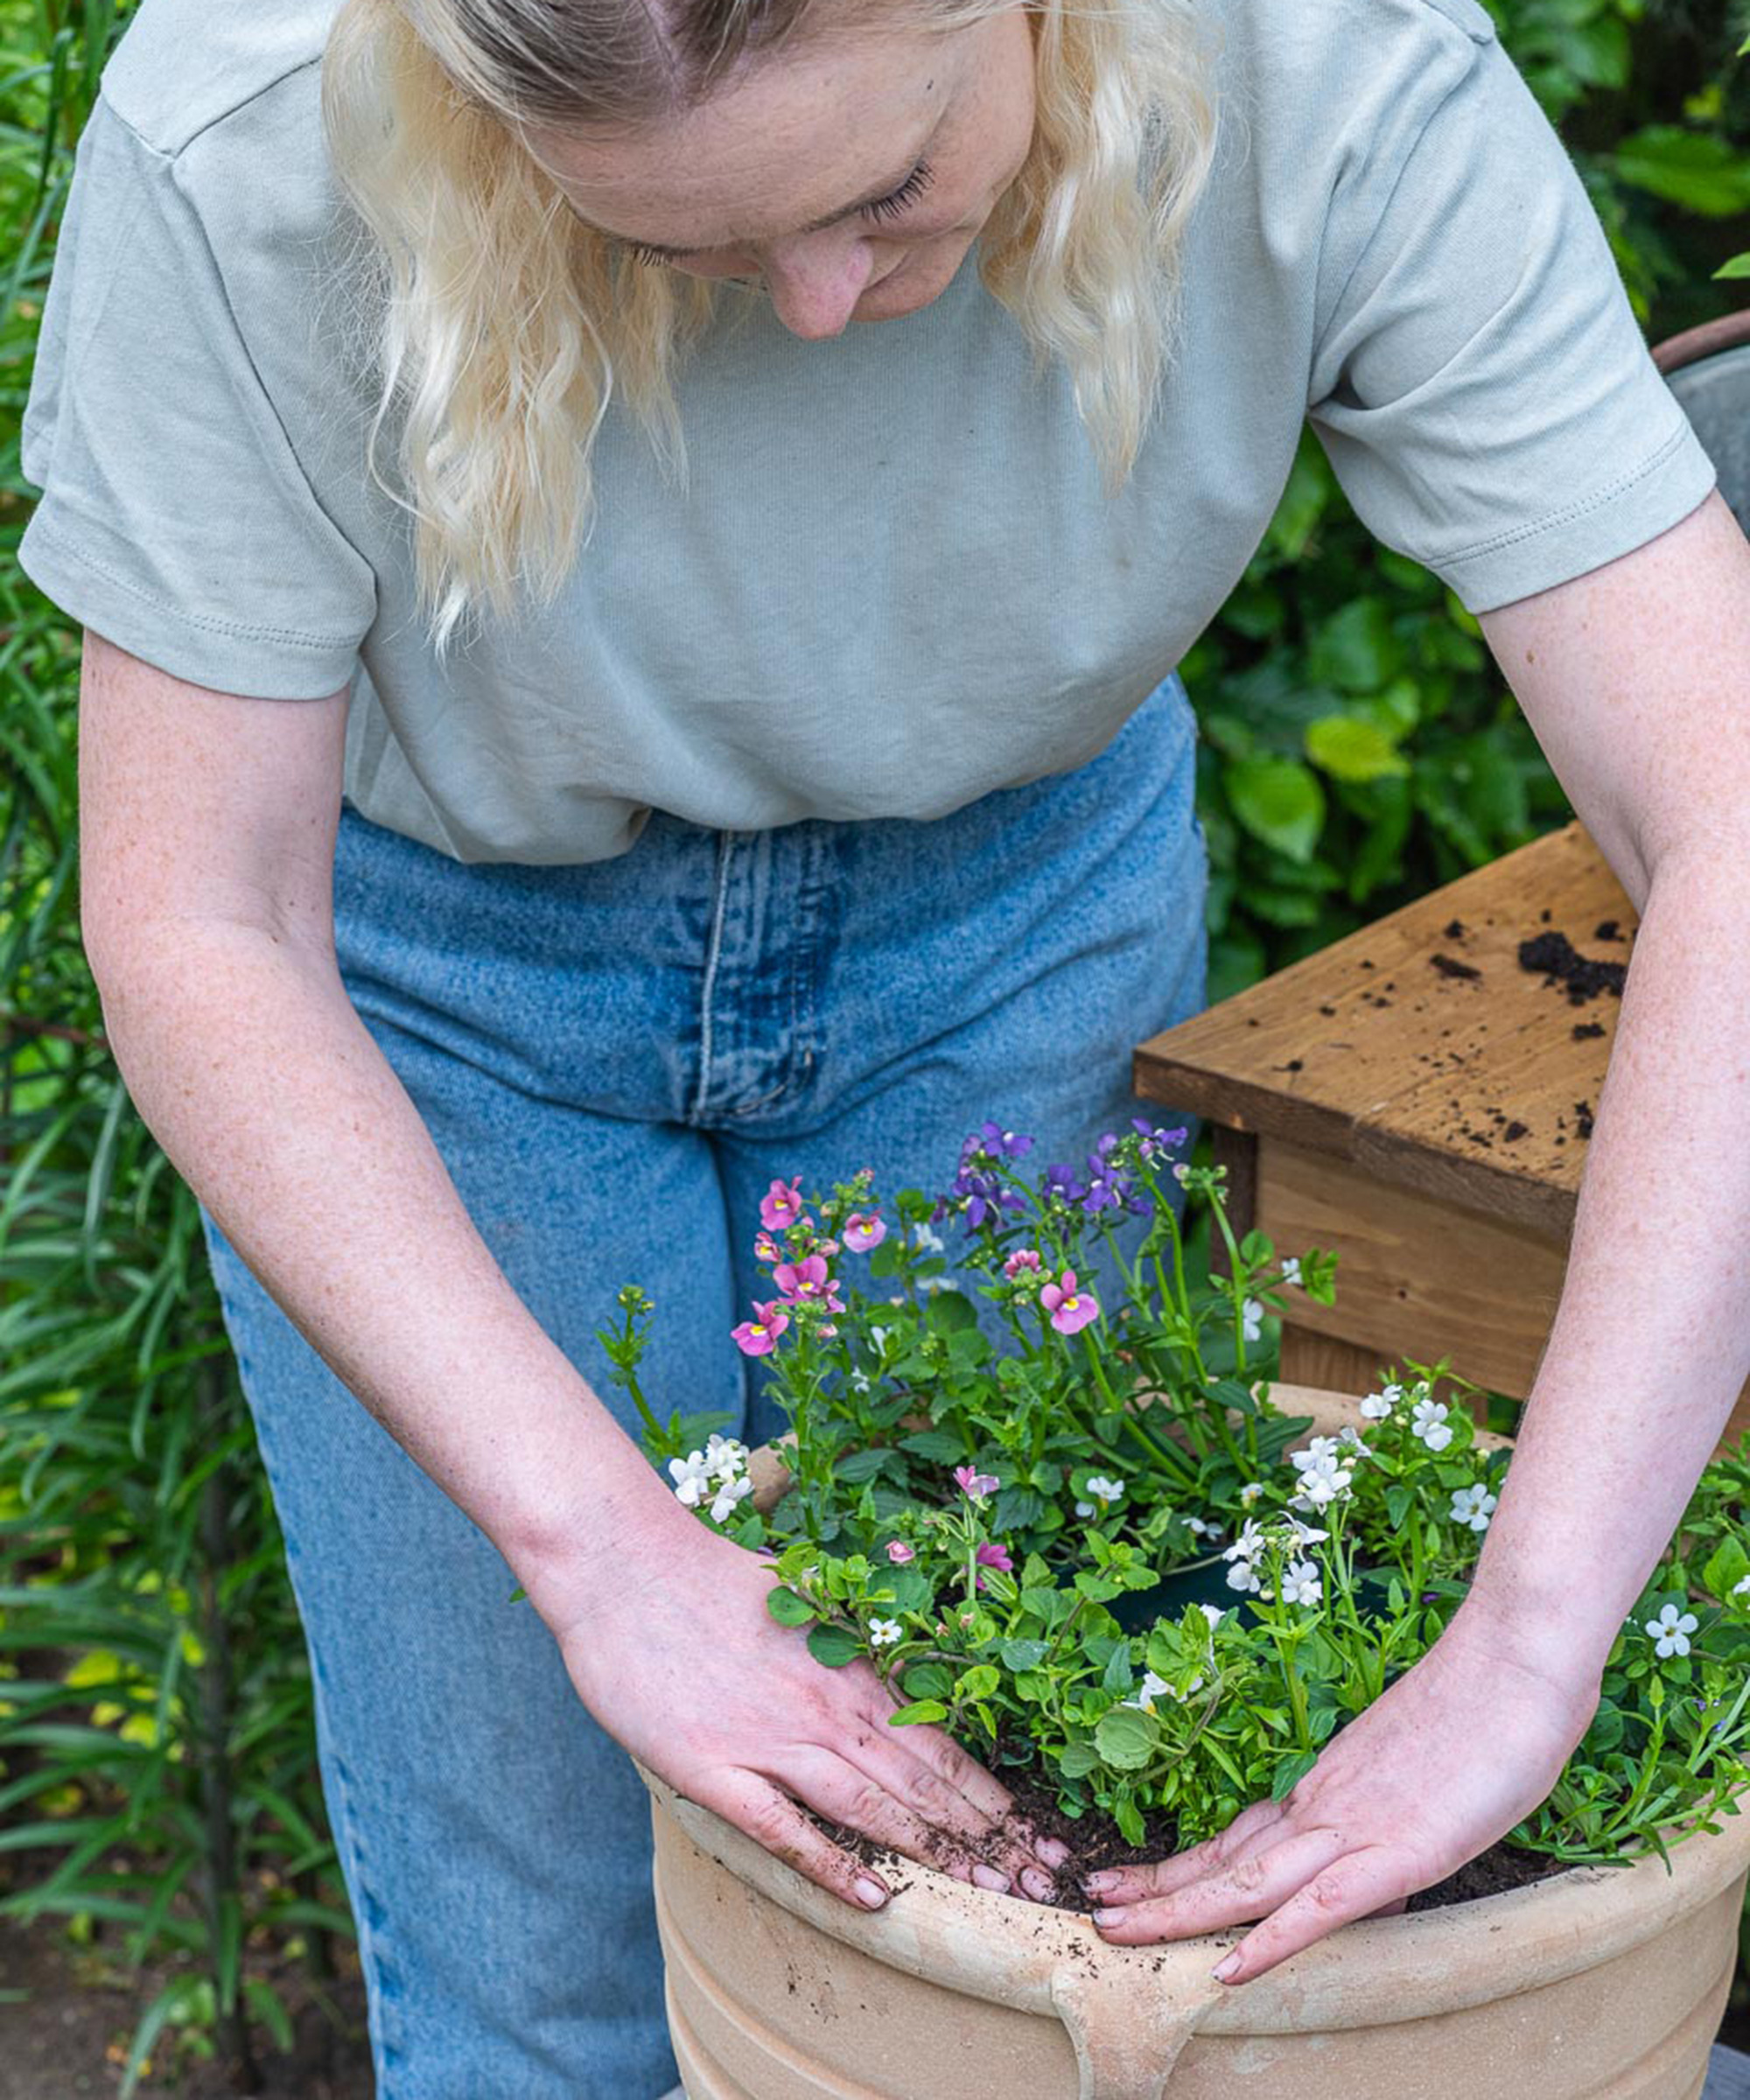
Pack extra compost around each plant, ensuring the rootball is thoroughly immersed in the soil. Firm down the compost around the plants. A tight fit is just fine. The plants around the edge will eventually grow and spill over the edge of the pot.
Step 7: replace your rose
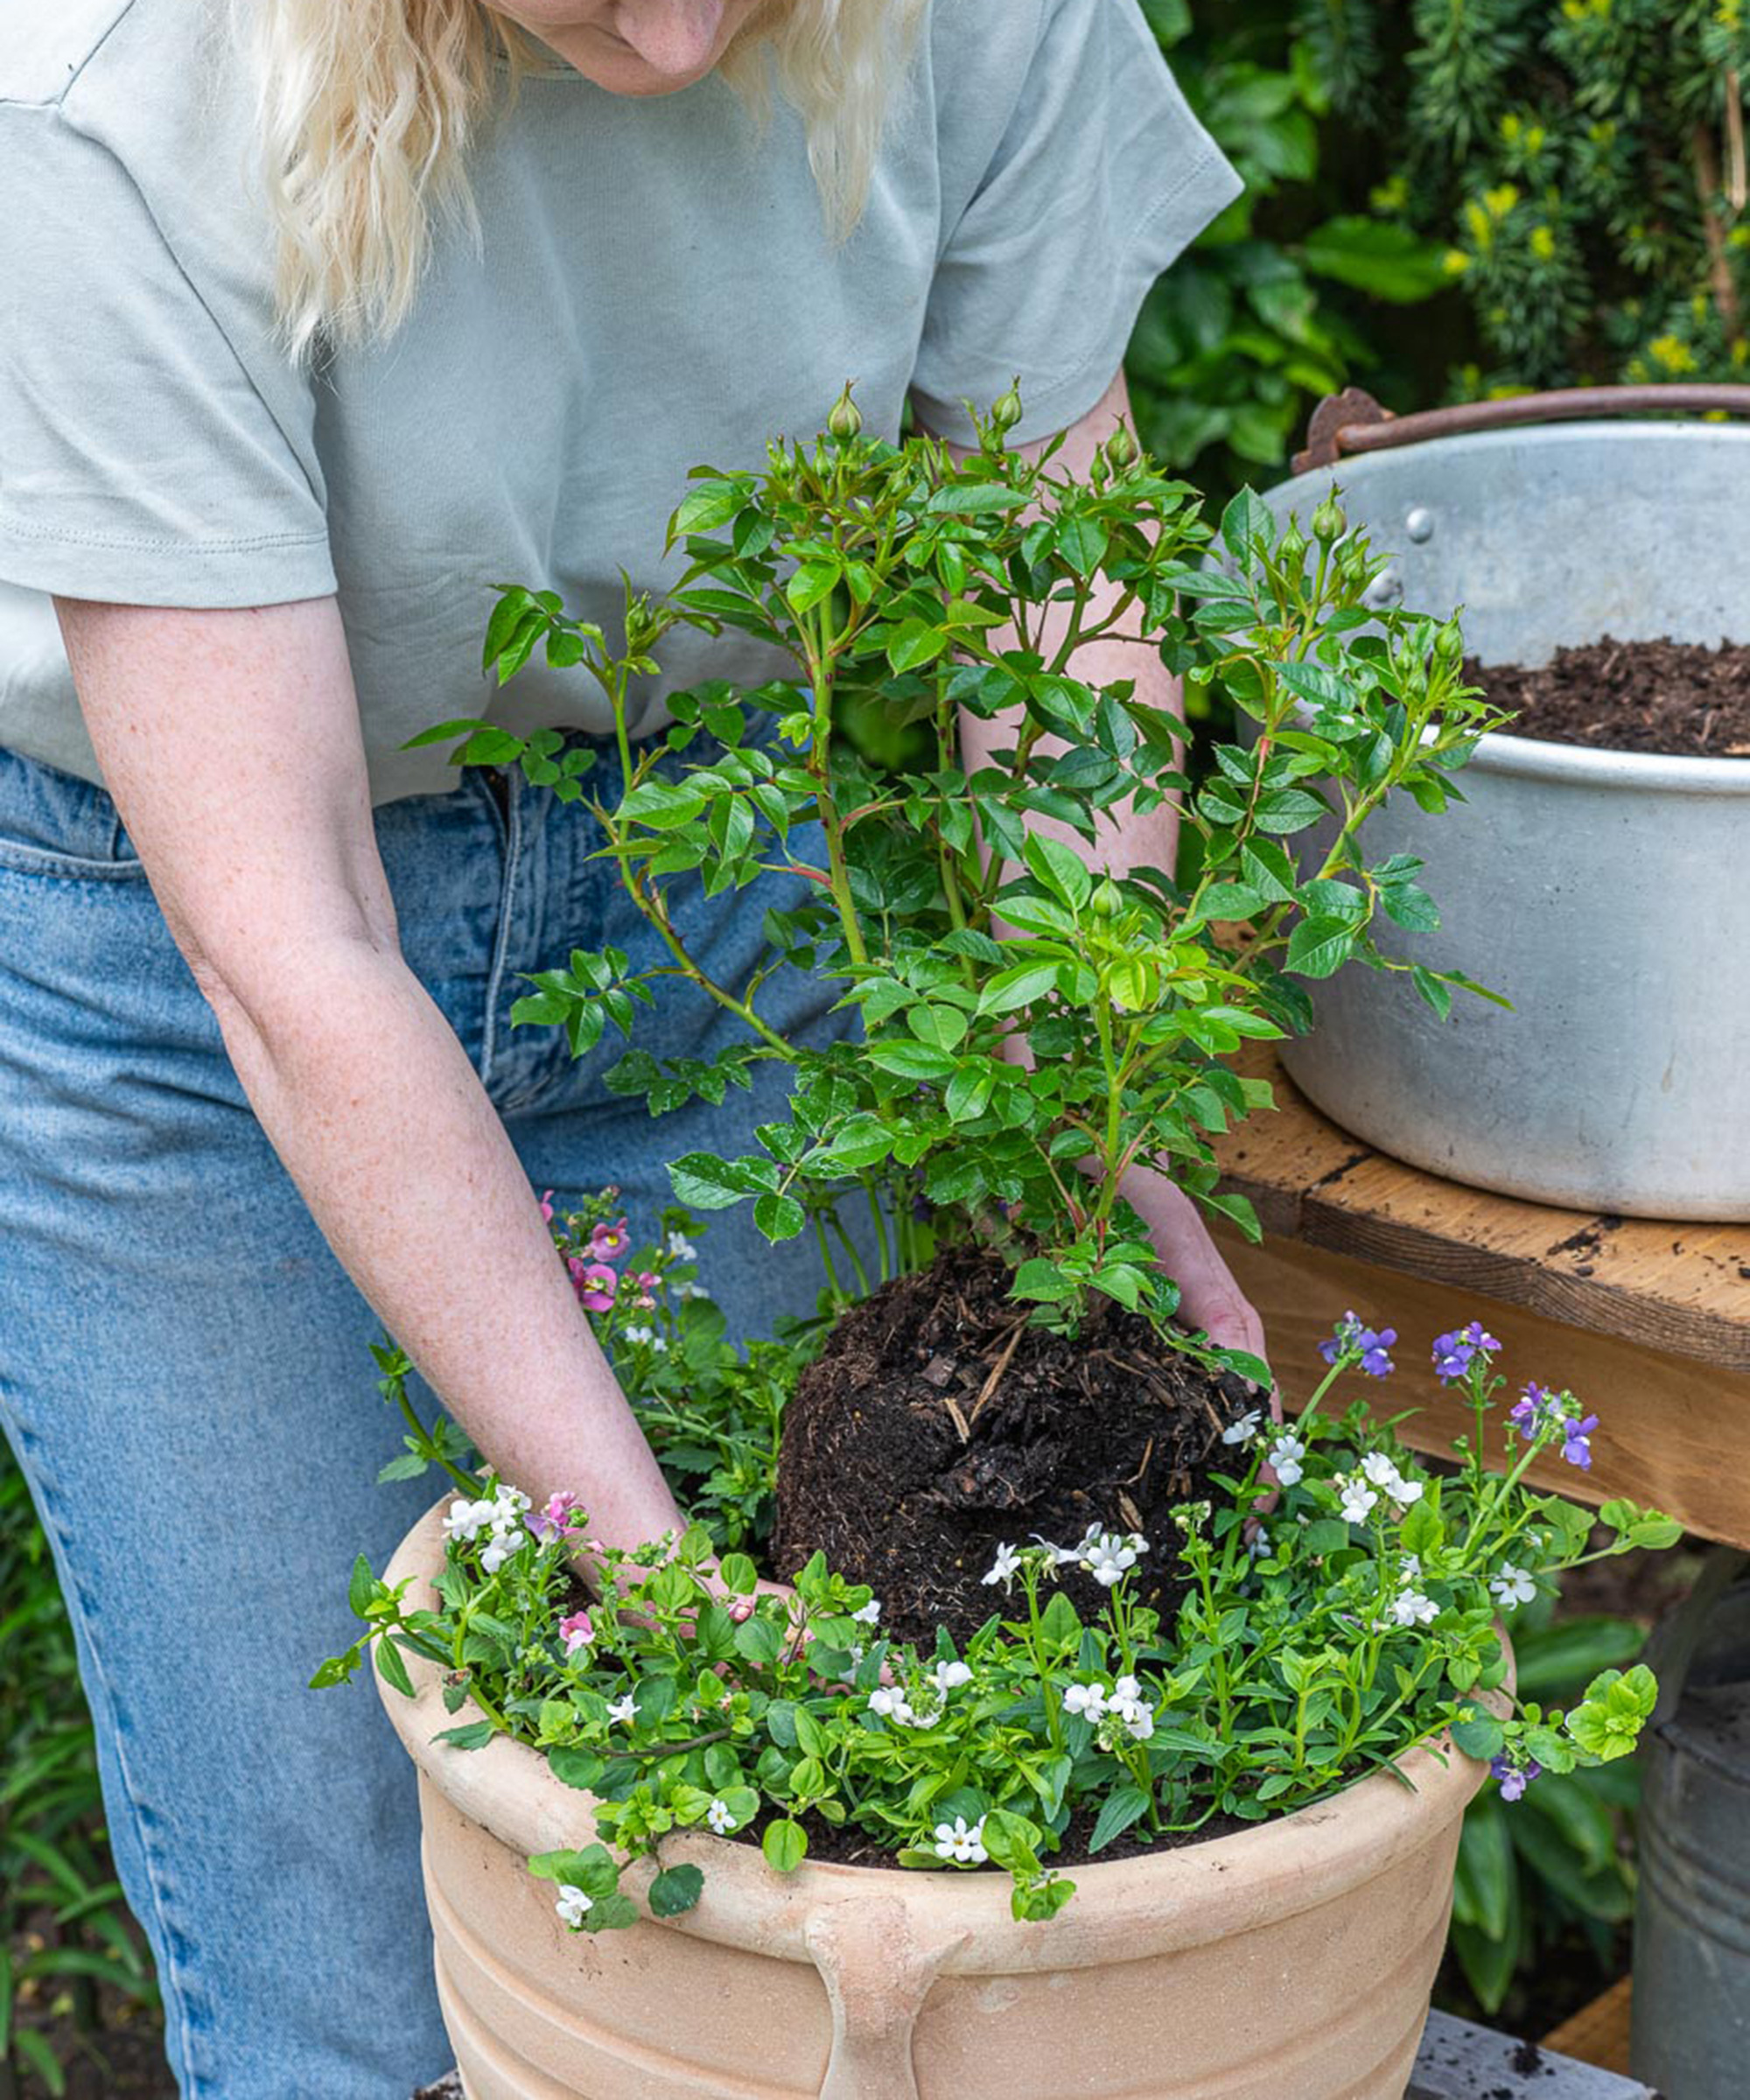
Next, remove the rose pot from the central hole. Taking care to ensure that the soil doesn't crumble. Lower the rose gently into position. Firm it into place and add a little more soil to ensure it’s properly planted in.
Step 8: finish with watering
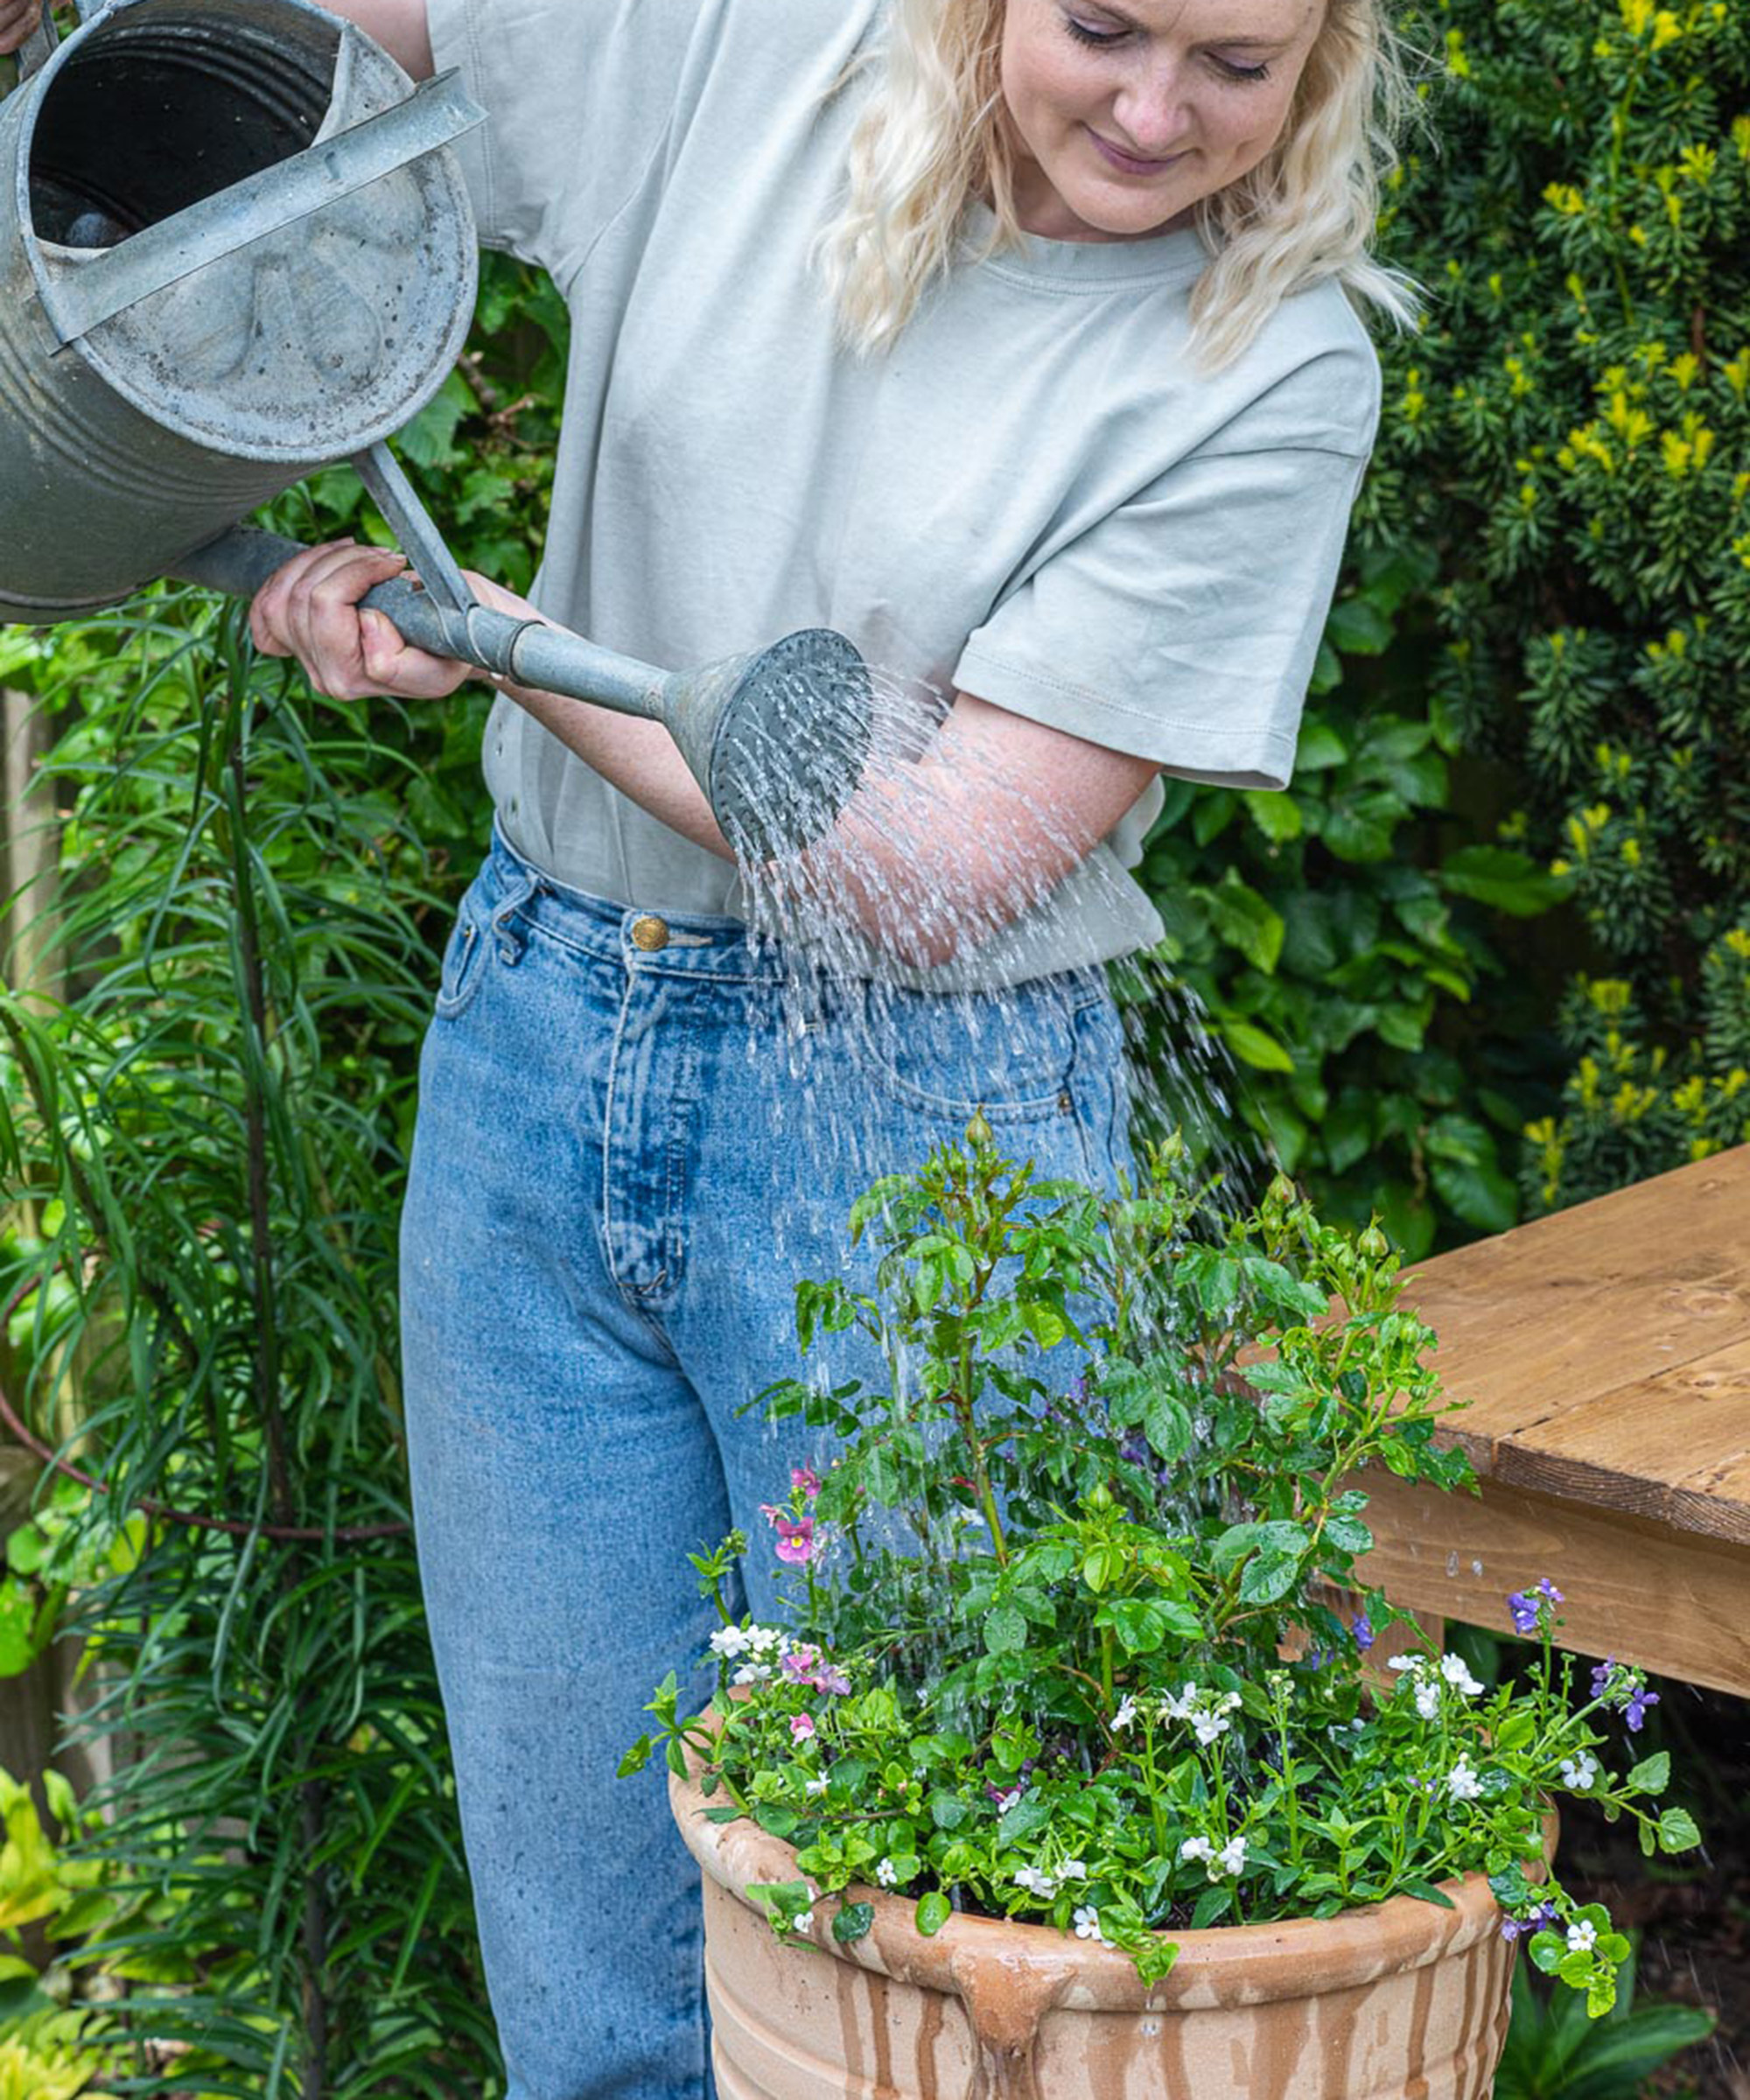
Once you are happy that all the plants are firmly in position, give your finished container a good soaking with the watering can using a rose head. When learning how to plant flowers in pots, it's essential to keep watering your container regularly and never allow the compost to dry out completely.
Keep deadheading throughout the season and some plants will give you a second flush of flowers. If any perennials you’ve used get too big, lift and divide them to grow your plant collection and prevent overcrowding. They could be planted in a separate pot, or you could find a permanent home for them in a well chosen spot in a border.
If you want to learn how to grow roses so you can add more stunning choices to your pots, there's plenty of tips in our expert guide.
Container 2: contemporary succulent bowl
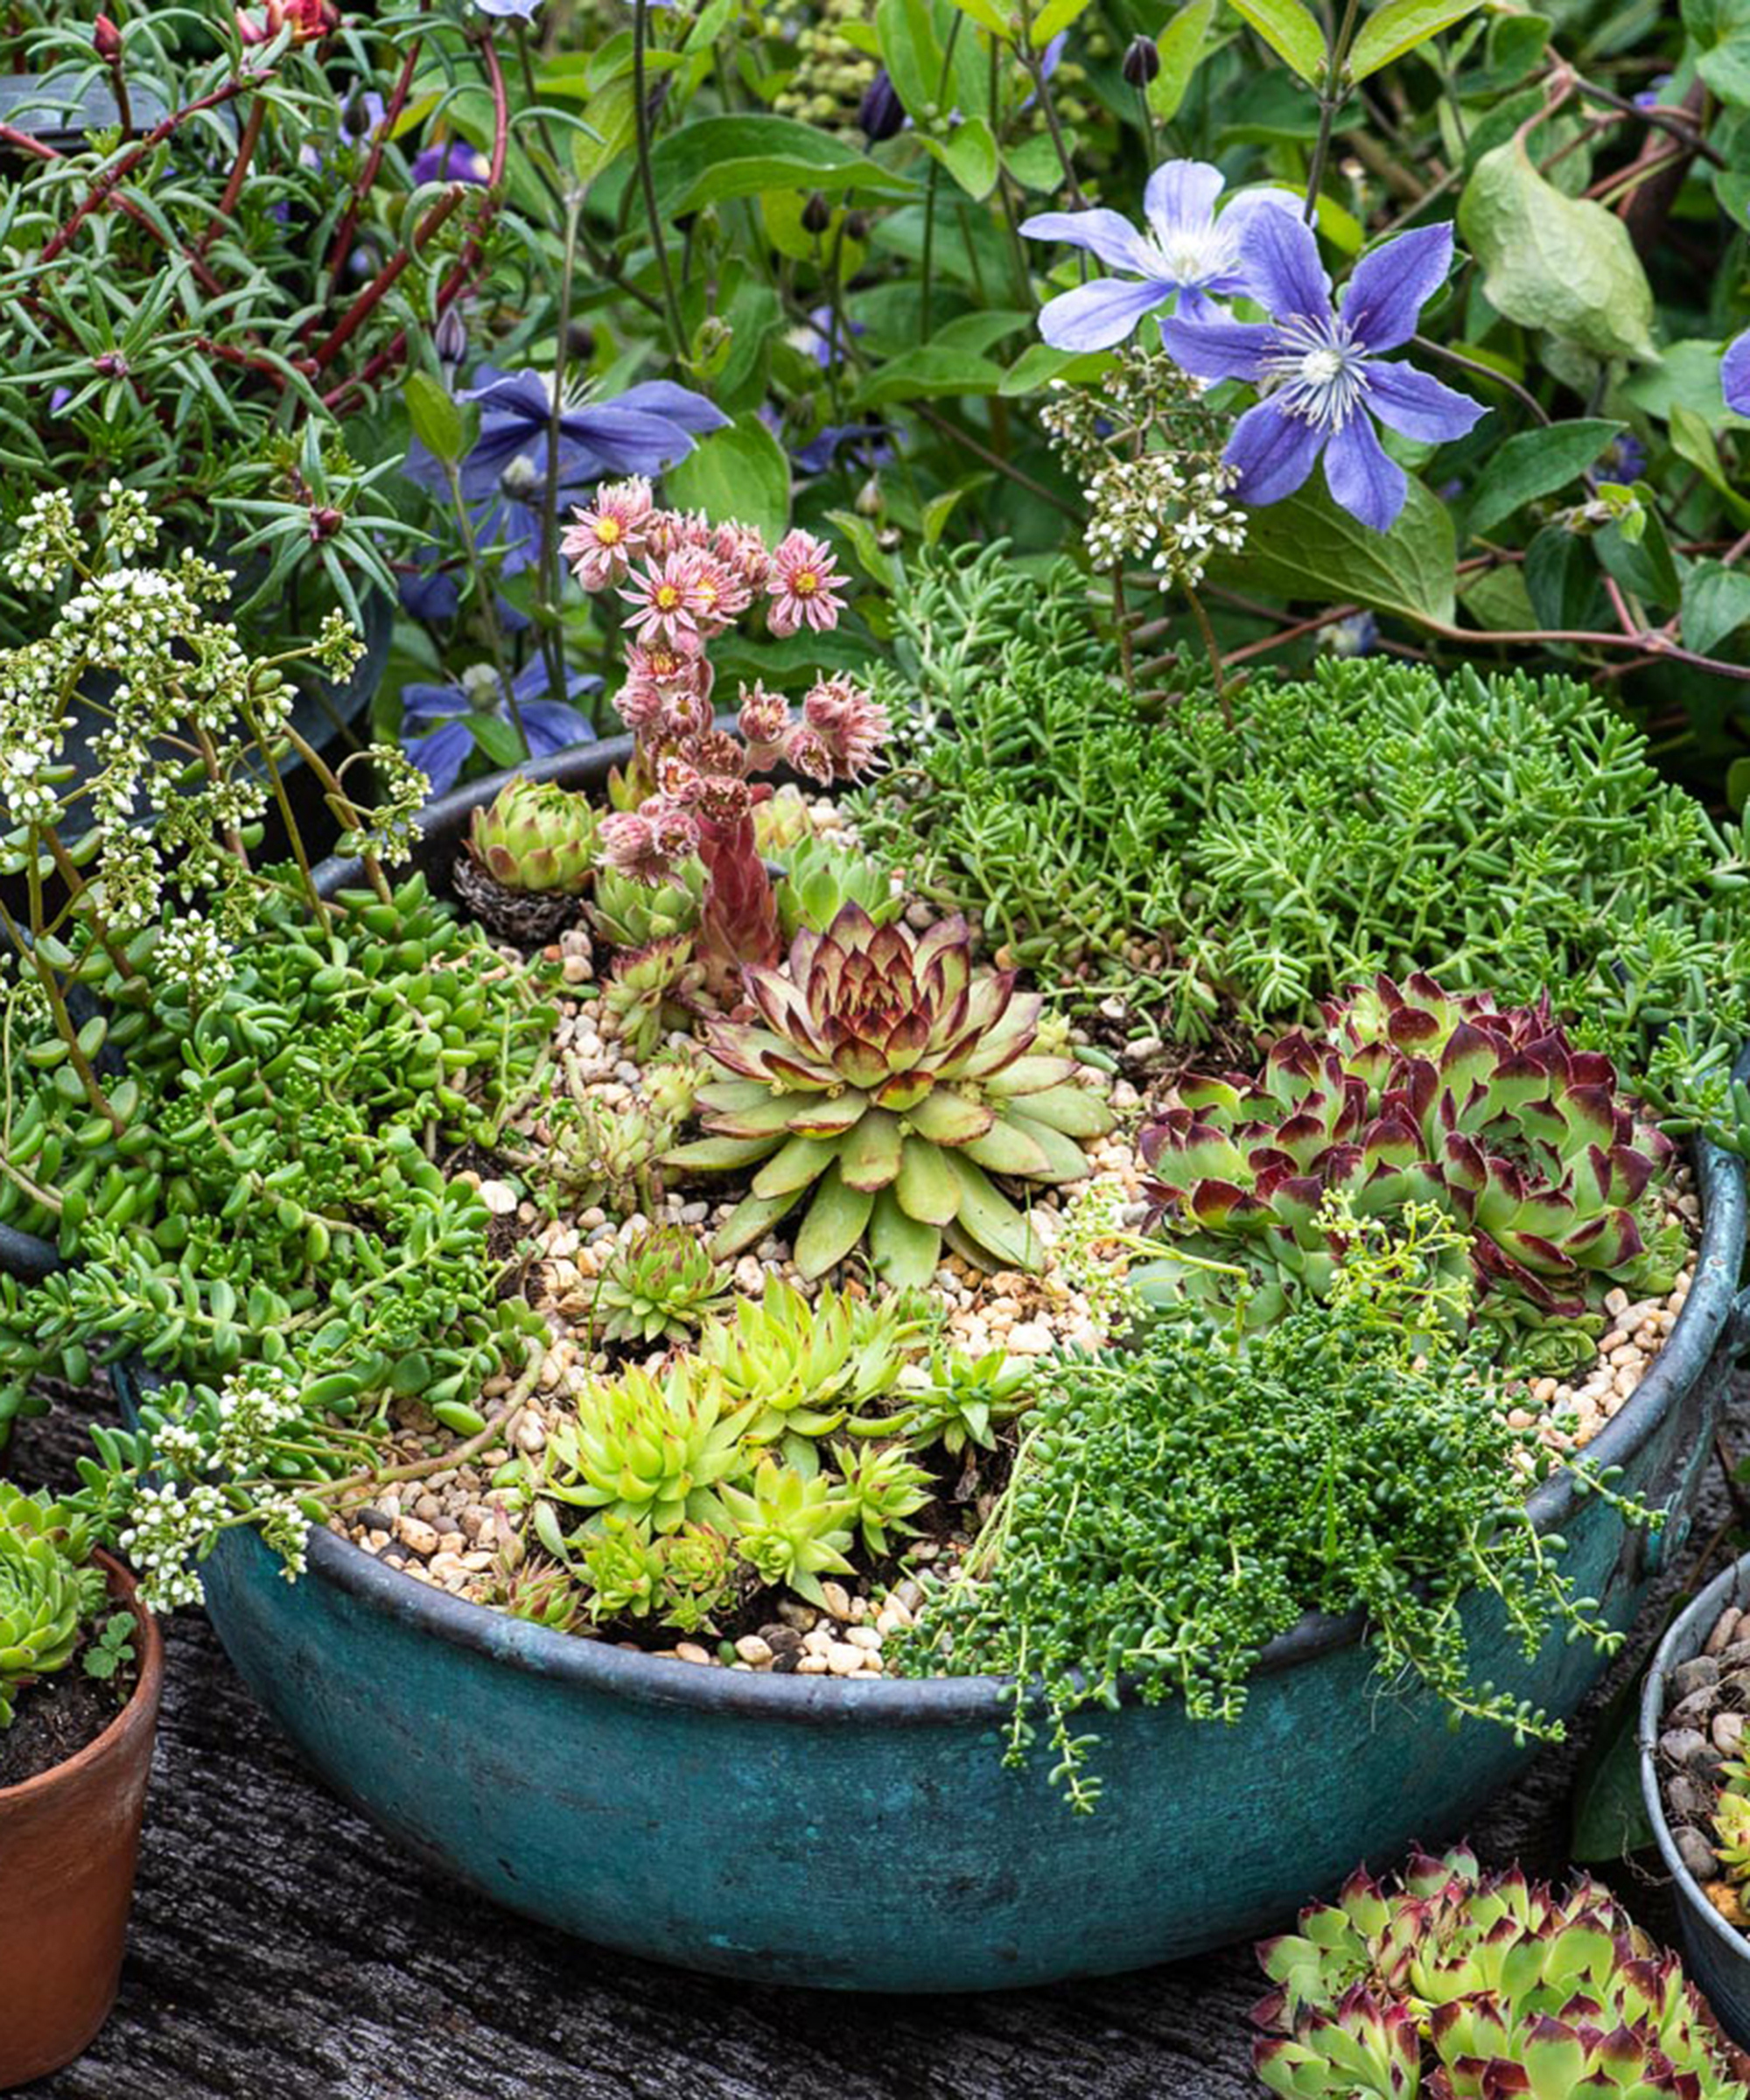
You will need:
- Large copper bowl (or similar design)
- Electric drill
- 3 x different Sedums to spread and trail
- 3 x different Sempervivum to stand proud, flowering later in season
- Fine horticultural grit to top dress
- Succulent potting mix or mix your own using 50% top soil, 40% compost and 10% gravel
- Artist's brush
Step 1: prep your pot
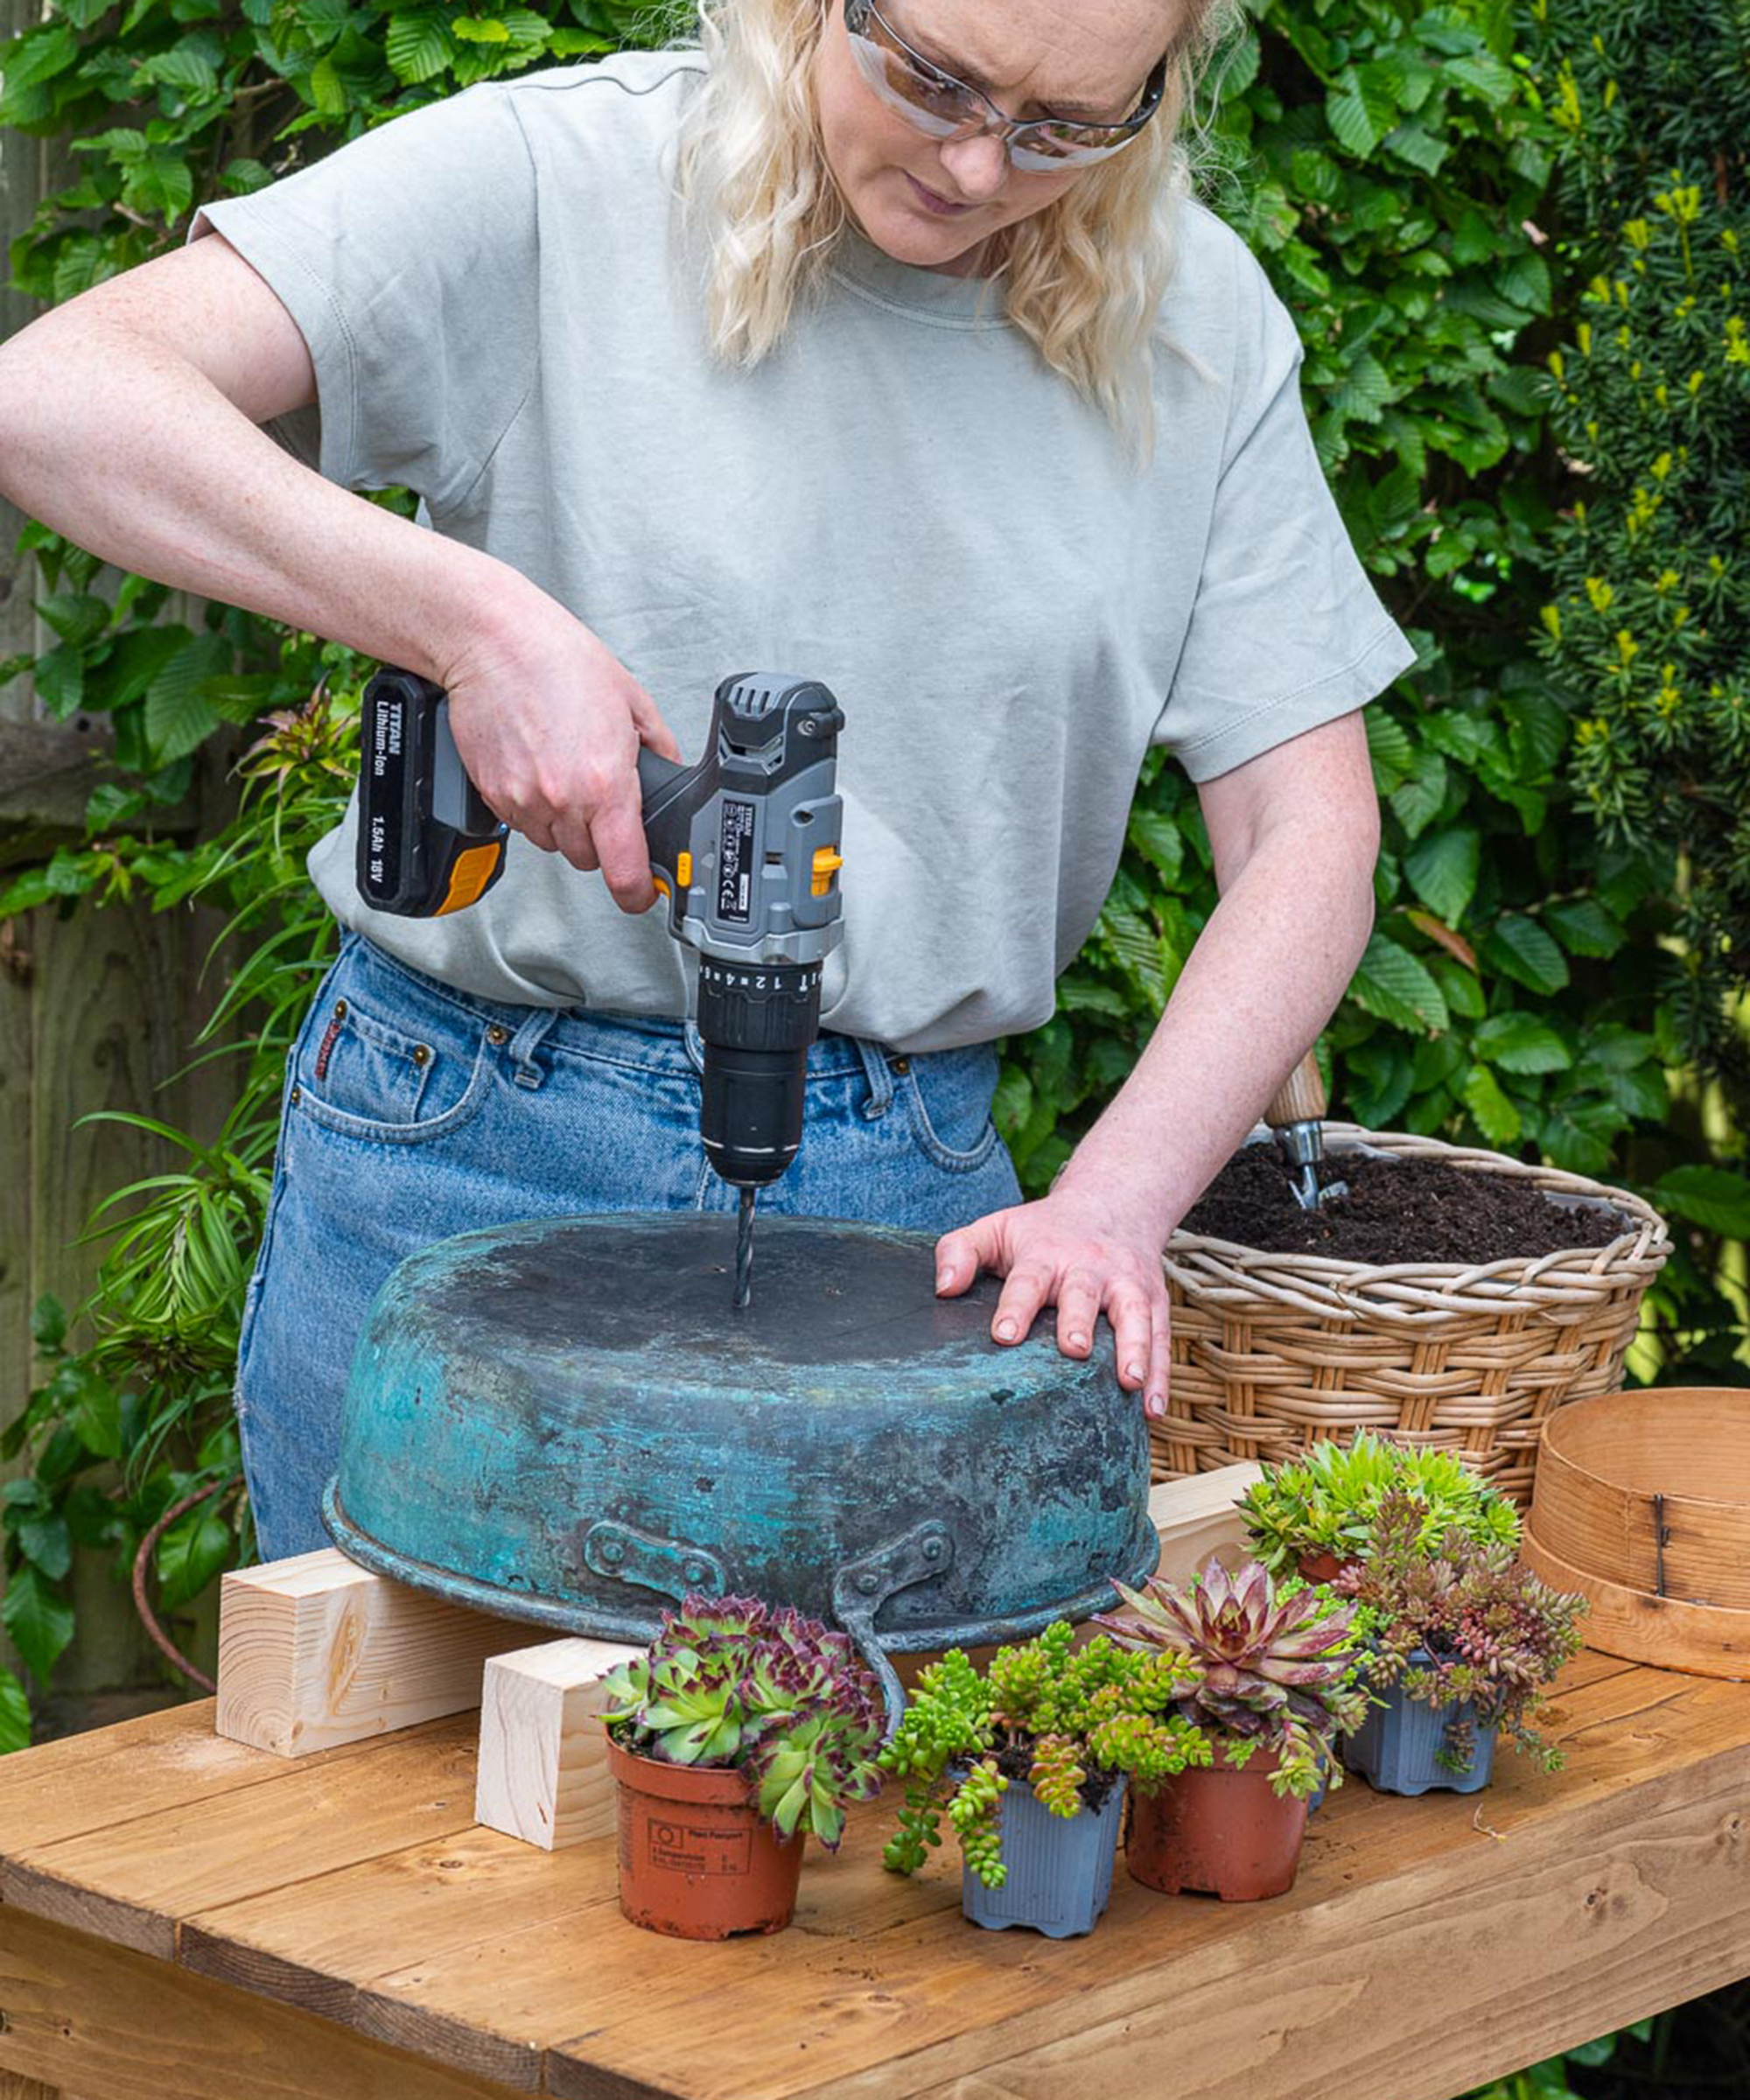
Place your copper bowl upside down on a steady surface. Be sure to wear safety glasses for this part of the project.
Drill drainage holes in the base of the copper bowl. These are essential when you're learning how to plant flowers in pots, but particularly with succulents which require good drainage.
If you don't have a copper bowl, you could use any large, shallow bowl to create a similar look with succulents. Keep it contemporary if you're planning to use this planter as a focal point in your modern garden ideas.
Step 2: plan your arrangement
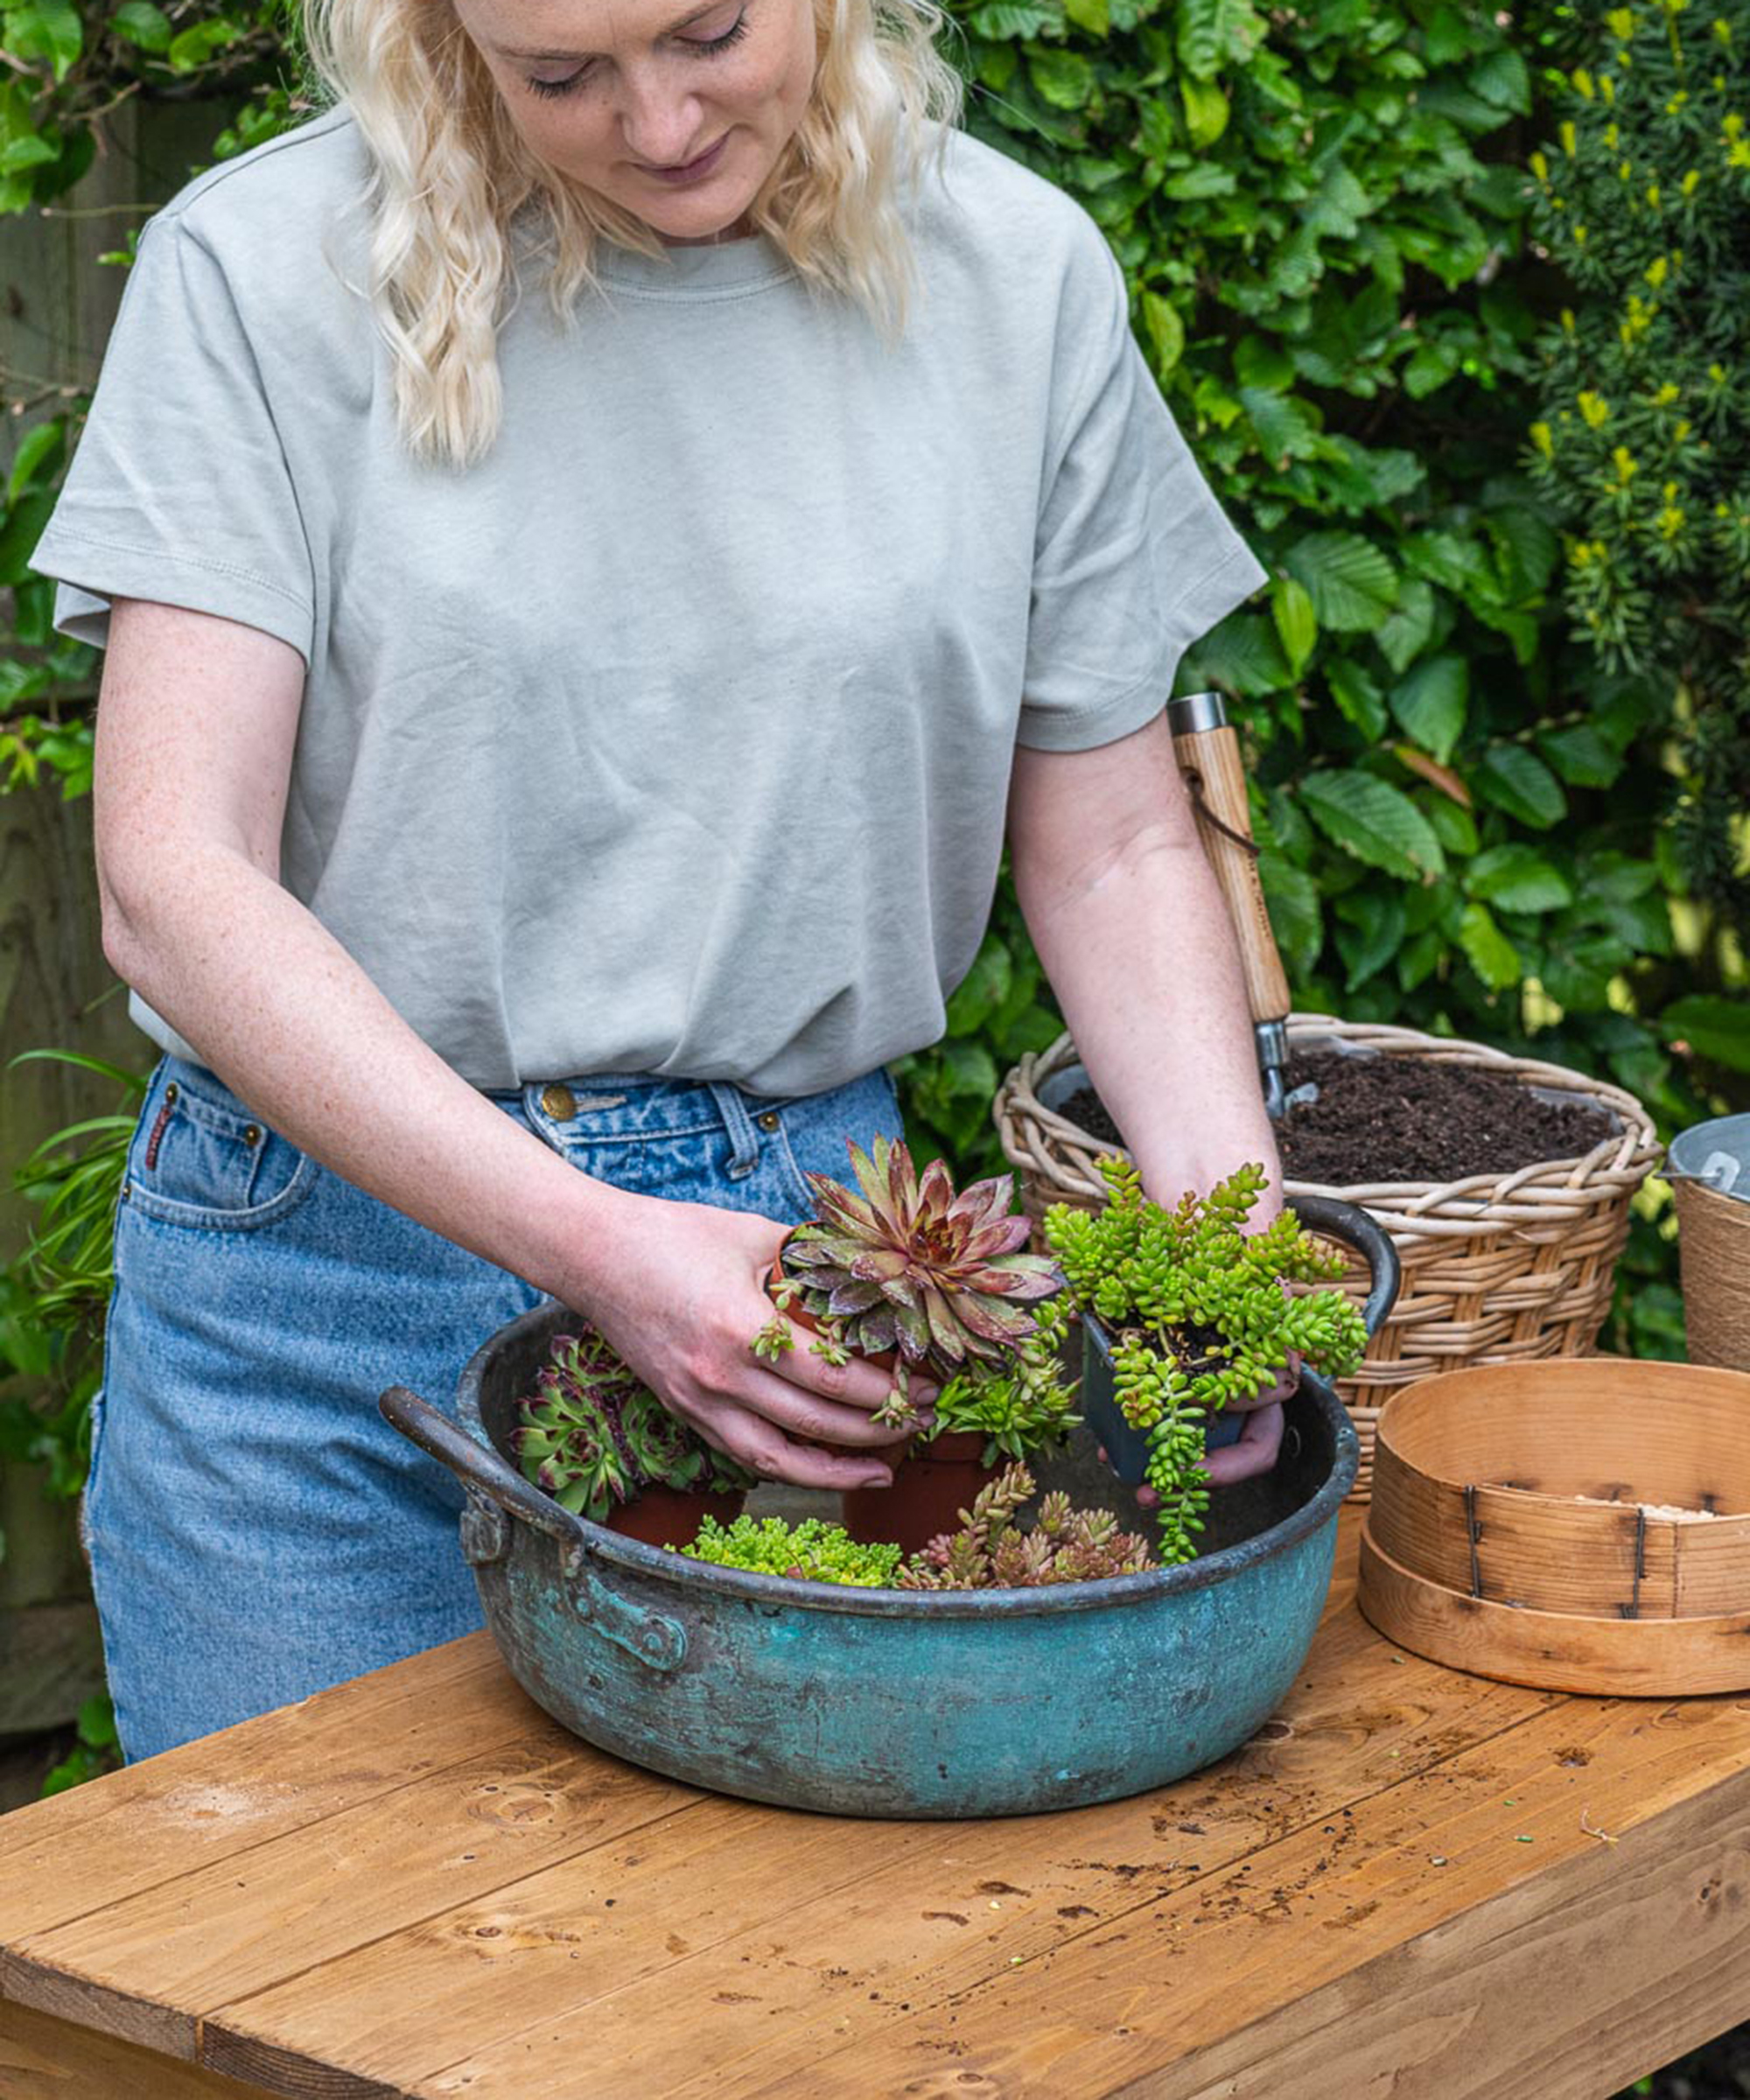
Before adding anything to the pot, keep the succulents in their plastic pots and arrange them in the bowl. This will ensure you can create your desired balance between the different shapes and shades of the leaves before you plant them.
Step 3: add your gravel and soil
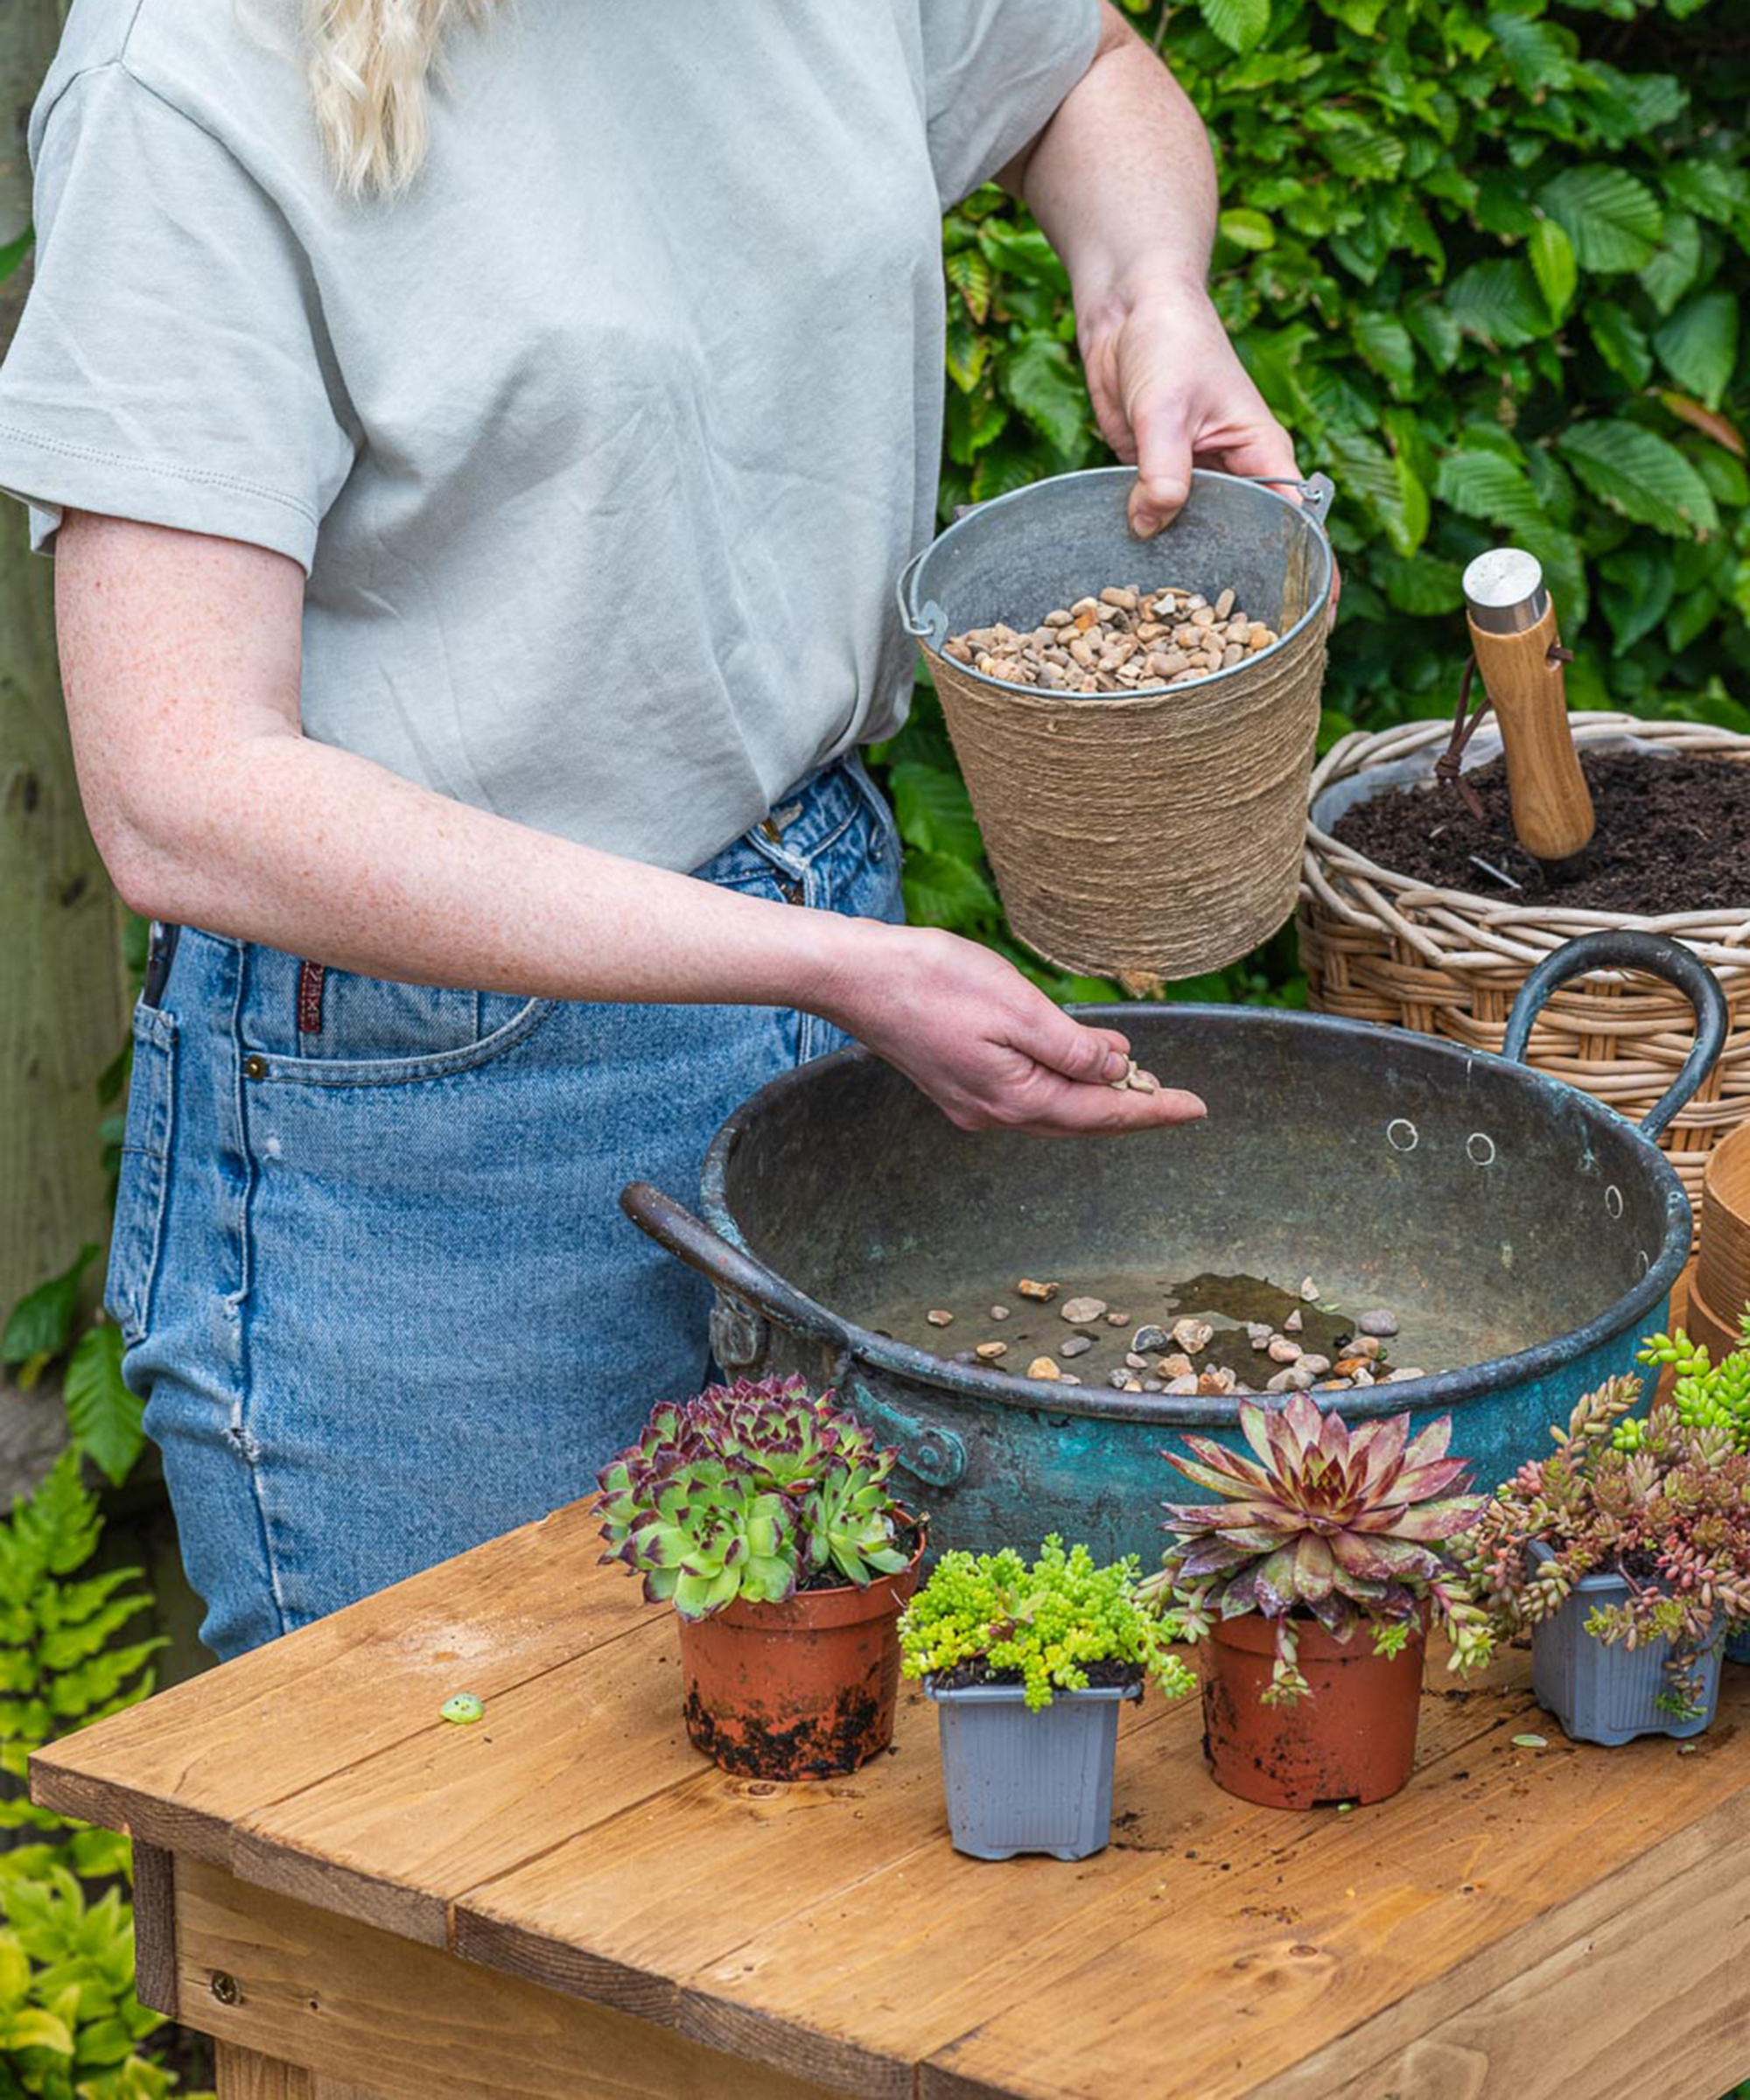
Next, you need to cover the drainage holes with a layer of gravel to prevent the compost leaking out. Next add compost specially formulated for how to grow succulents. Alternatively use your own mix which is a blend of compost and horticultural grit to a ratio of 6:1.
Step 4: position your succulents in place
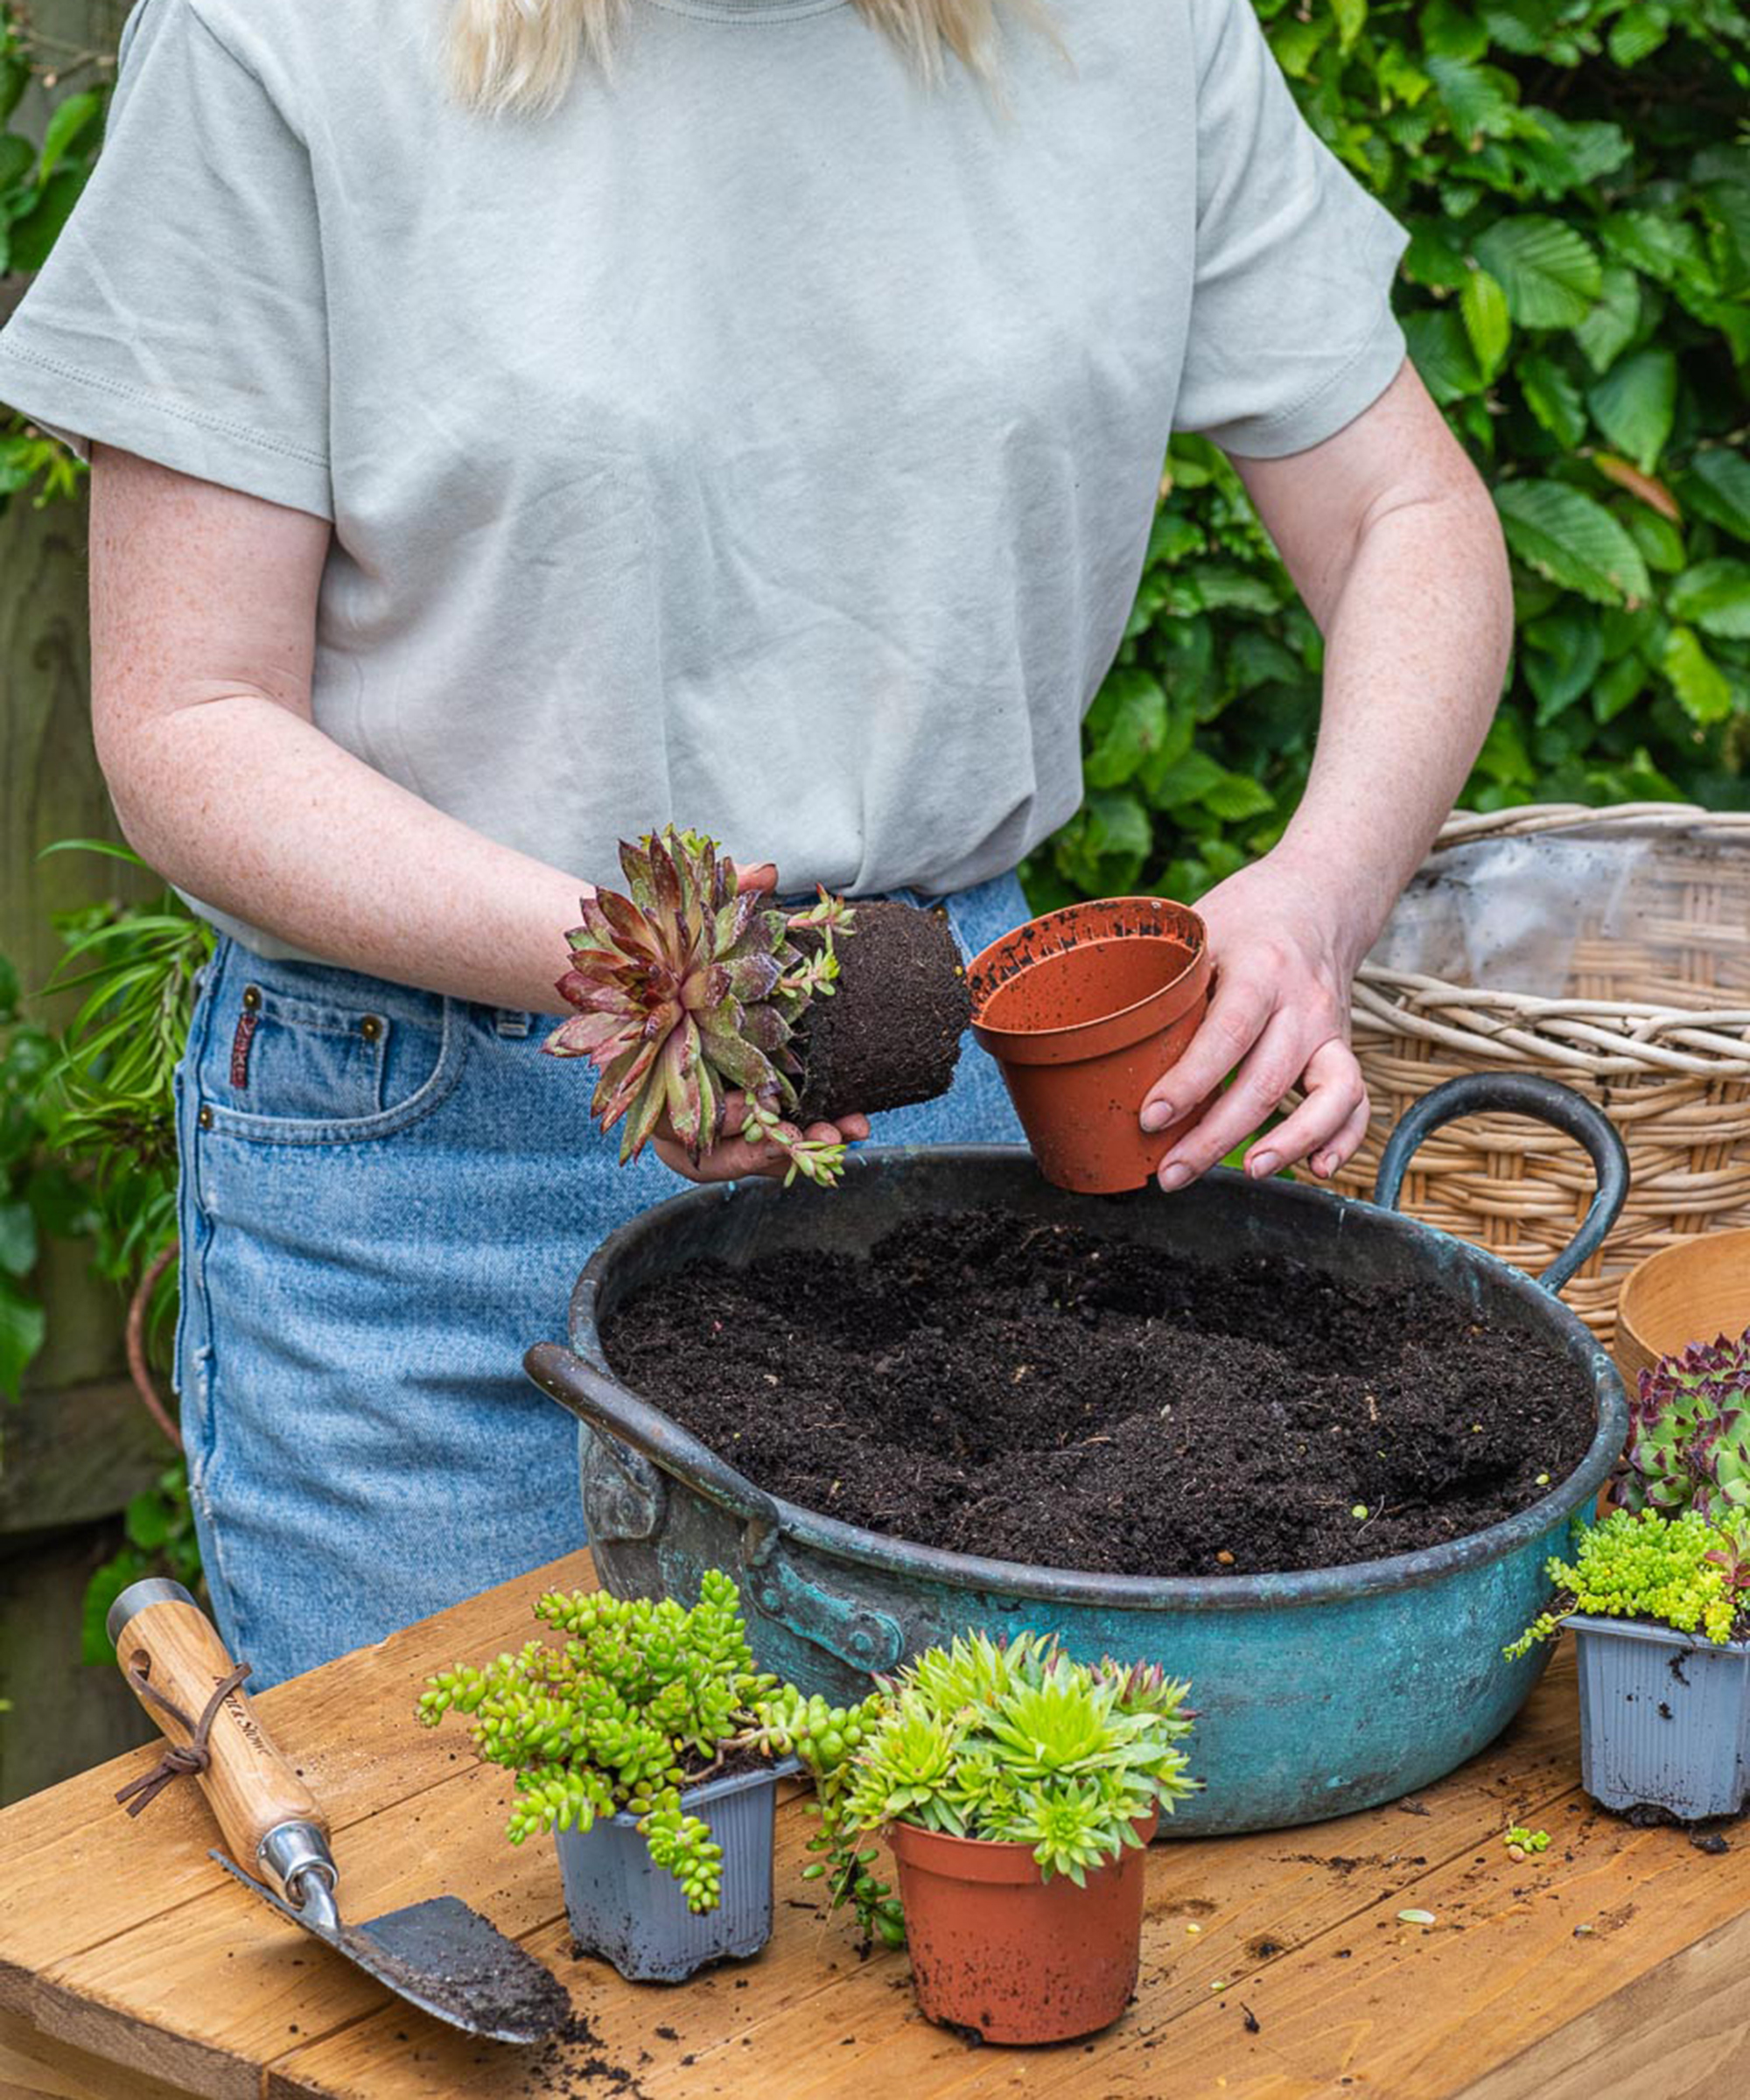
For the next stage of how to plant flowers in pots, replace each succulent in position, still in the plastic pot, and make a deep indent in the compost which forms the planting hole for each plant. Next, ease the succulents out of their pots one-by-one and place in their planting hole. Do this with care so as not to disturb the rootball.
Step 5: finish with fine grit
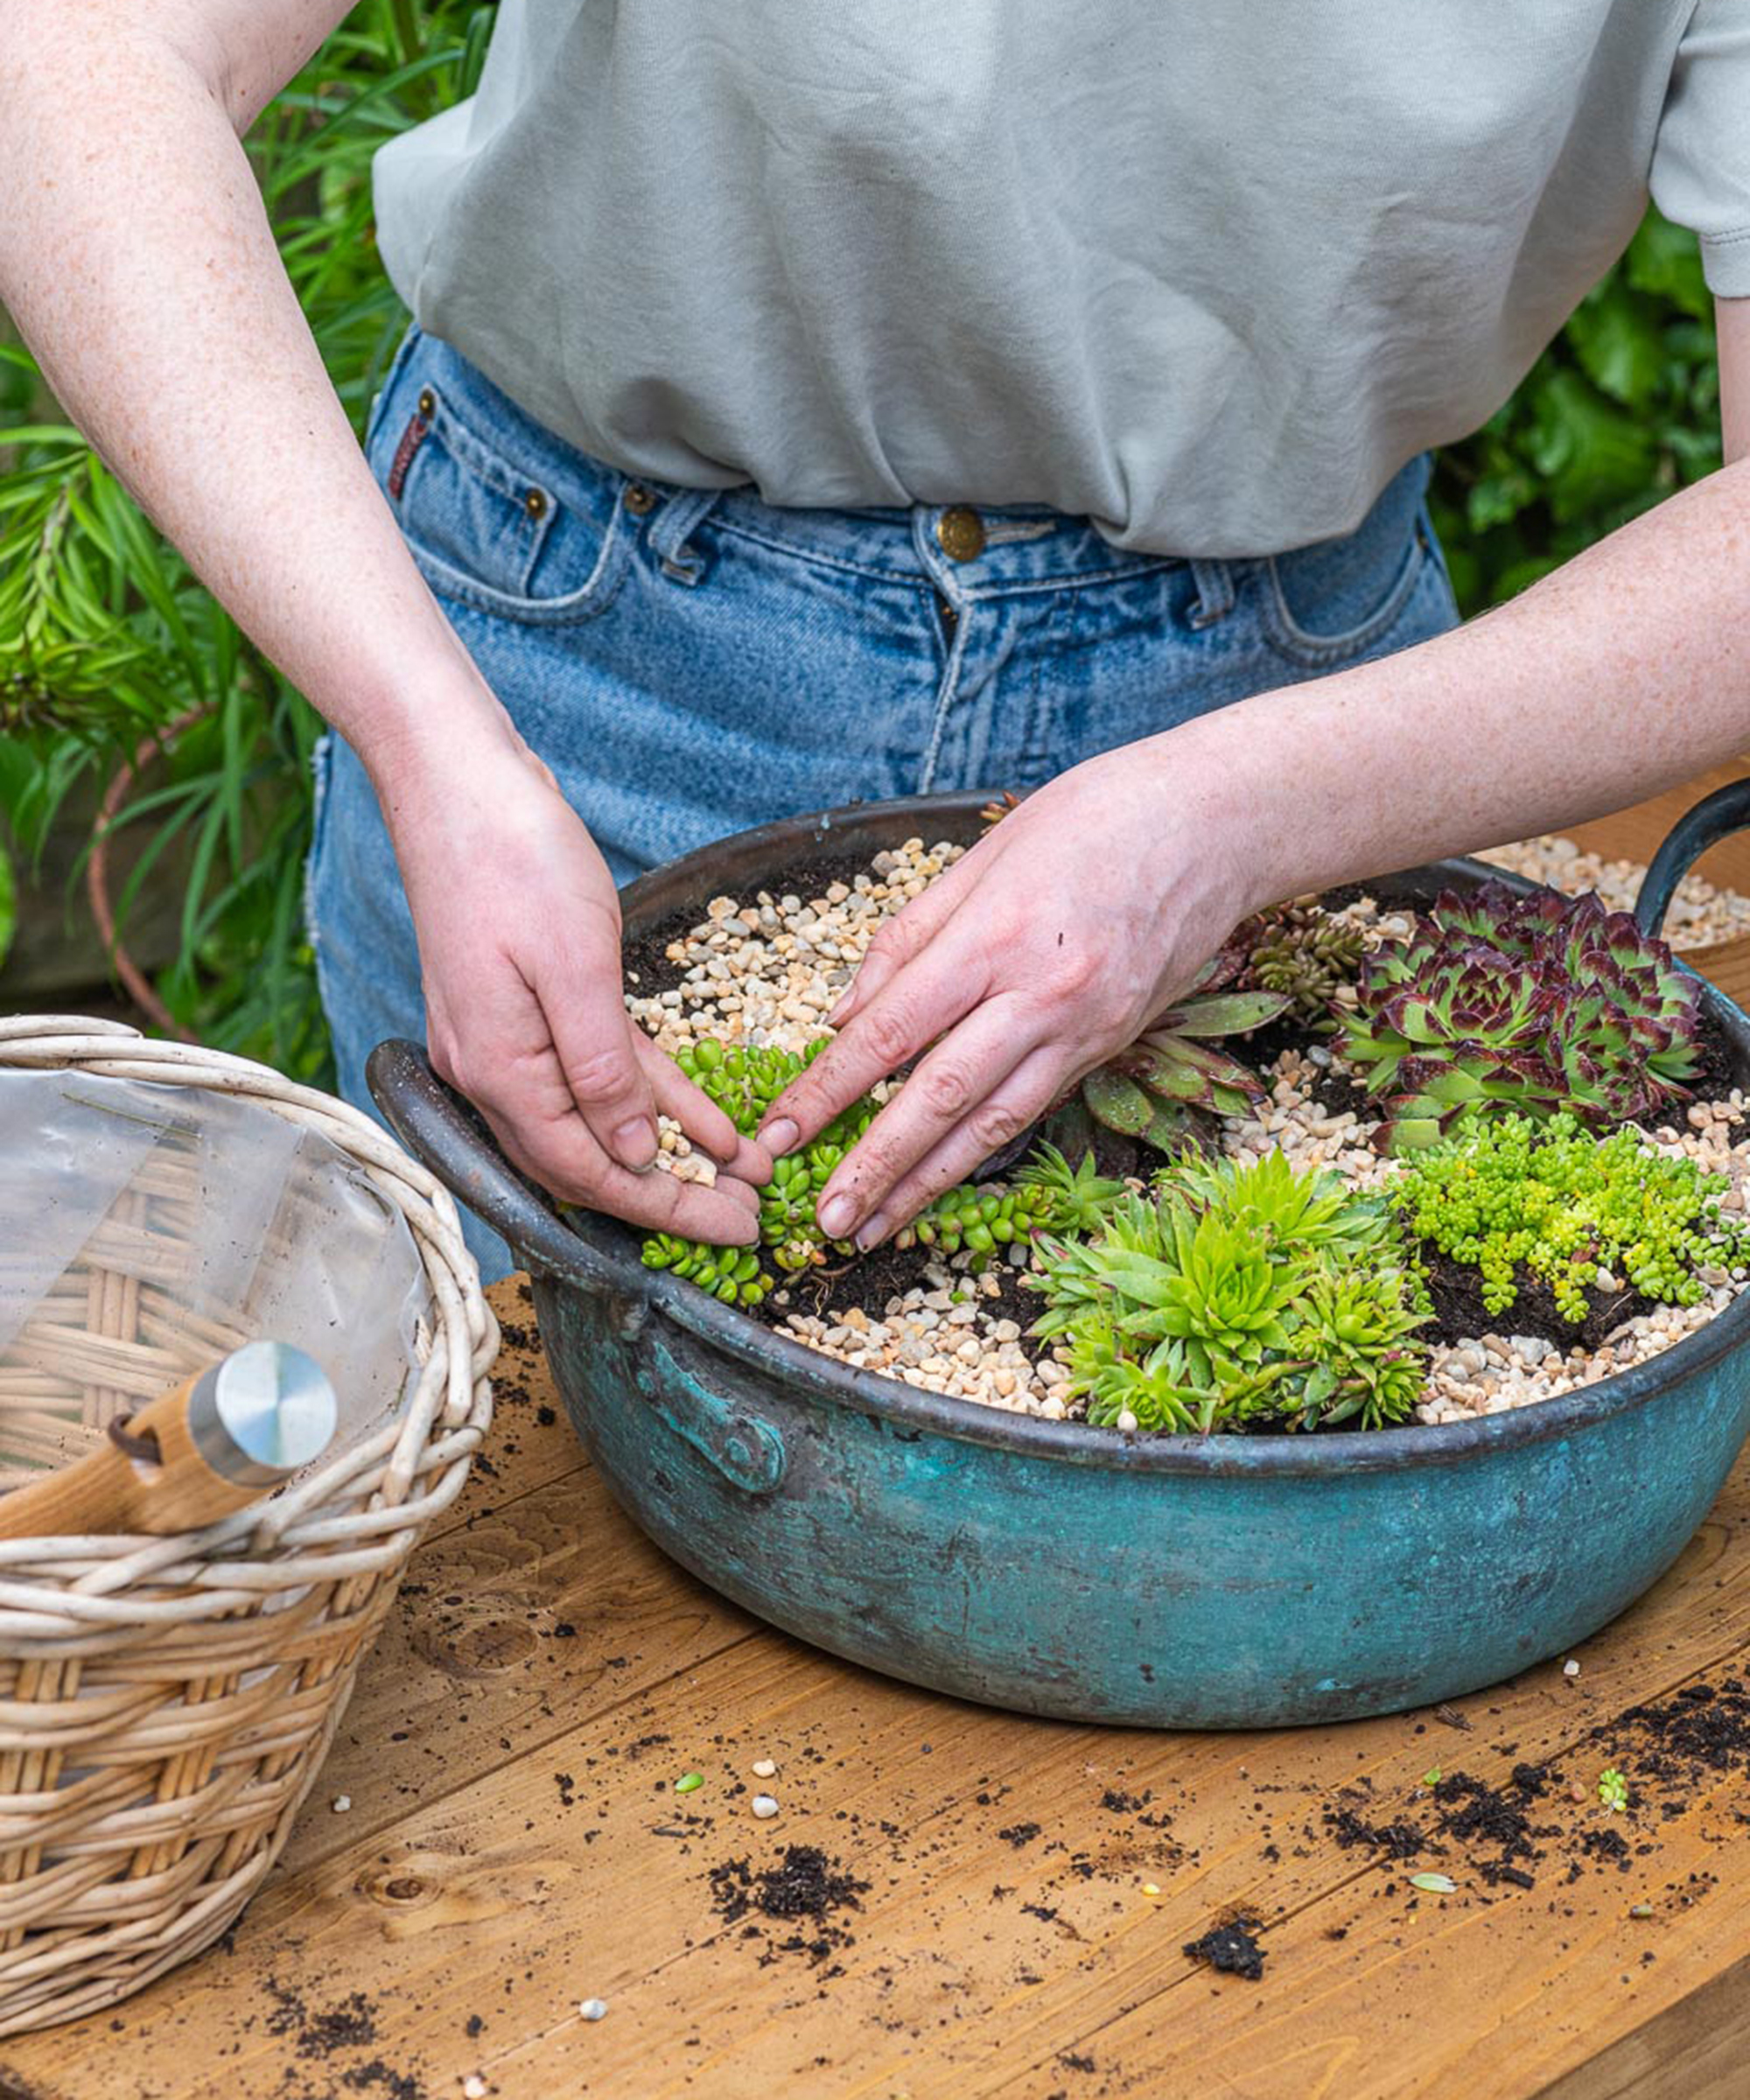
Firm the compost round each succulent, ensuring the soil does not cover the neck of the plant. Next sprinkle a mulch of fine grit on the surface of the compost. Ensure there’s a layer of grit beneath each succulent, building up around the neck of the plant. This prevents the leaves being in contact with damp soil which could cause them to rot.
Step 6: water your display

Water your arrangement thoroughly with a watering can which has a narrow spout. This way you can avoid the leaves. Brush away any droplets and excess grit on the leaves with a brush.
Once you’ve finished your container make sure you position it out of direct sunlight as the leaves of succulents can get scorched by the sun. We think it would work brilliantly on a garden table as the centerpiece for your outdoor dining ideas.
When it comes to watering plants, it’s just as easy to over water as it is to underwater, so allow your container to dry out between waterings. Check the soil regularly as the period between watering will be shorter during hot weather. If the leaves are looking shrivelled then they aren’t getting enough water, whereas translucent leaves indicate over watering.
Don't forget, there's more tips on how to care for succulents in our guide.

Teresa has worked as an Editor on a number of gardening magazines for three years now. So she is lucky enough to see and write about gardening across all sizes, budgets and abilities. She recently moved into her first home and the garden is a real project! Currently she is relishing planning her own design and planting schemes. What she is most passionate about when it comes to gardening are the positive effects it has on our mental health to grow and care for plants, as well as being great for the environment too and help provide food and shelter for wildlife.
