How to plant a bulb lasagne: 5 simple steps for layers of spring color
Learn how to plant a bulb lasagne like this one and you will be rewarded with months of dazzling displays of spring flowers

Sarah Wilson
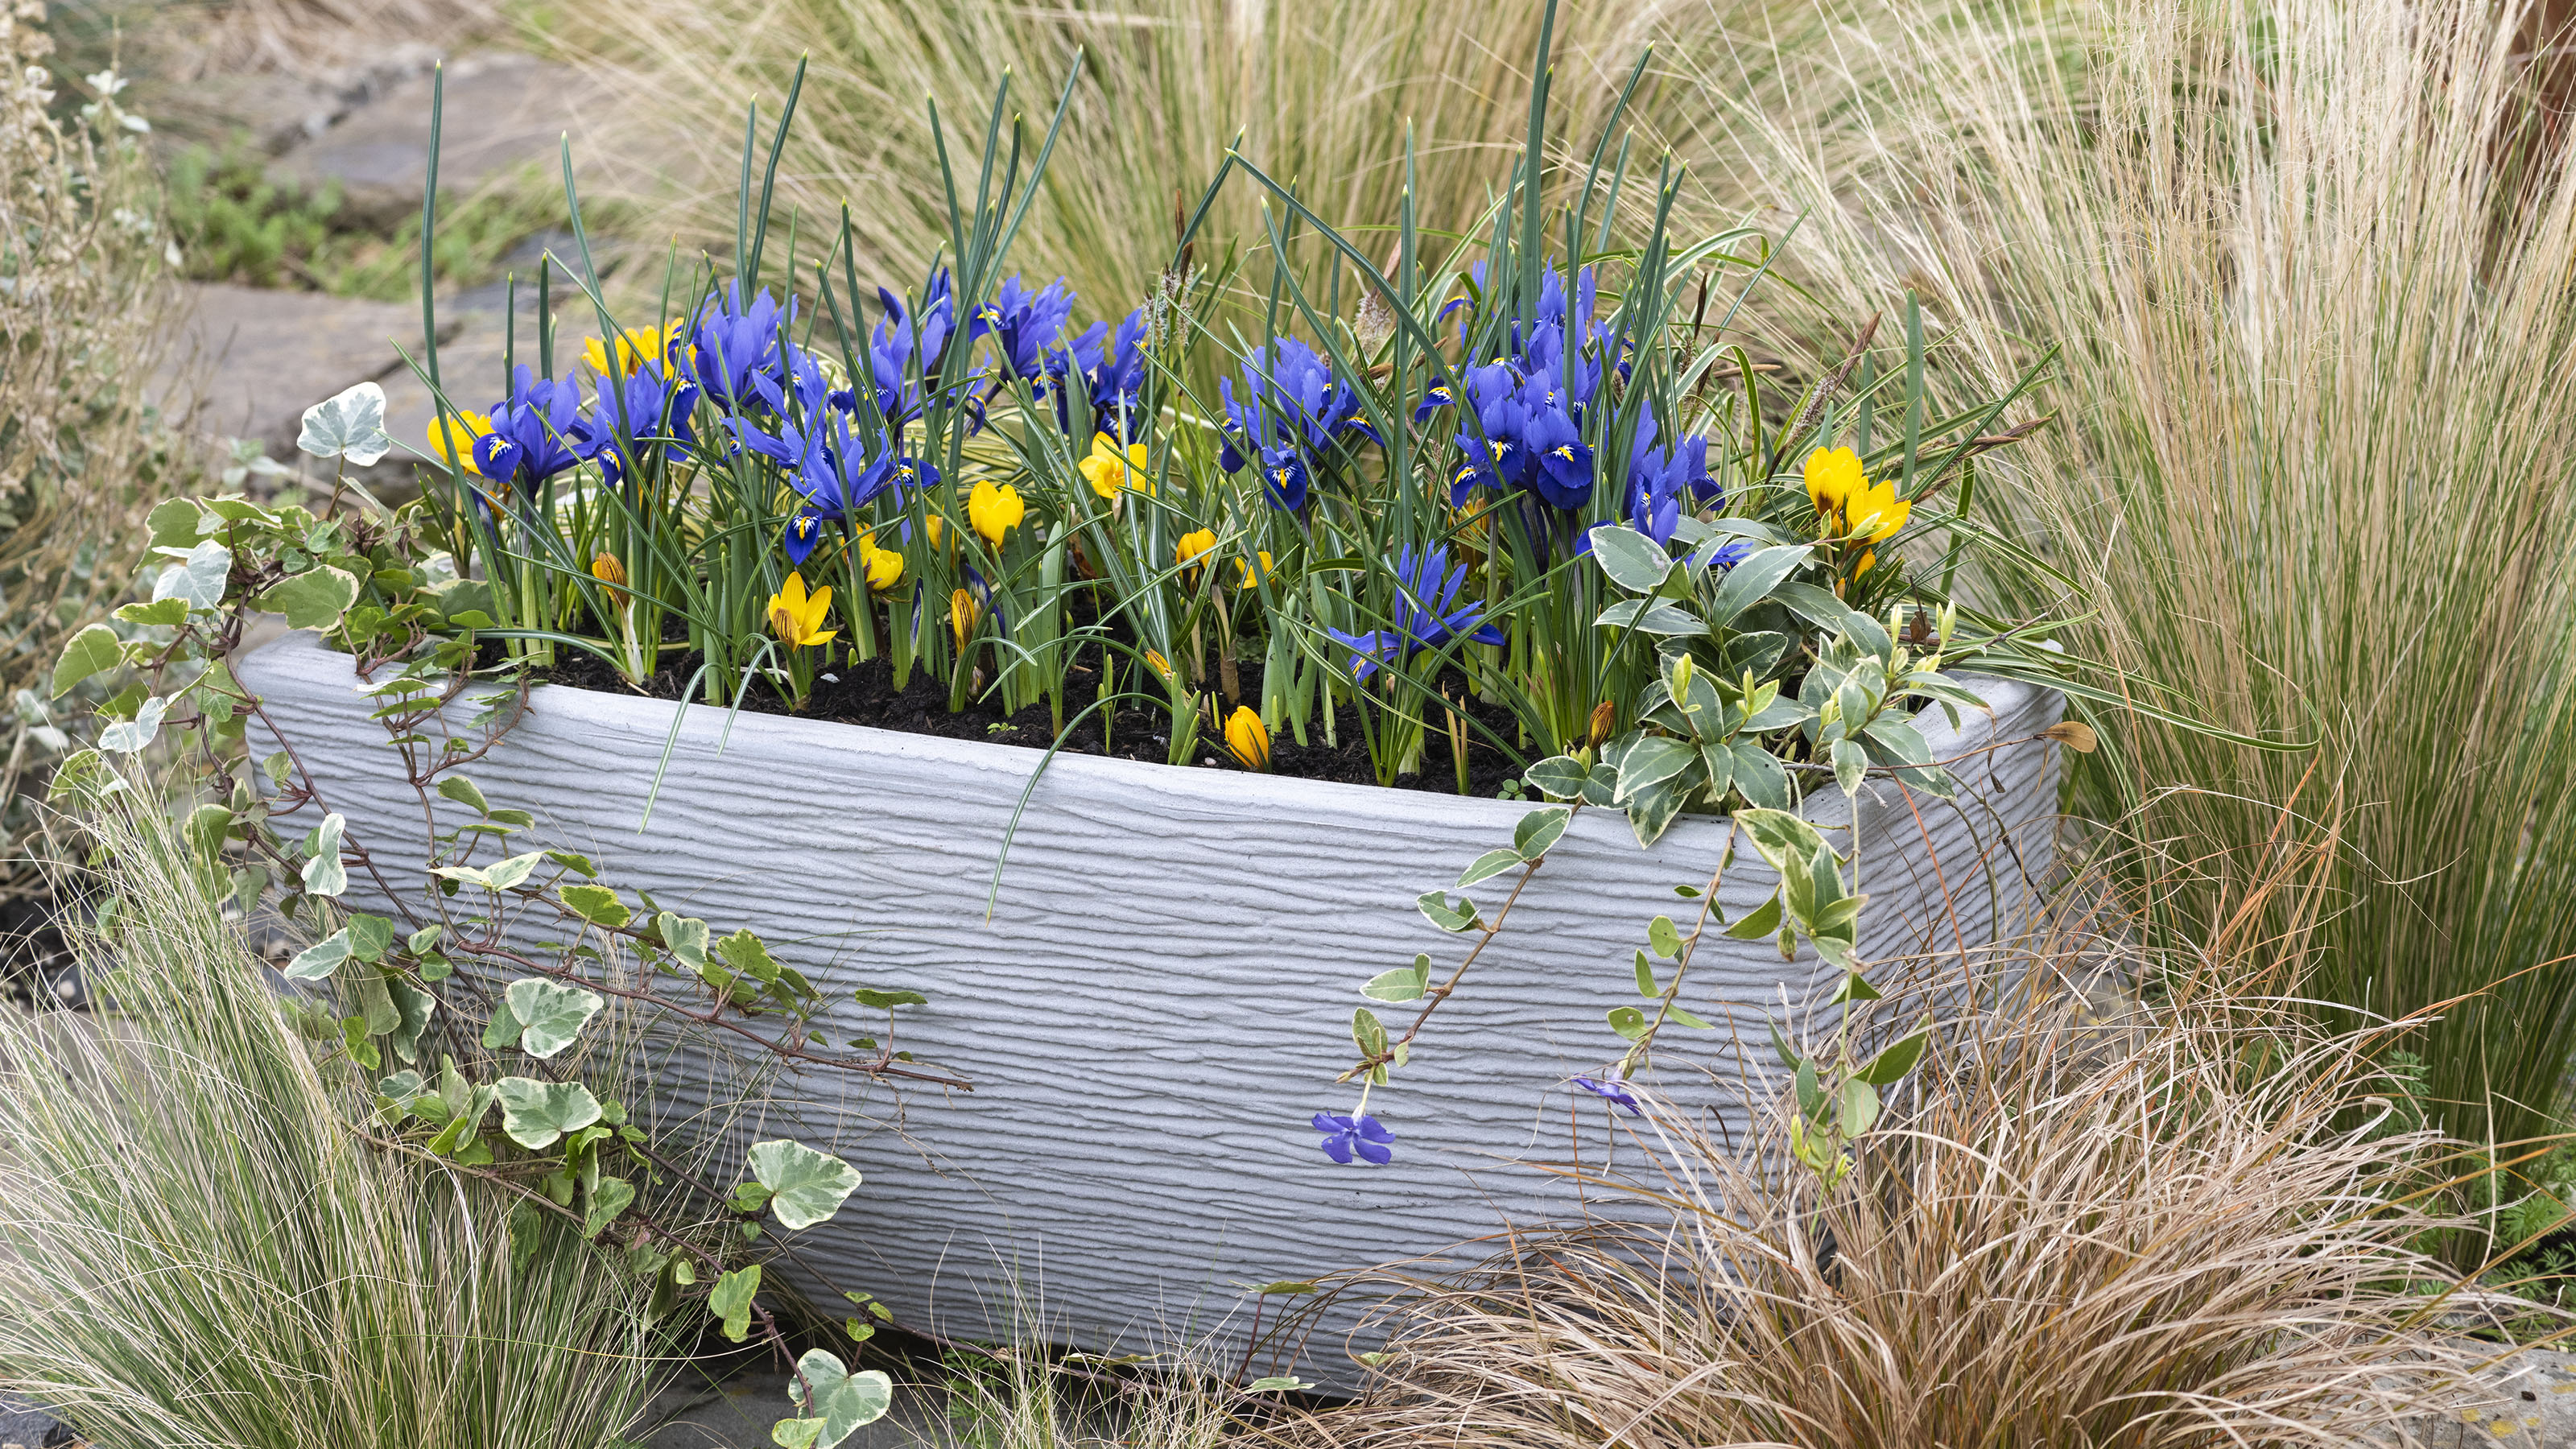
Learning how to plant a bulb lasagne is one of the best ways to make the most of your spring bulbs. A bulb lasagne might sound complicated, but all it is is two or more layers of bulbs, planted in the same pot.
This clever planting technique will give you months of spring color, with early bulbs like snowdrops and iris putting on a show early on, followed by daffodils and then tulips. This method is also referred to as successional planting.
The biggest bulbs, which are the later bloomers go into your pot first, moving through to the smallest ones on top (earliest to flower). It's an easy method for planting bulbs and is definitely rewarding.
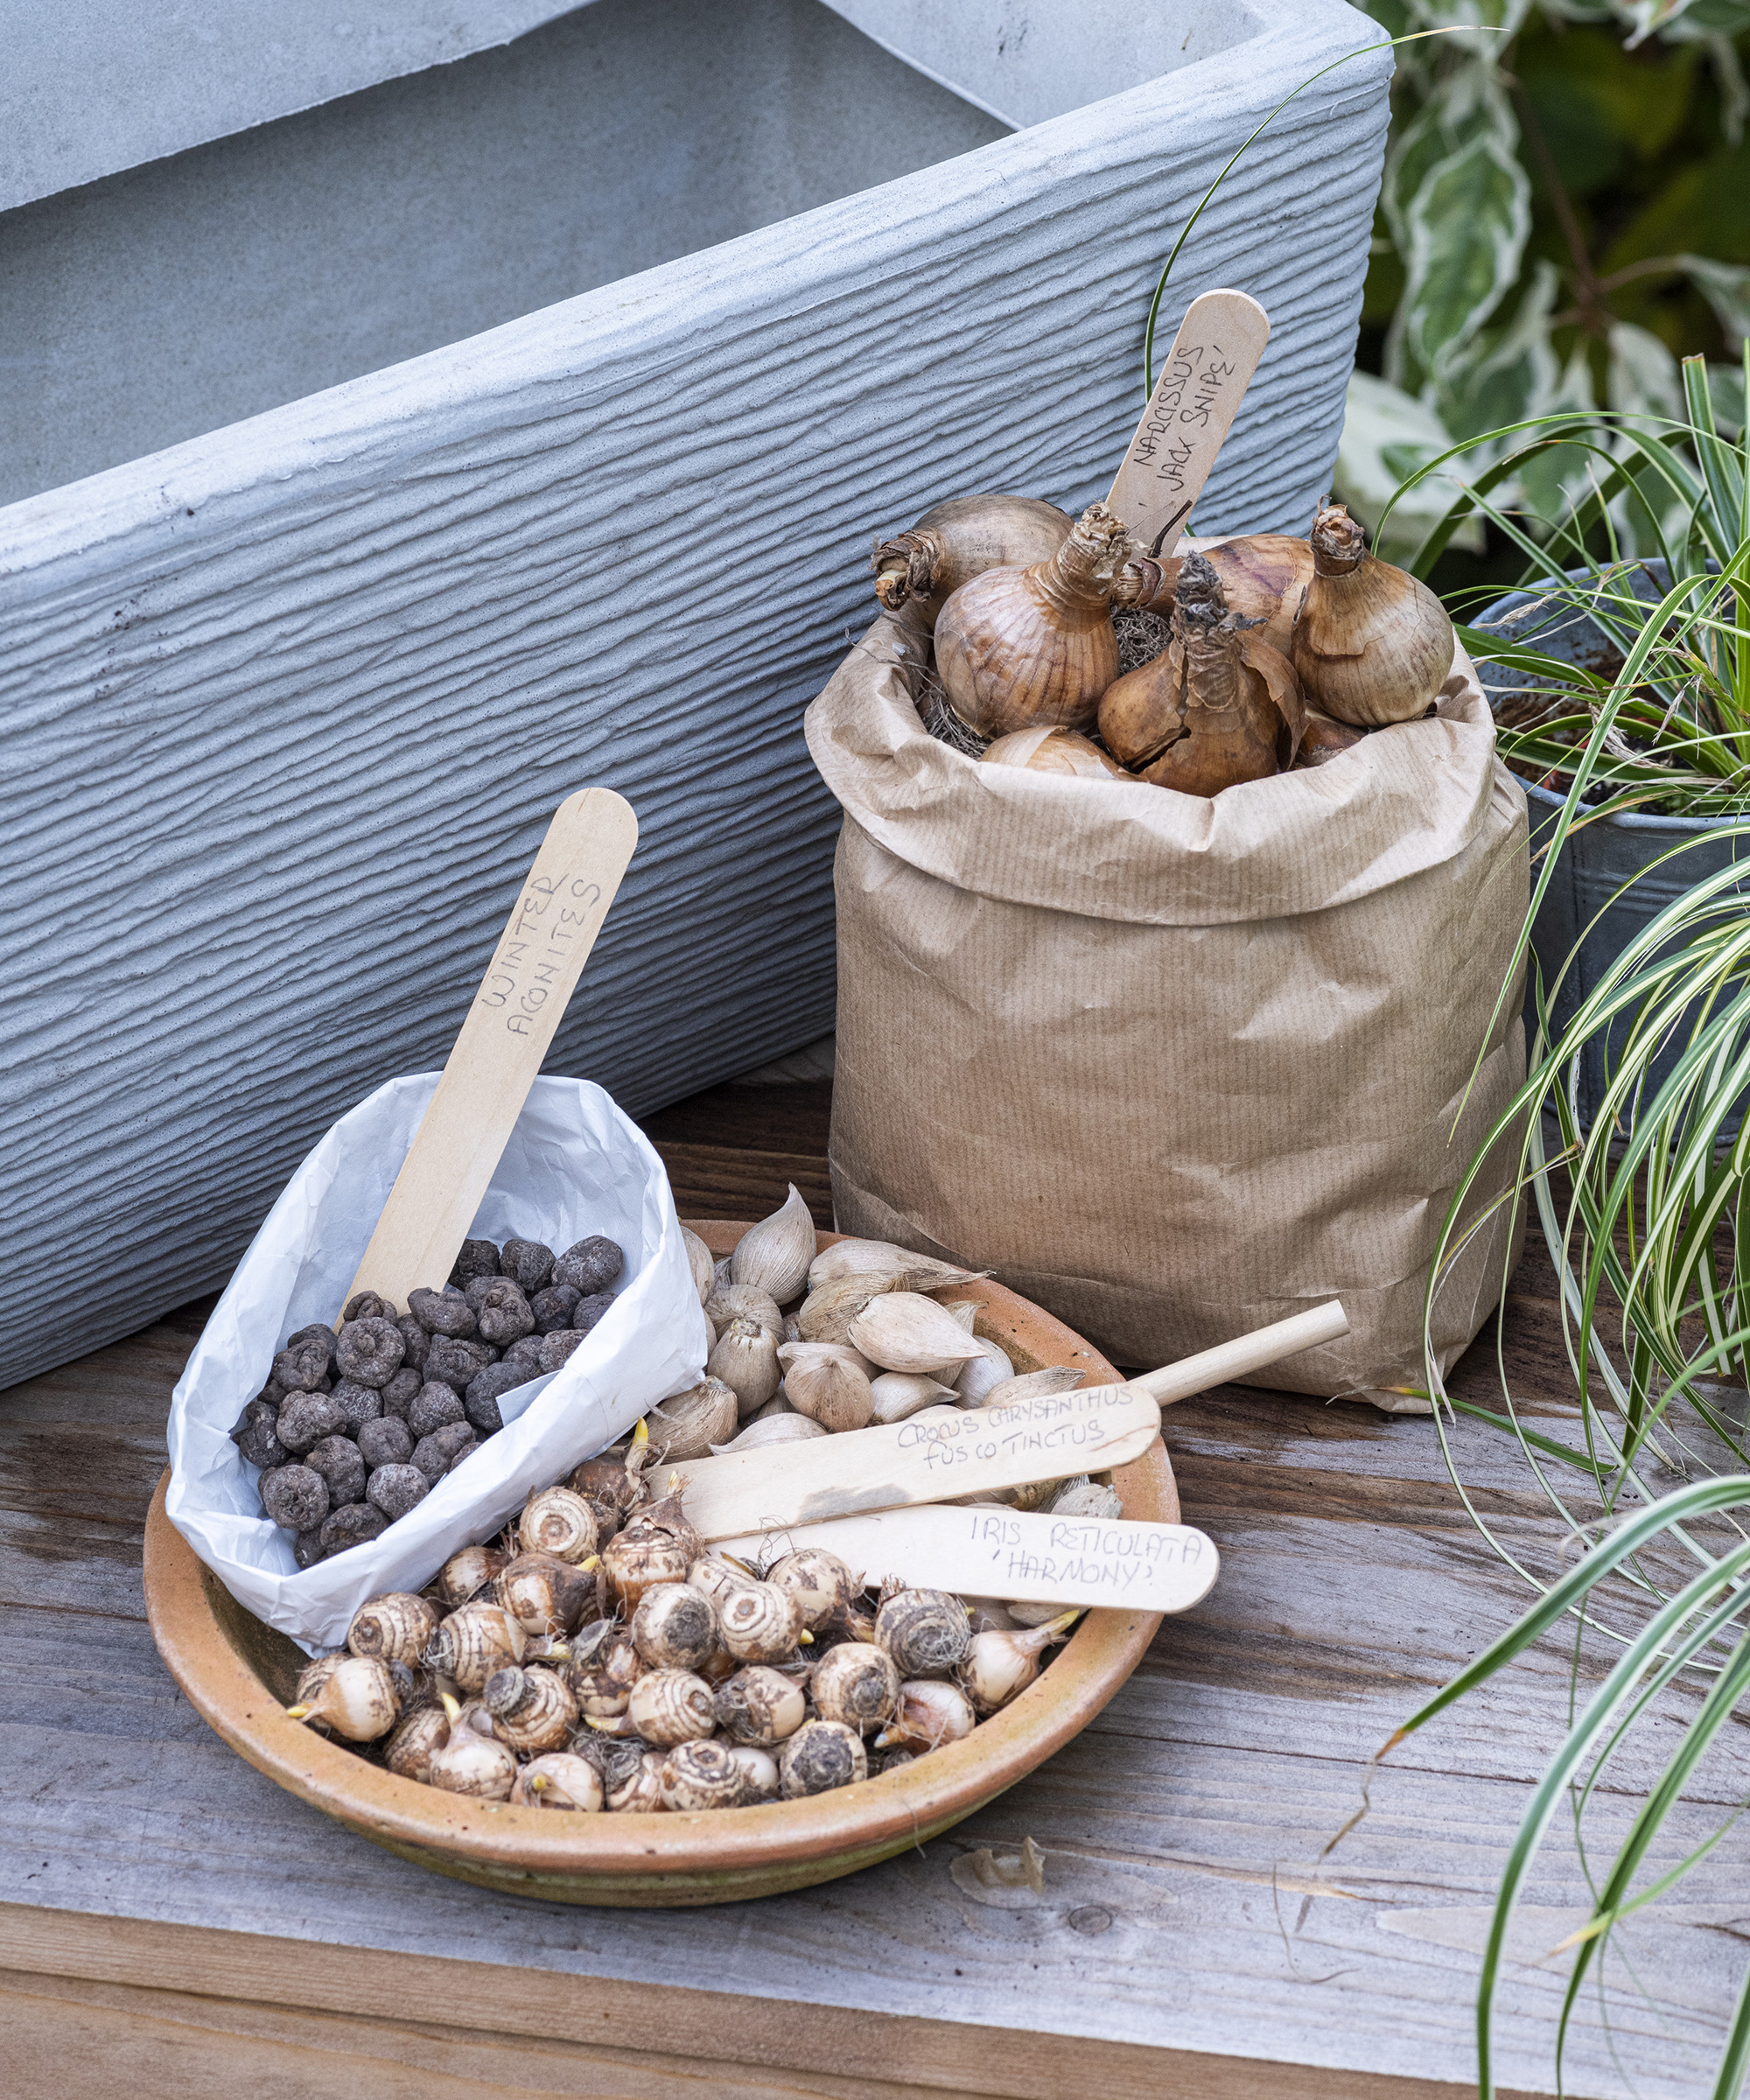
Bulbs are layered up in order of size, with the largest at the bottom
Learn how to plant a bulb lasagne for a stunning spring display
For this particular bulb lasagne we've chosen winter aconites, crocus, irises and narcissus bulbs as well as some ivy and pretty blue periwinkles.
The planter will look quite bare at the initial planting stage before the bulbs spring up, but the trailing ivy and periwinkles will give a bit of interest during the winter. And soon enough the first layer of winter aconites will start appearing.
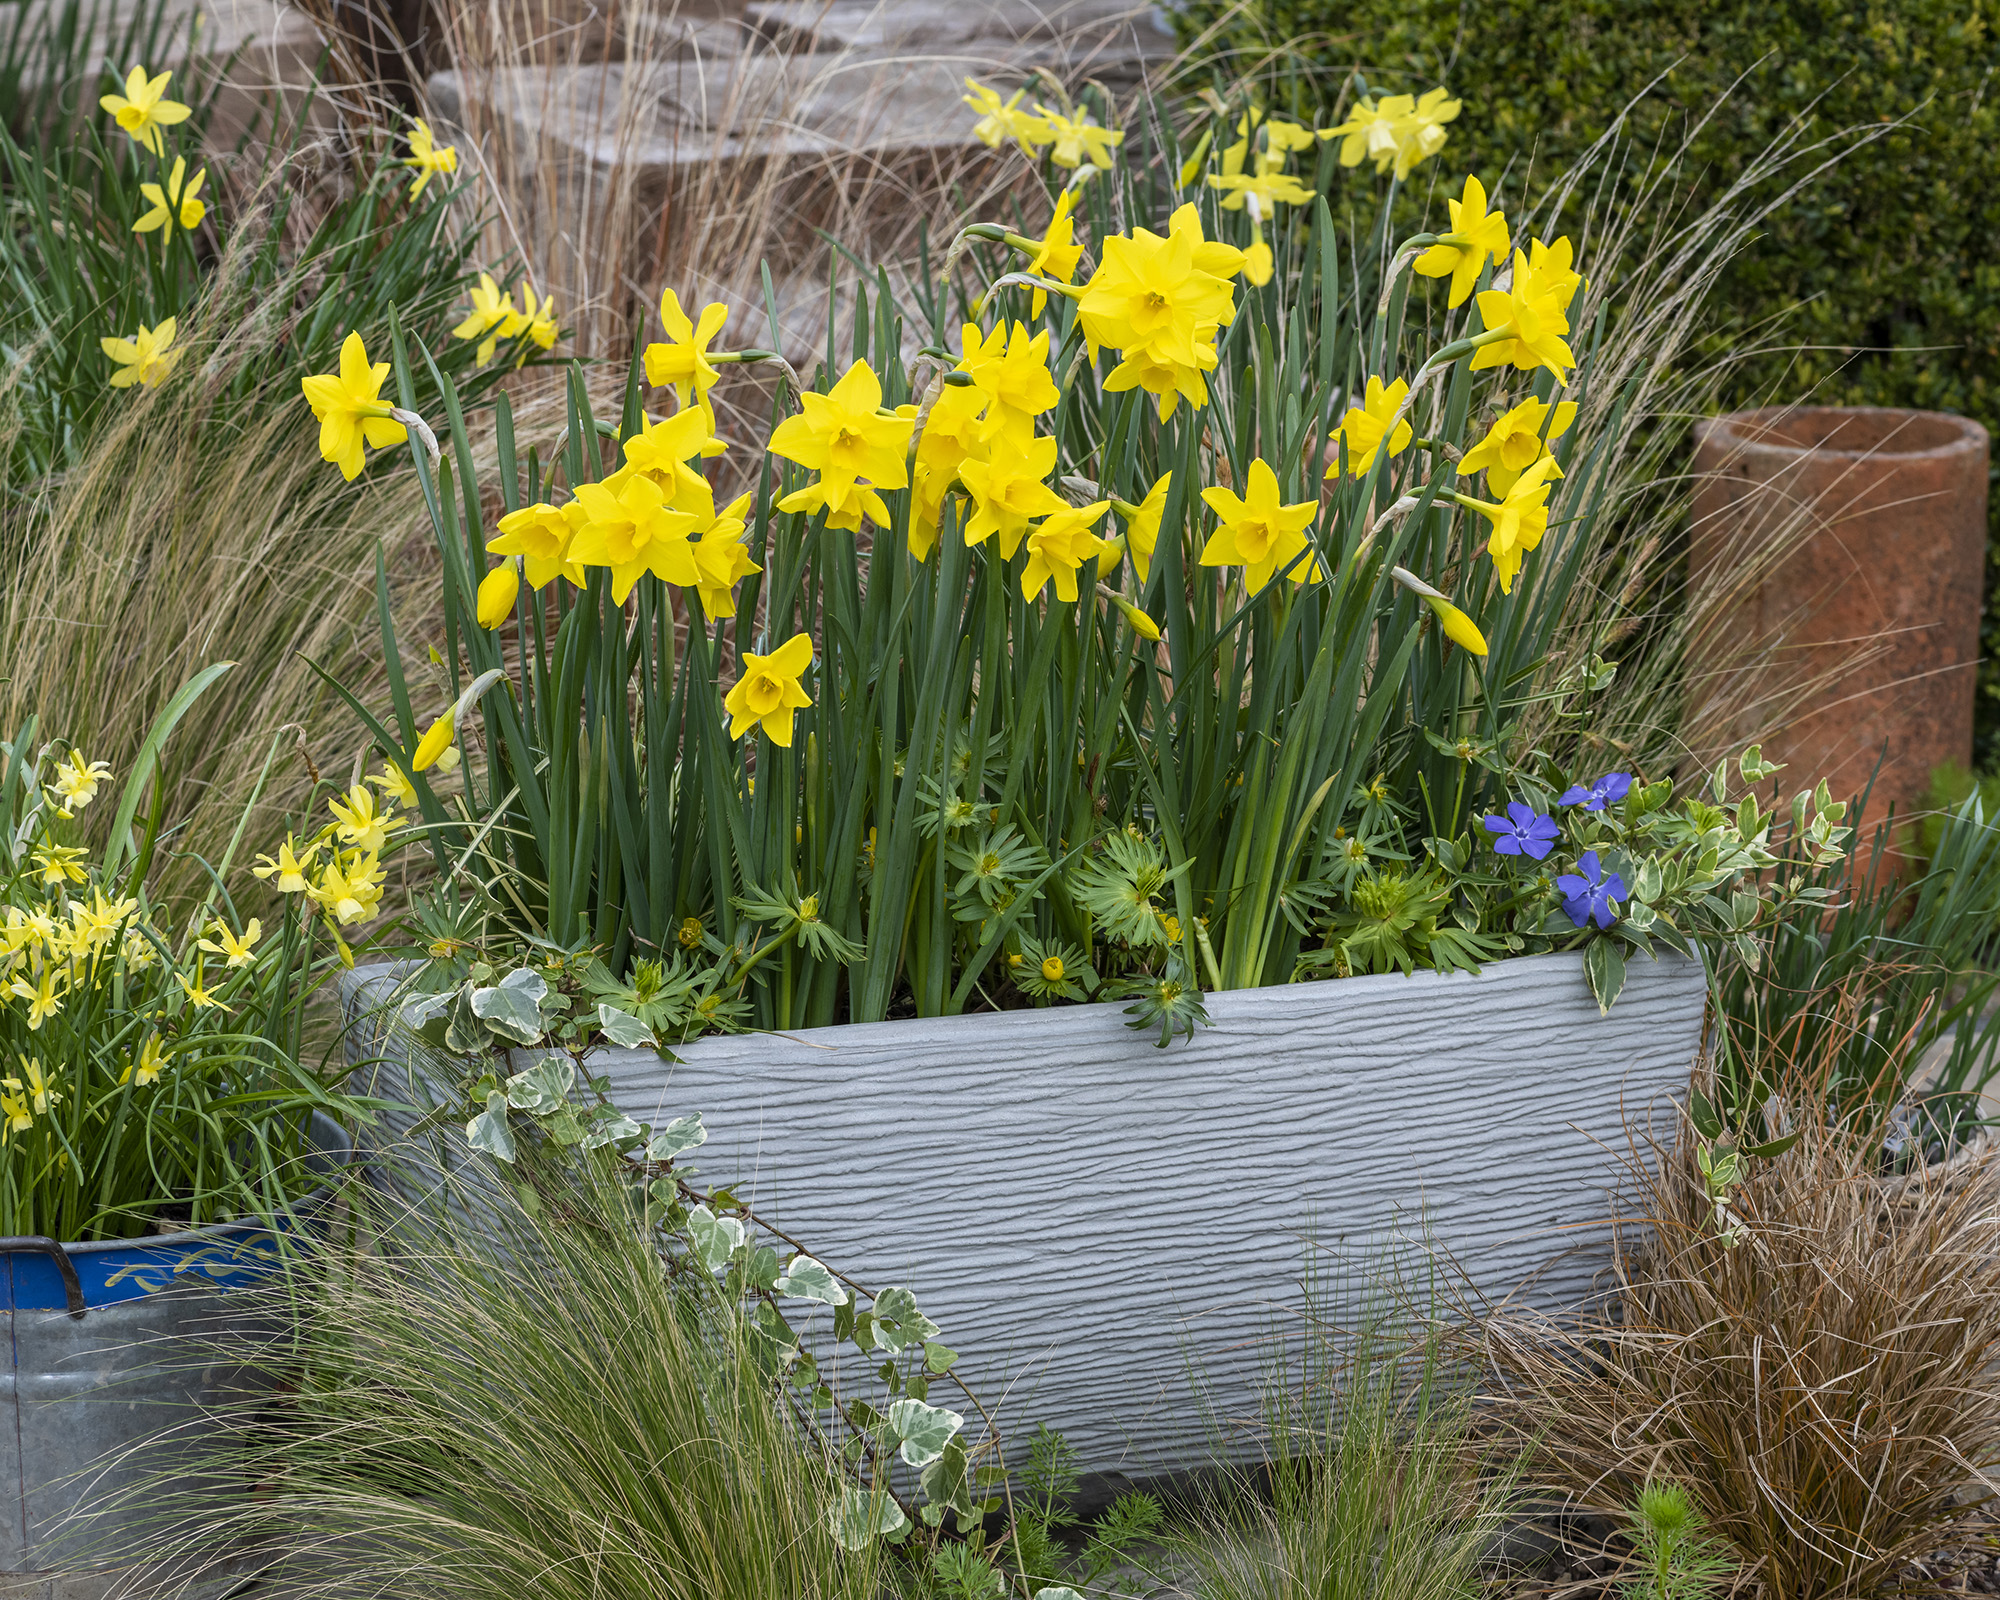
Daffodils will be the last layer of plants to emerge in spring
Plant list:
- Winter aconites, view at Amazon
- Crocus fuscotinctus, view crocus at Amazon
- Iris reticulata, view at Amazon
- Narcissus bulbs, view at Amazon
- Variegated ivies and periwinkles to trail over the edges
- 2 x baby Carex oshimensis to plant above narcissus
1. Prepare your pot
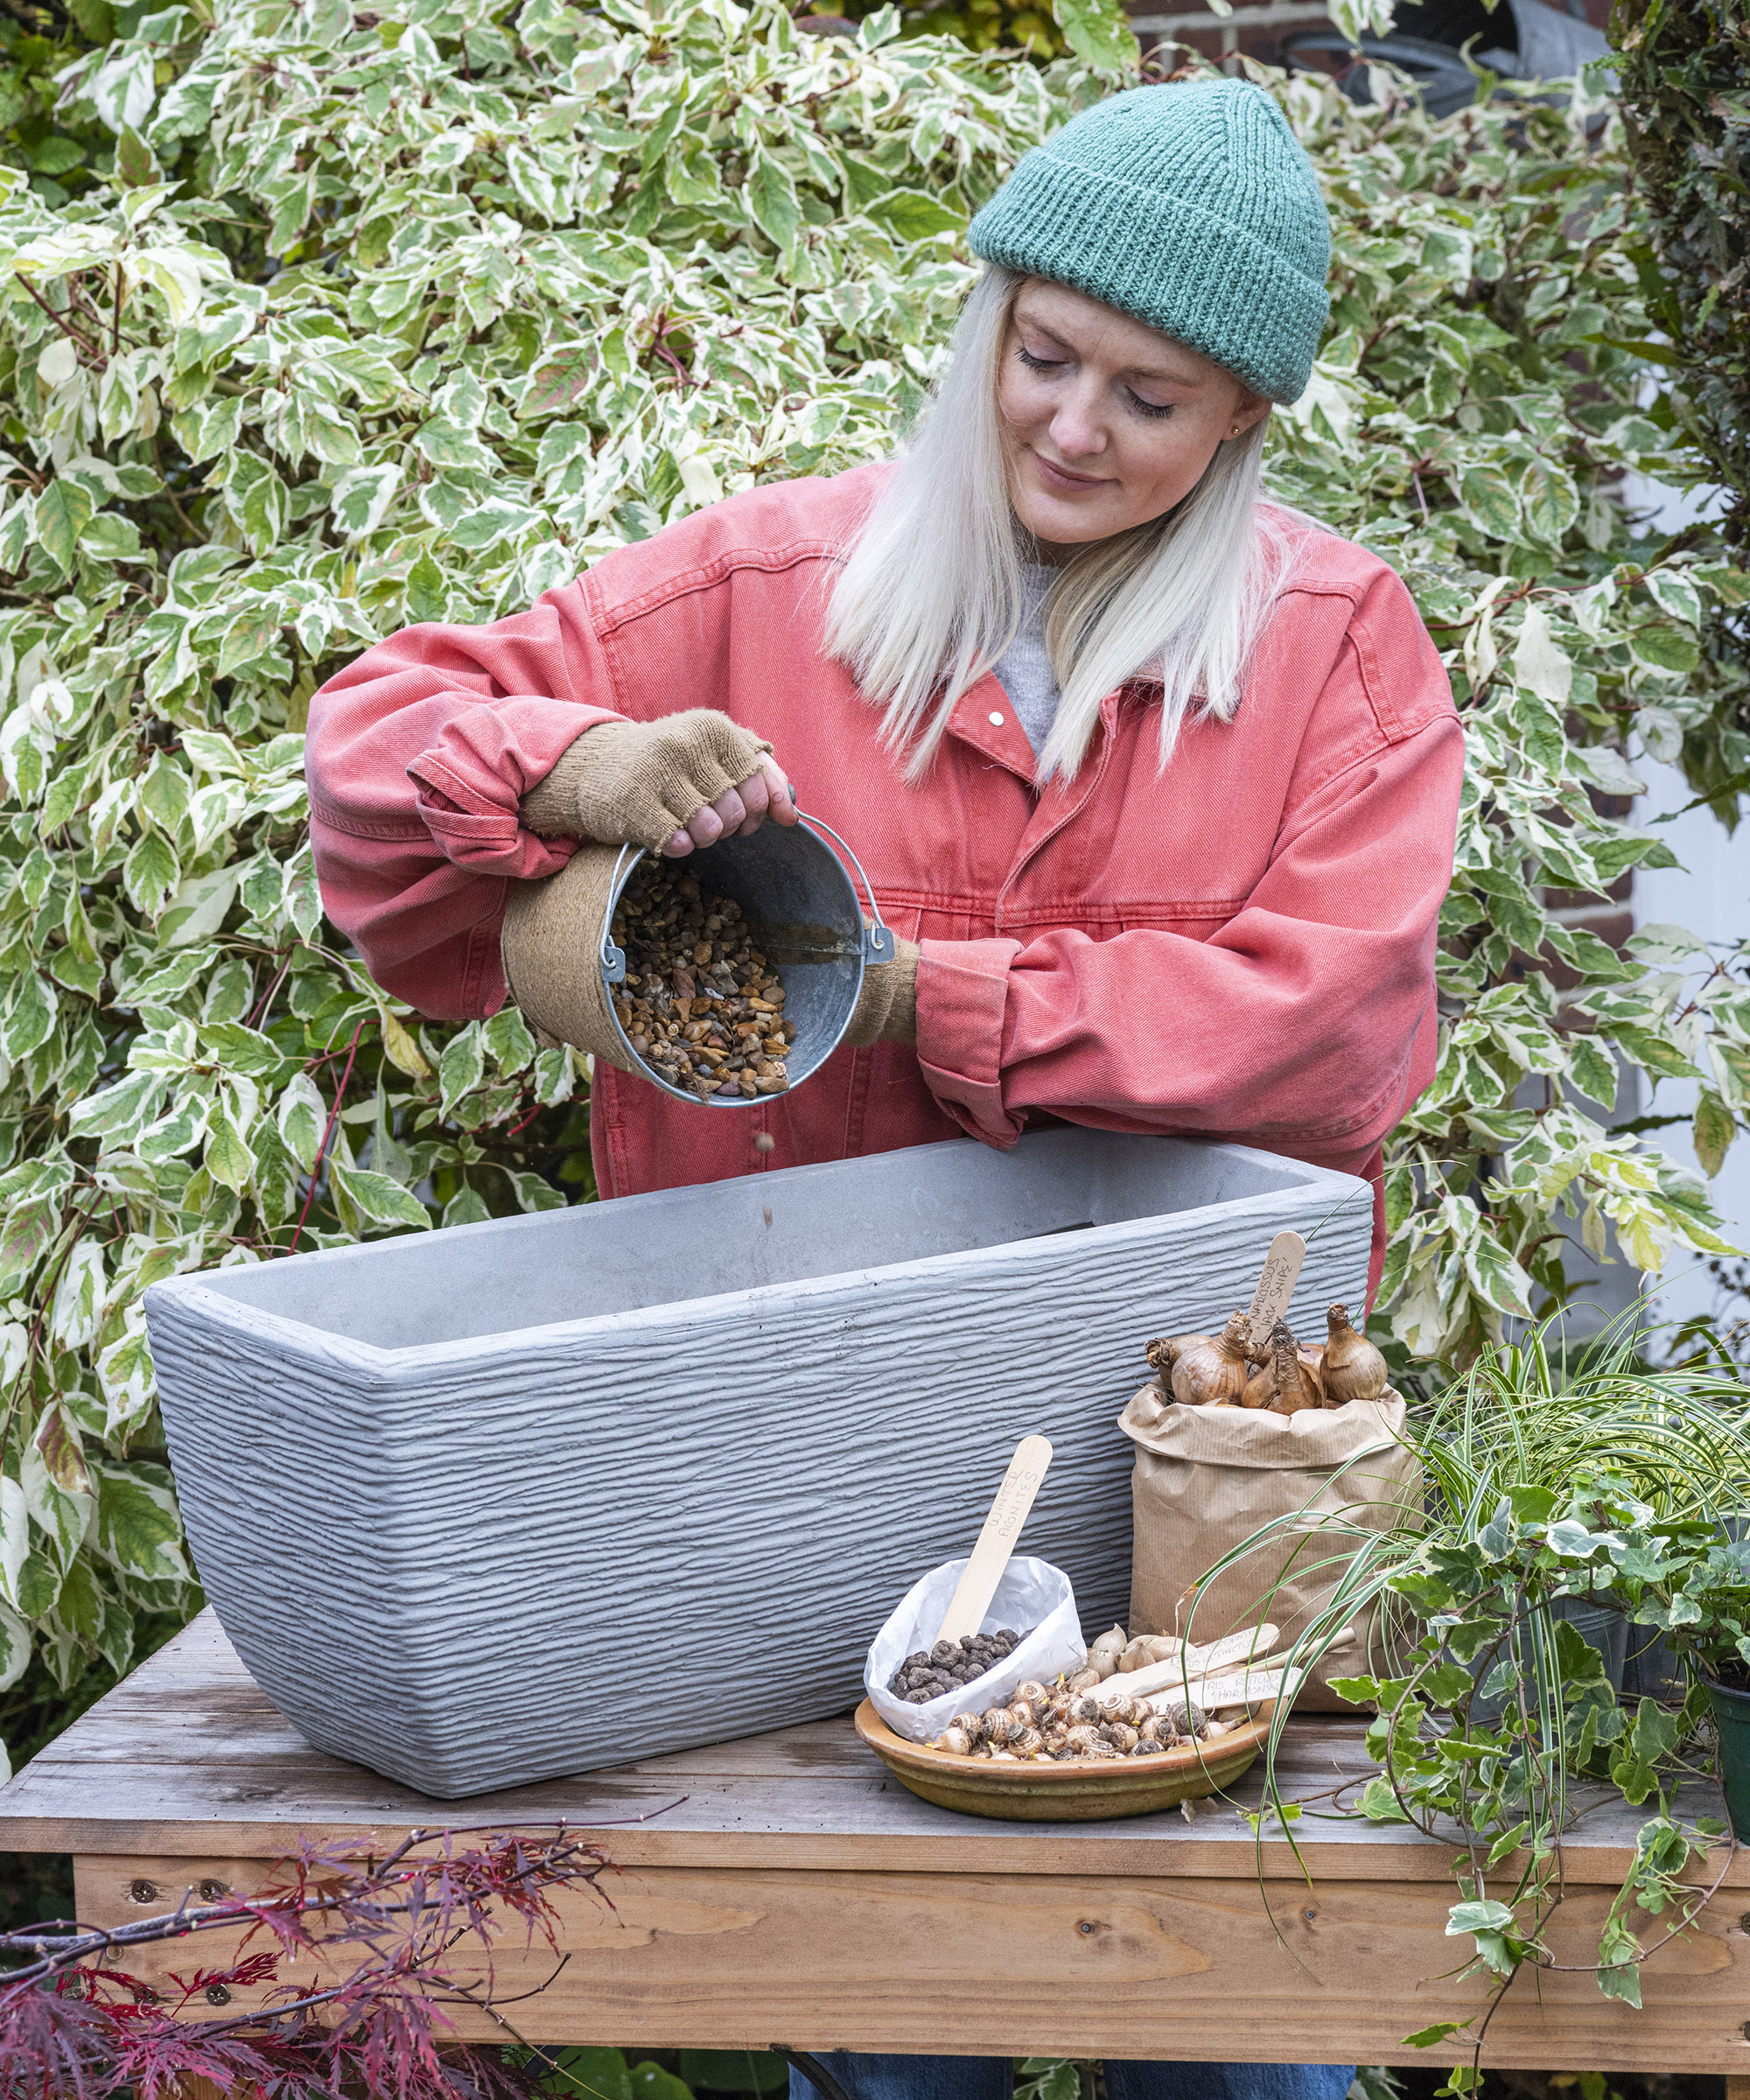
Go for a mock stone planter which will be lighter and easier to move than real stone
It's essential that your garden planter has sufficient drainage holes at the base to stop your bulbs from being waterlogged. Enlarge them if needed. They were rather small in the planter we used, so we increased the size with a drill.
Then cover the drainage holes with crocks and gravel and fill with multi purpose compost to about three quarters full.
2. Start with your first layer of bulbs
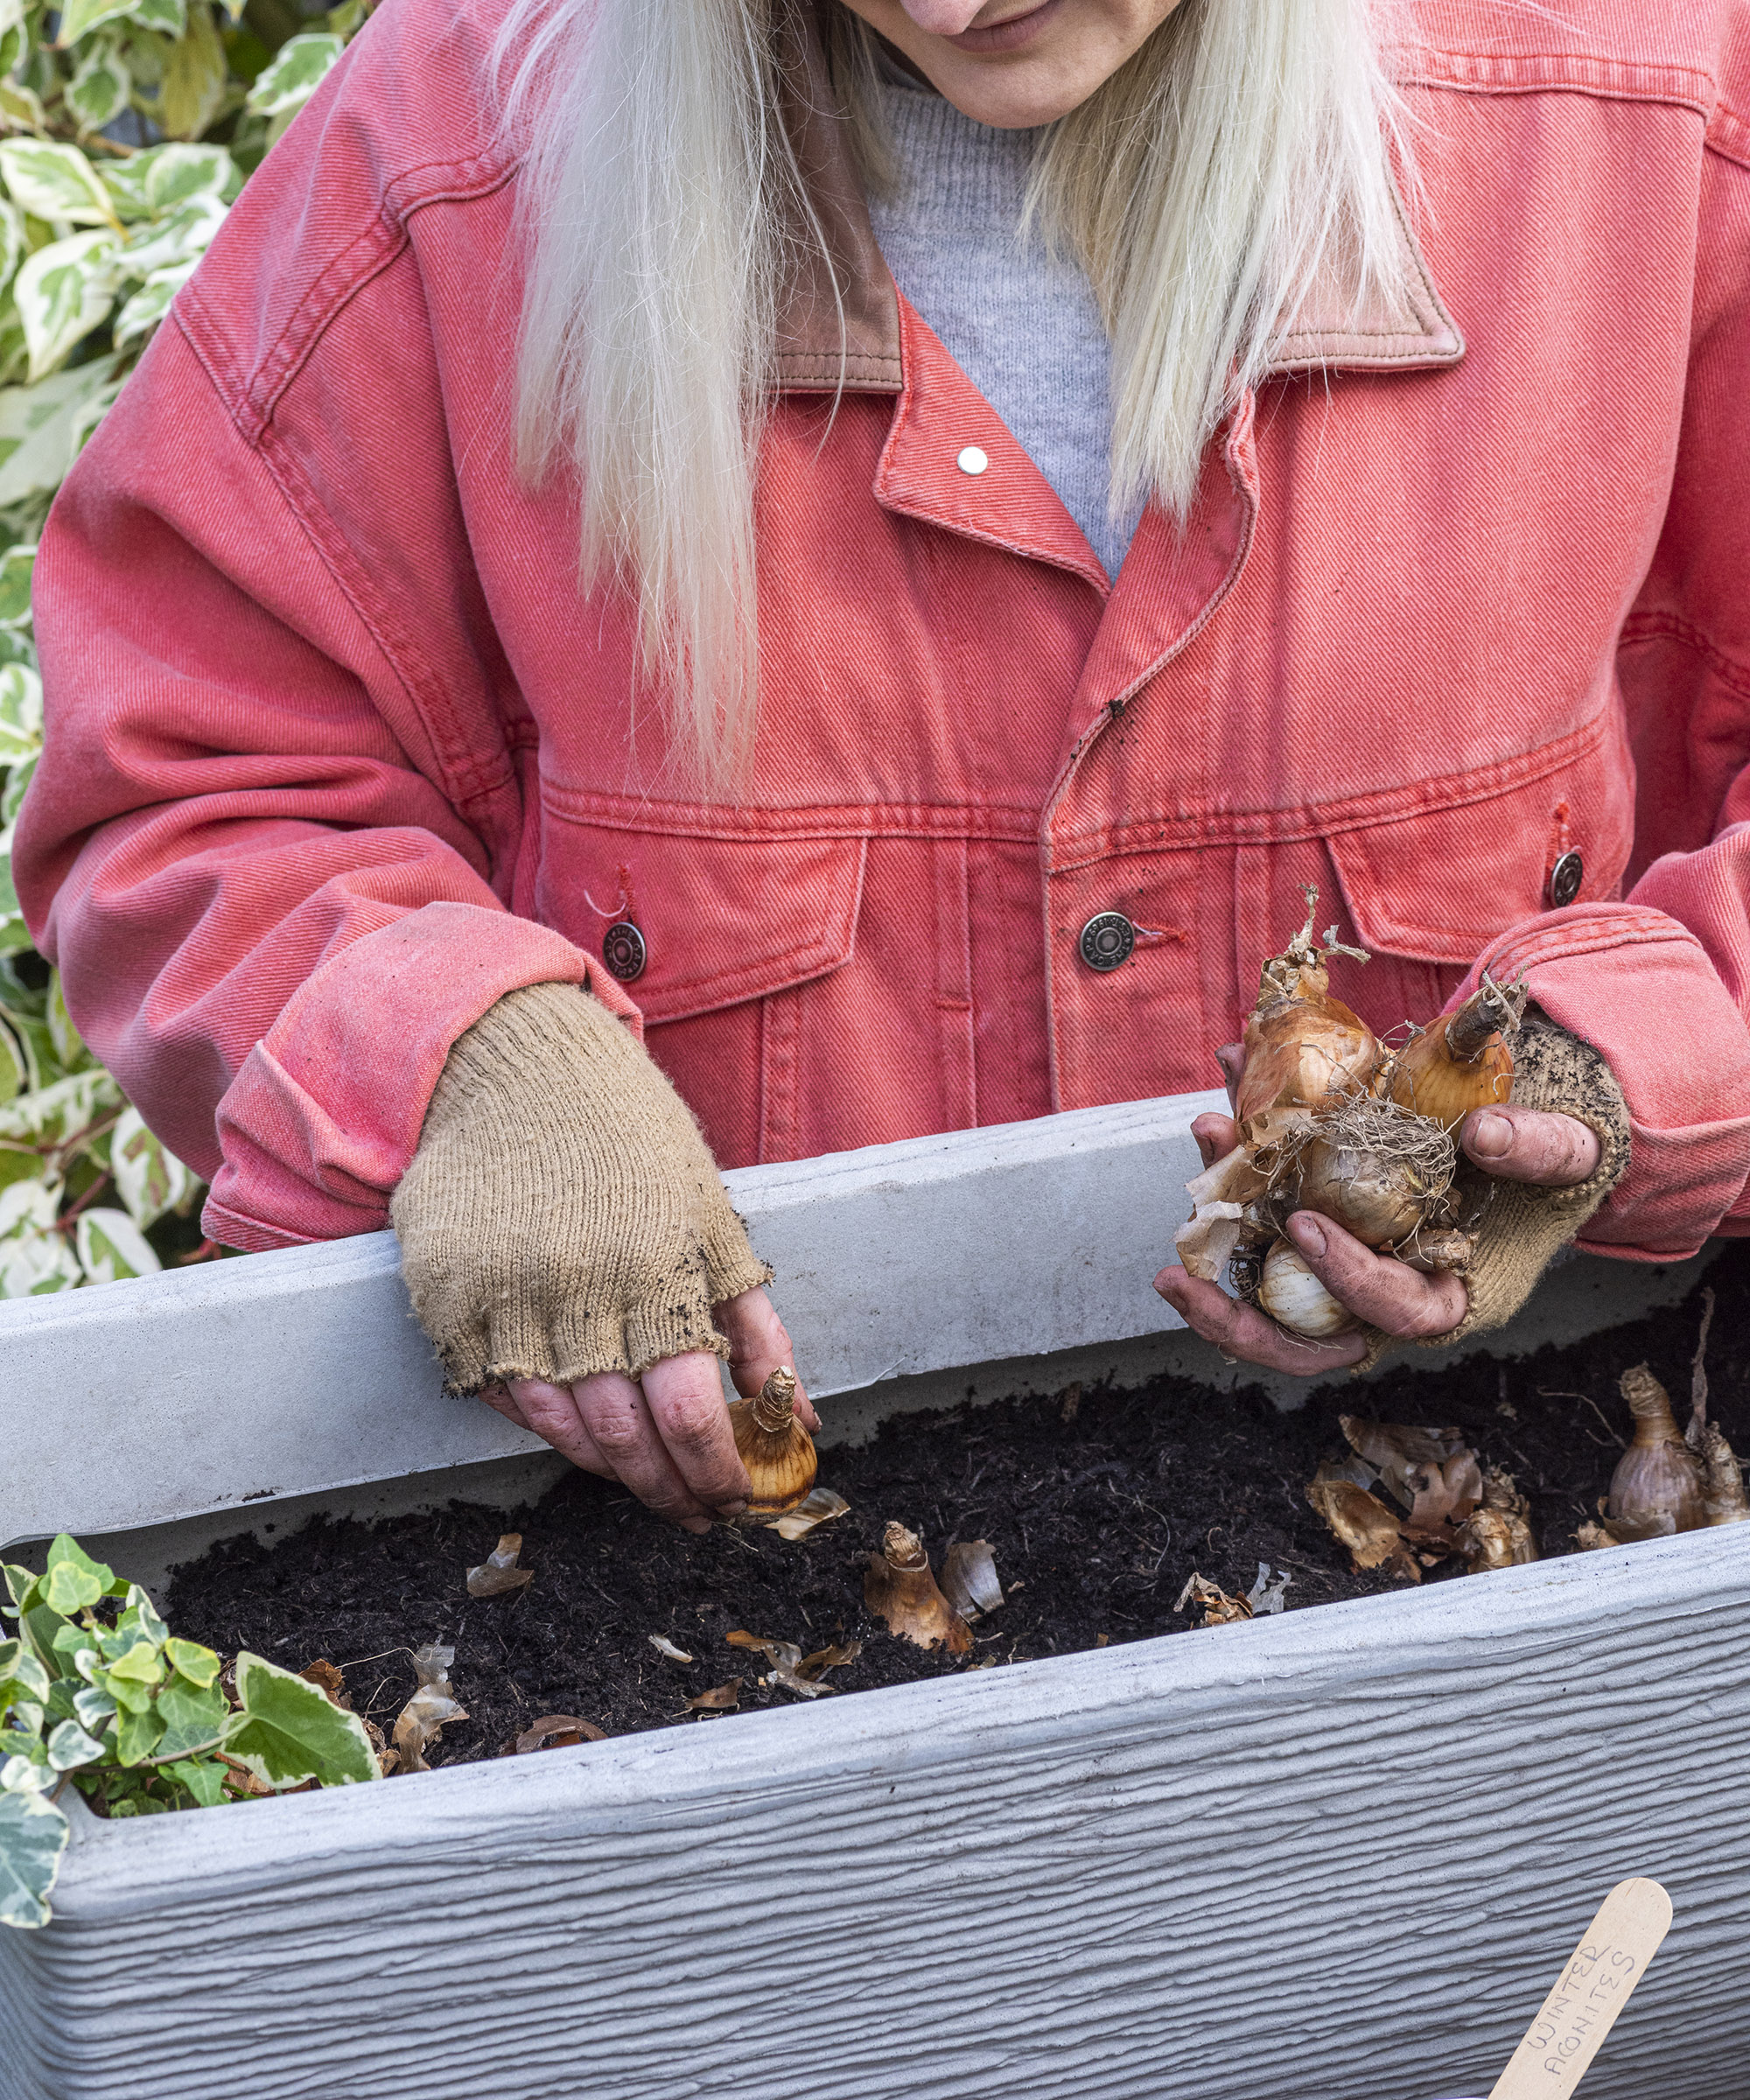
Push bulbs into the compost with tips facing skyward
Plant the largest and latest flowering bulbs in the deepest layer. In this case we've used a few types of daffodils planted in five groups of seven bulbs. Place the bulbs with tips facing up. Water this layer thoroughly before moving onto the next.
We recommend you use a small sprinkling of gravel to mark the location of each group of daffodils. This is to remind yourself where you've positioned them.
3. Add your second layer of bulbs
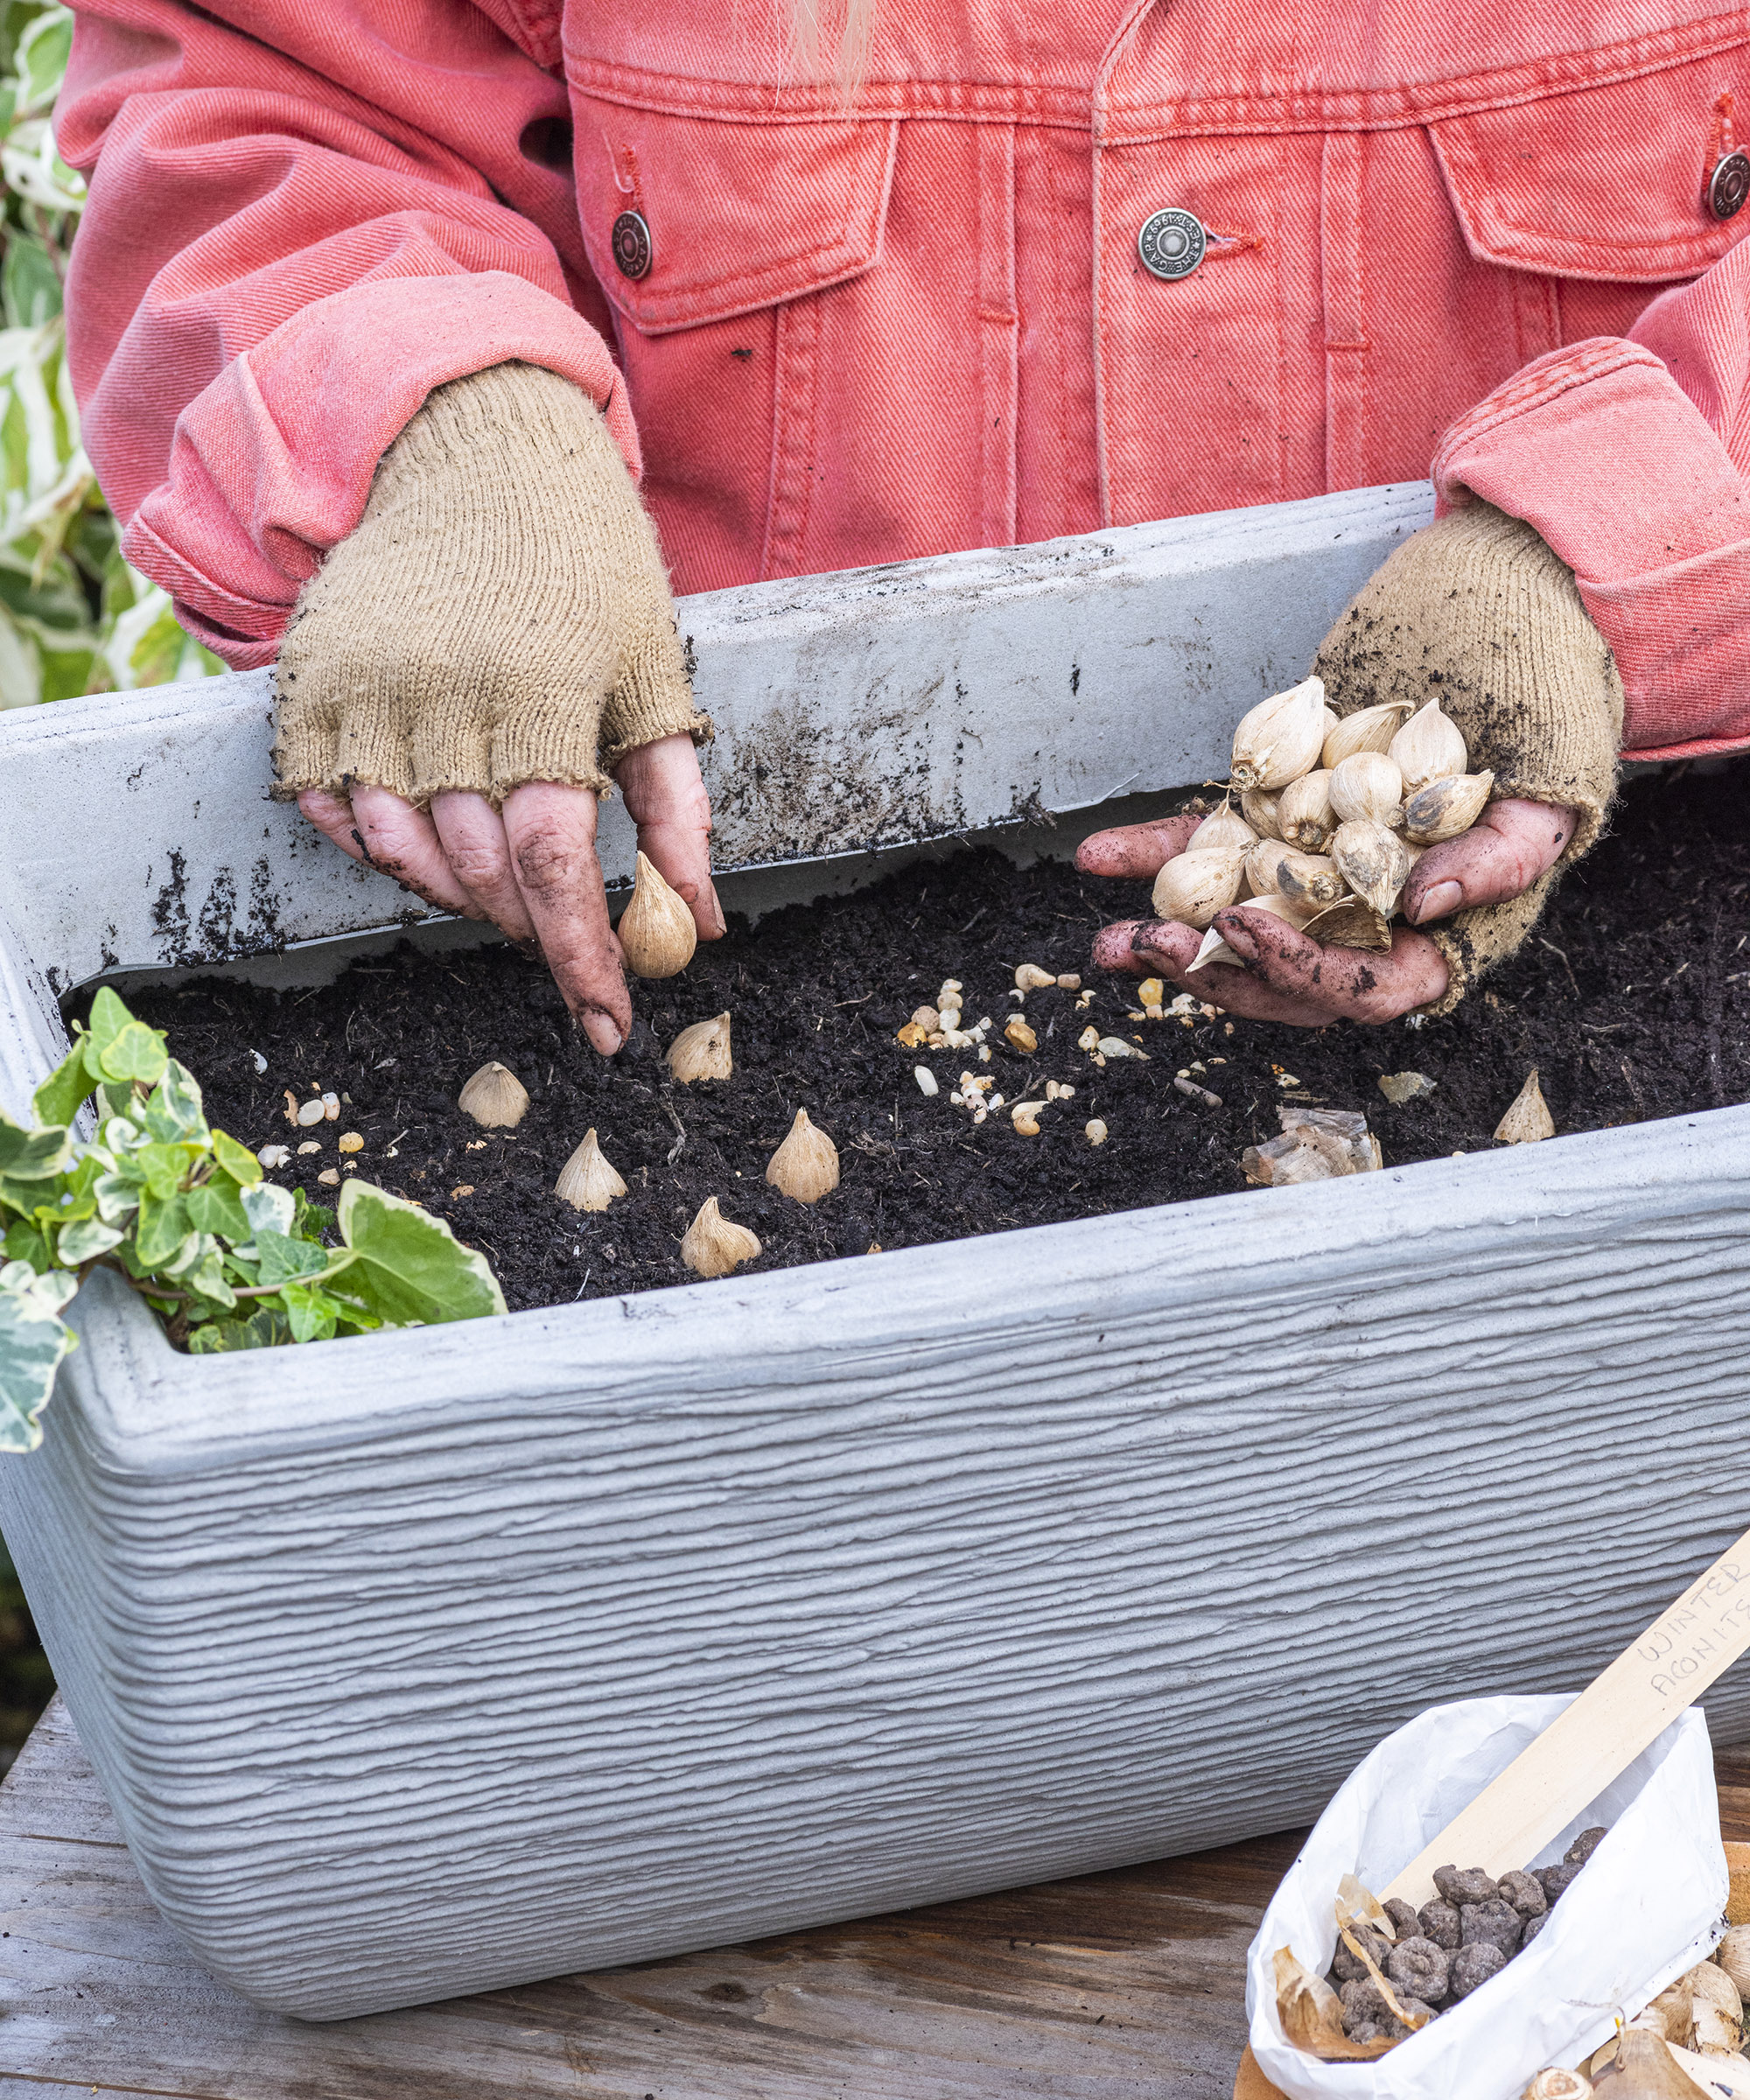
Iris will pop up during midwinter after winter aconites
Squeeze the ivy and periwinkle into the two front corners and middle and cover with soil, so they can trail over the front of the pot. Avoid the previous layer of narcissus having marked their location with small sprinklings of gravel.
In the middle layer, go the Iris reticulata ‘Harmony’, positioning them in the gaps between the narcissus bulbs. Cover with another inch or so of soil, and water.
4. Add your third and final layer
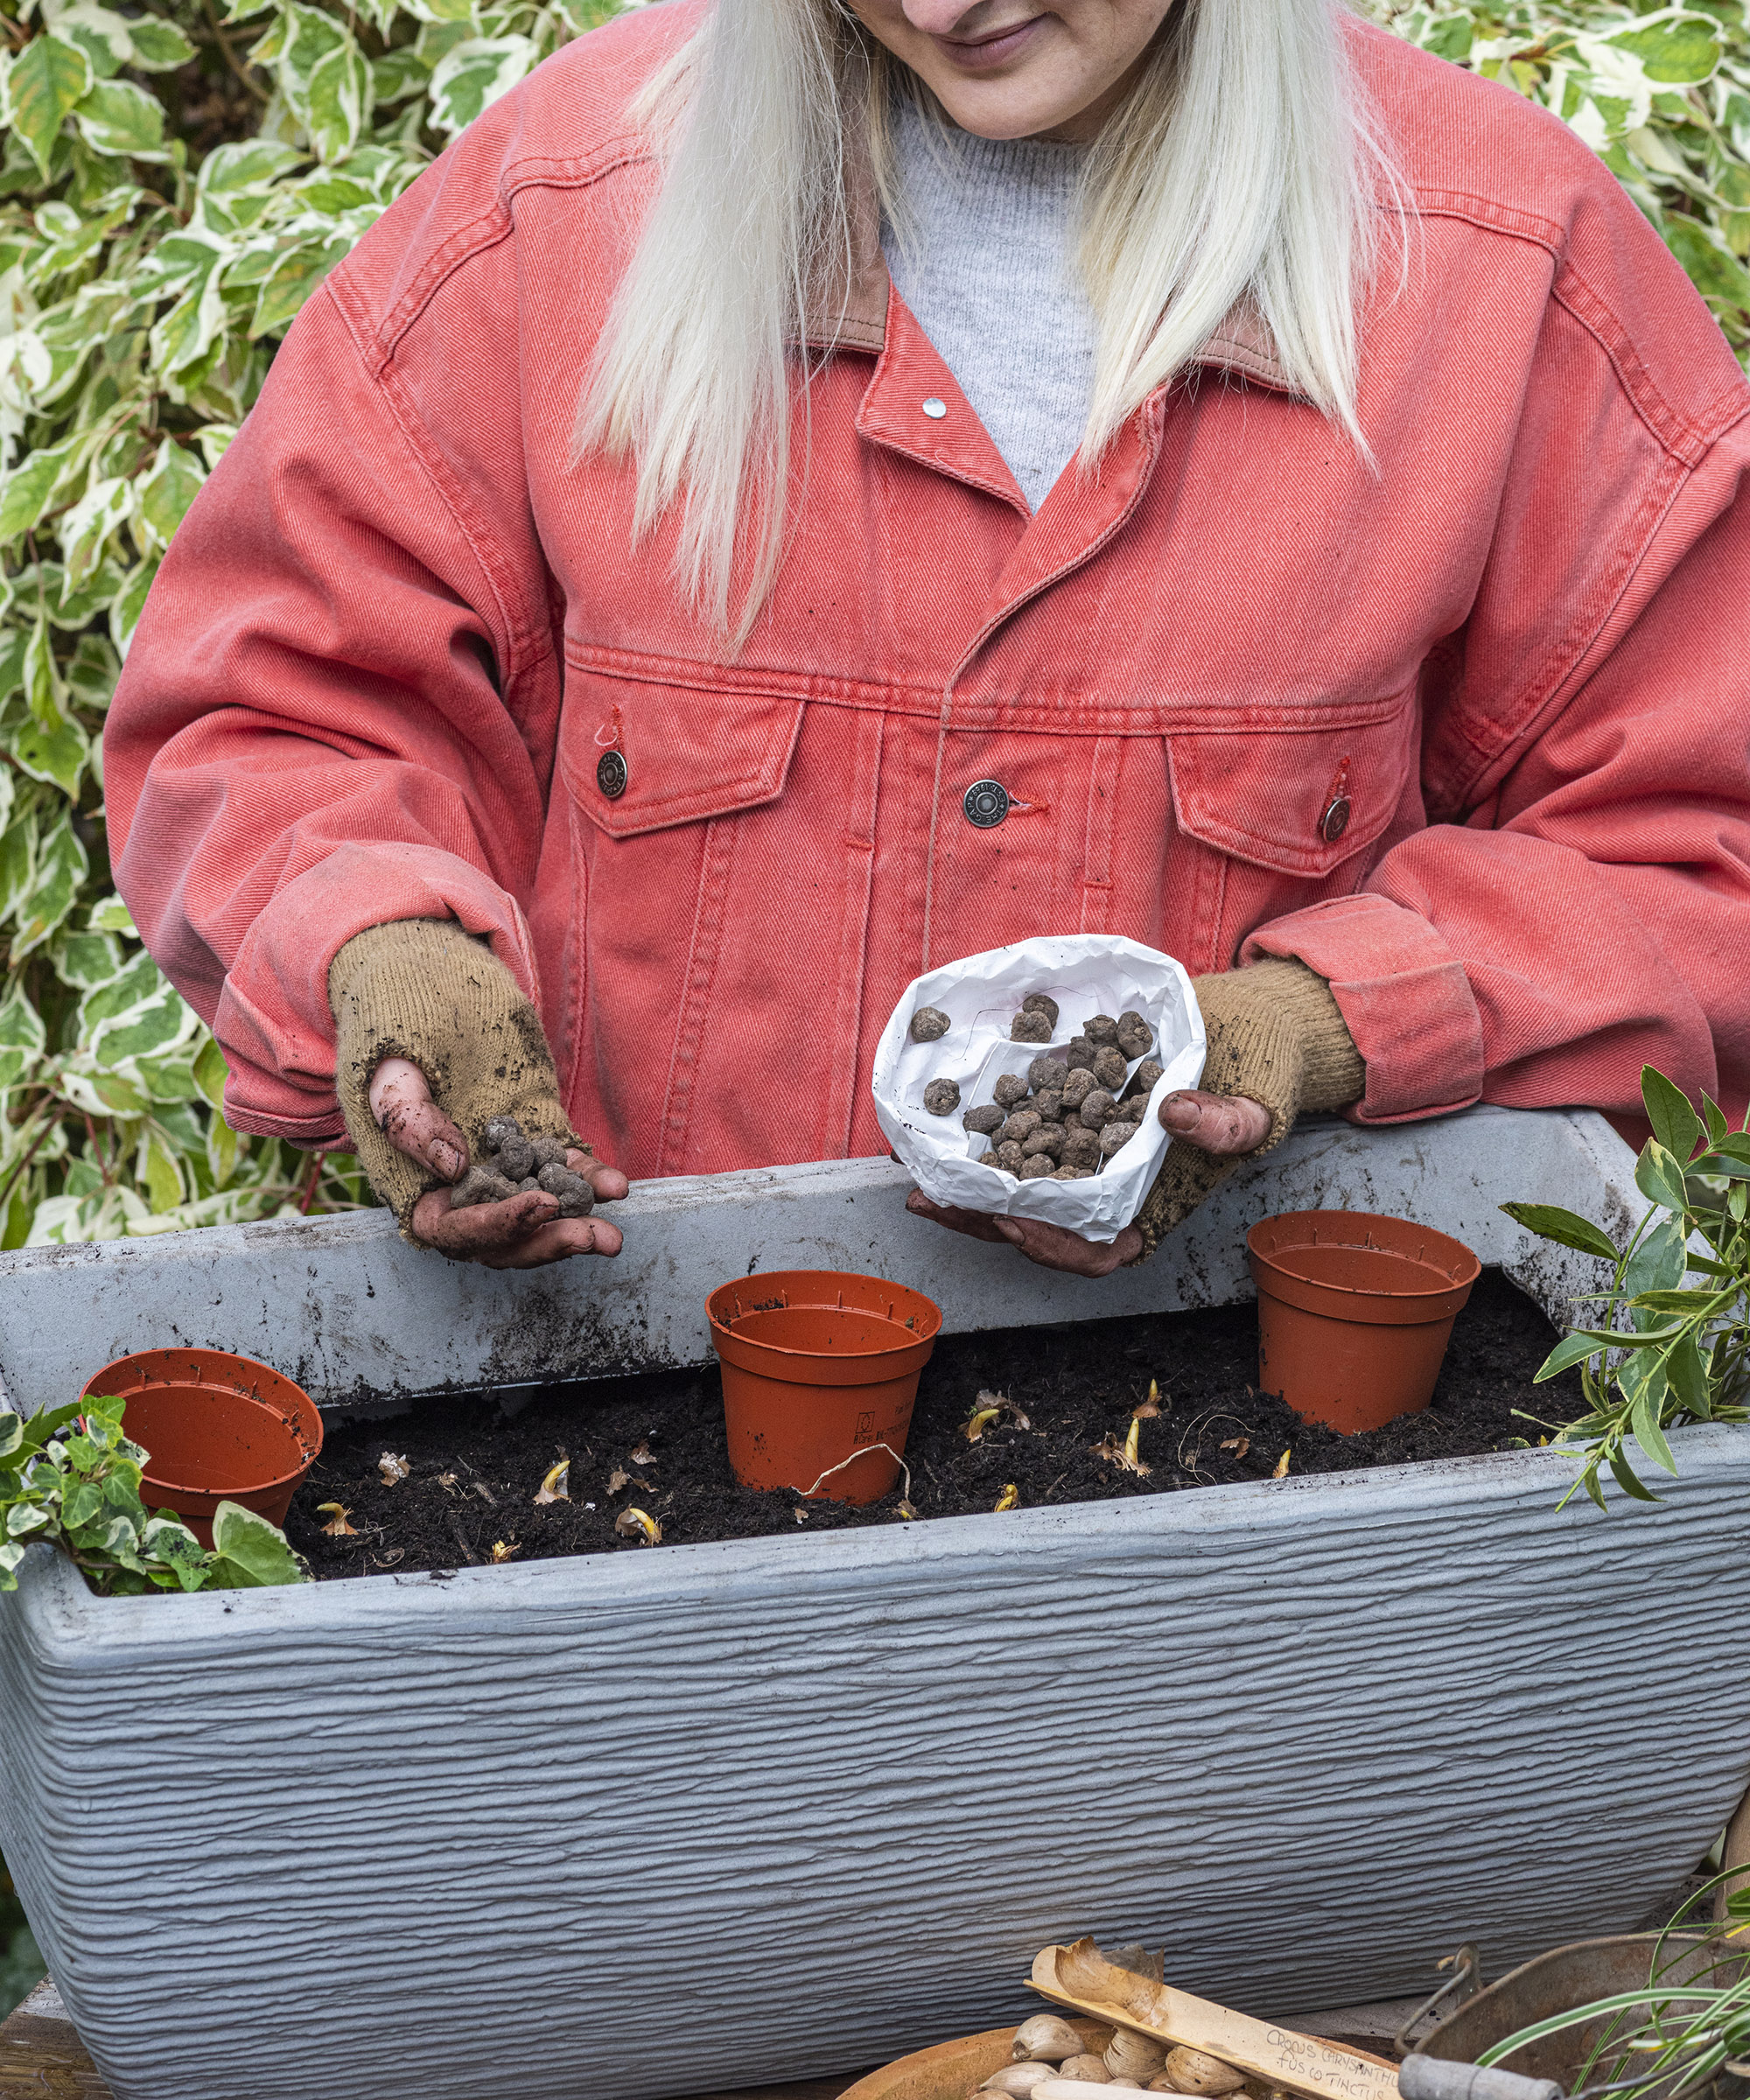
Winter aconites and crocuses will be the first to flower
The smallest bulbs, and therefore the ones which will form your top layer are the earliest to flower, in this case the winter aconites and crocus. Scatter the aconites randomly throughout the planter for a natural look.
To add winter interest, position baby Carex oshimensis above the narcissus in their pots, lifting out the plants but leaving behind the plastic pots to mark the spot. Be ready to remove the grasses in late winter/early spring when the narcissi start sprouting.
Cover with 2in of soil, and water. Spread the surface with fine horticultural grit. Winter aconites establish best ‘in the green’, so keep your plants damp to encourage the tiny dry tubers to sprout.
5. Position your bulb lasagne
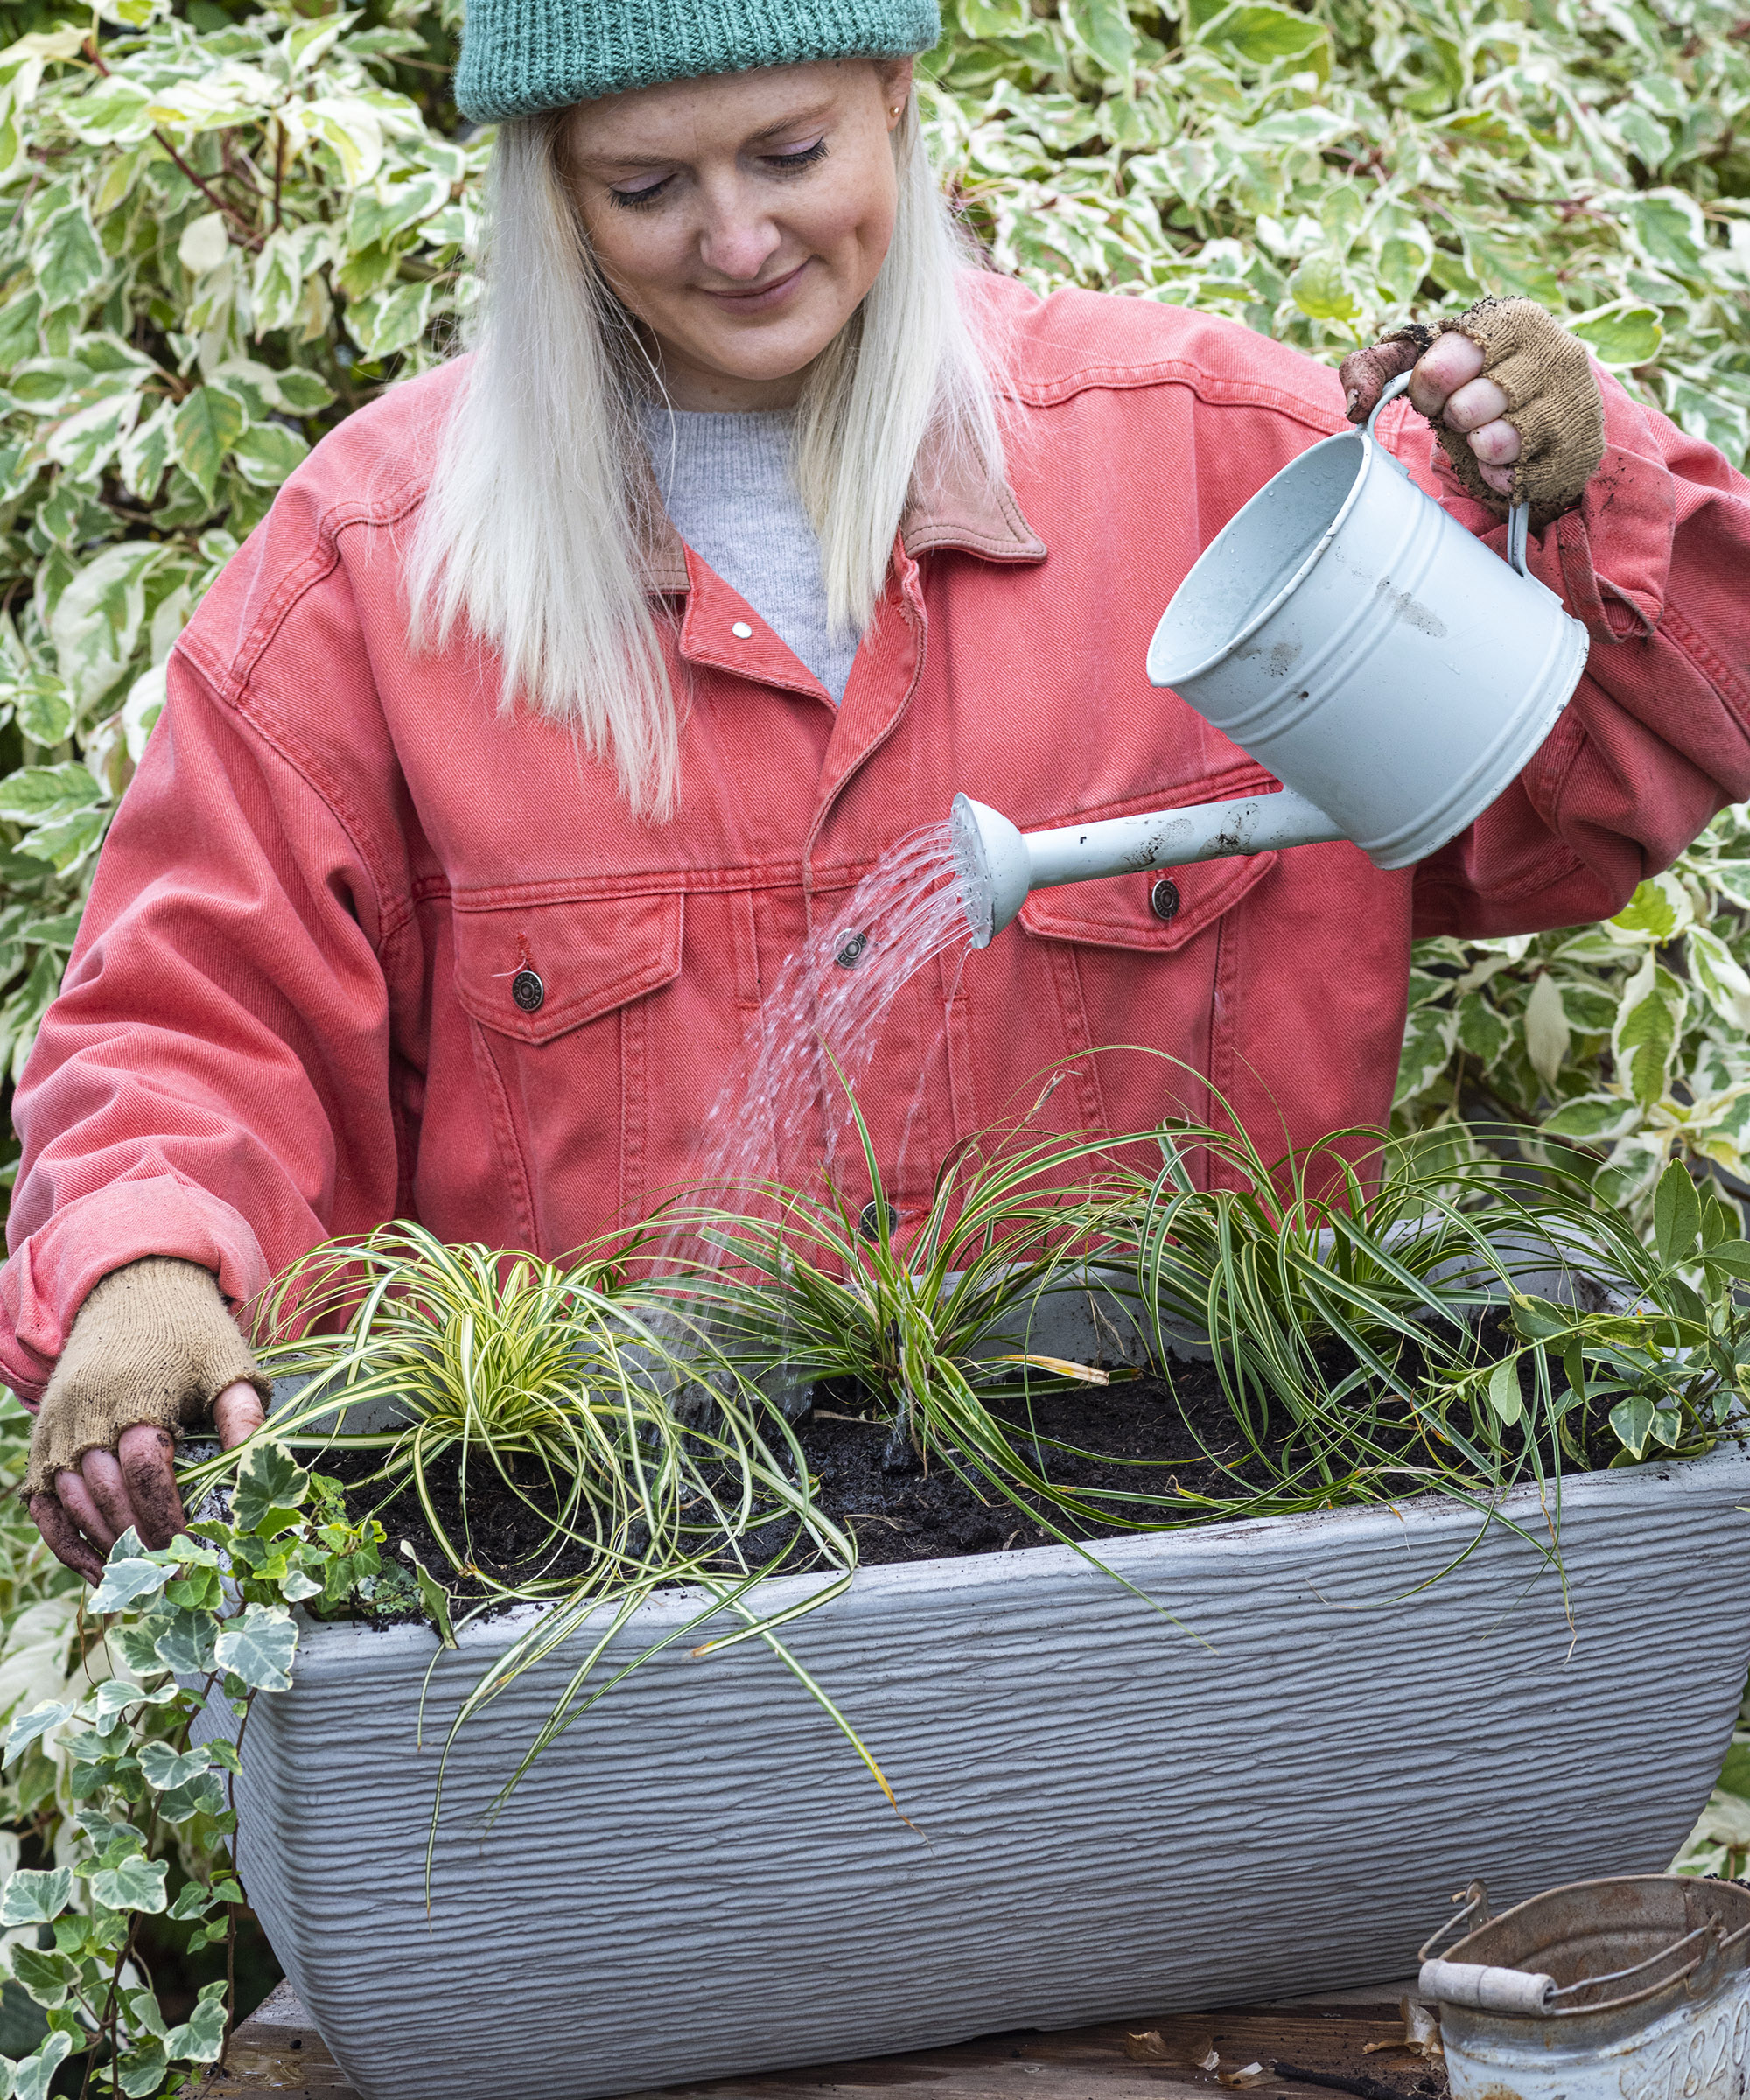
Water your bulb lasagne thoroughly after every layer of planting
Once planted, gently water your bulb lasagne. Marcus Eyles, Horticultural Director at Dobbies suggests placing your pot on 'pot feet' to ensure it drains freely. Then, leave it in a sheltered spot, for example, against the house wall on your patio. If squirrels or mice are a problem, follow our tips on how to stop squirrels digging up bulbs by covering the pot with wire mesh.
When green shoots appear in spring, move the pot into the open, ideally somewhere sunny. And remember to keep watering plants in dry weather. Marcus says to 'check the compost is damp but not wet every week.'
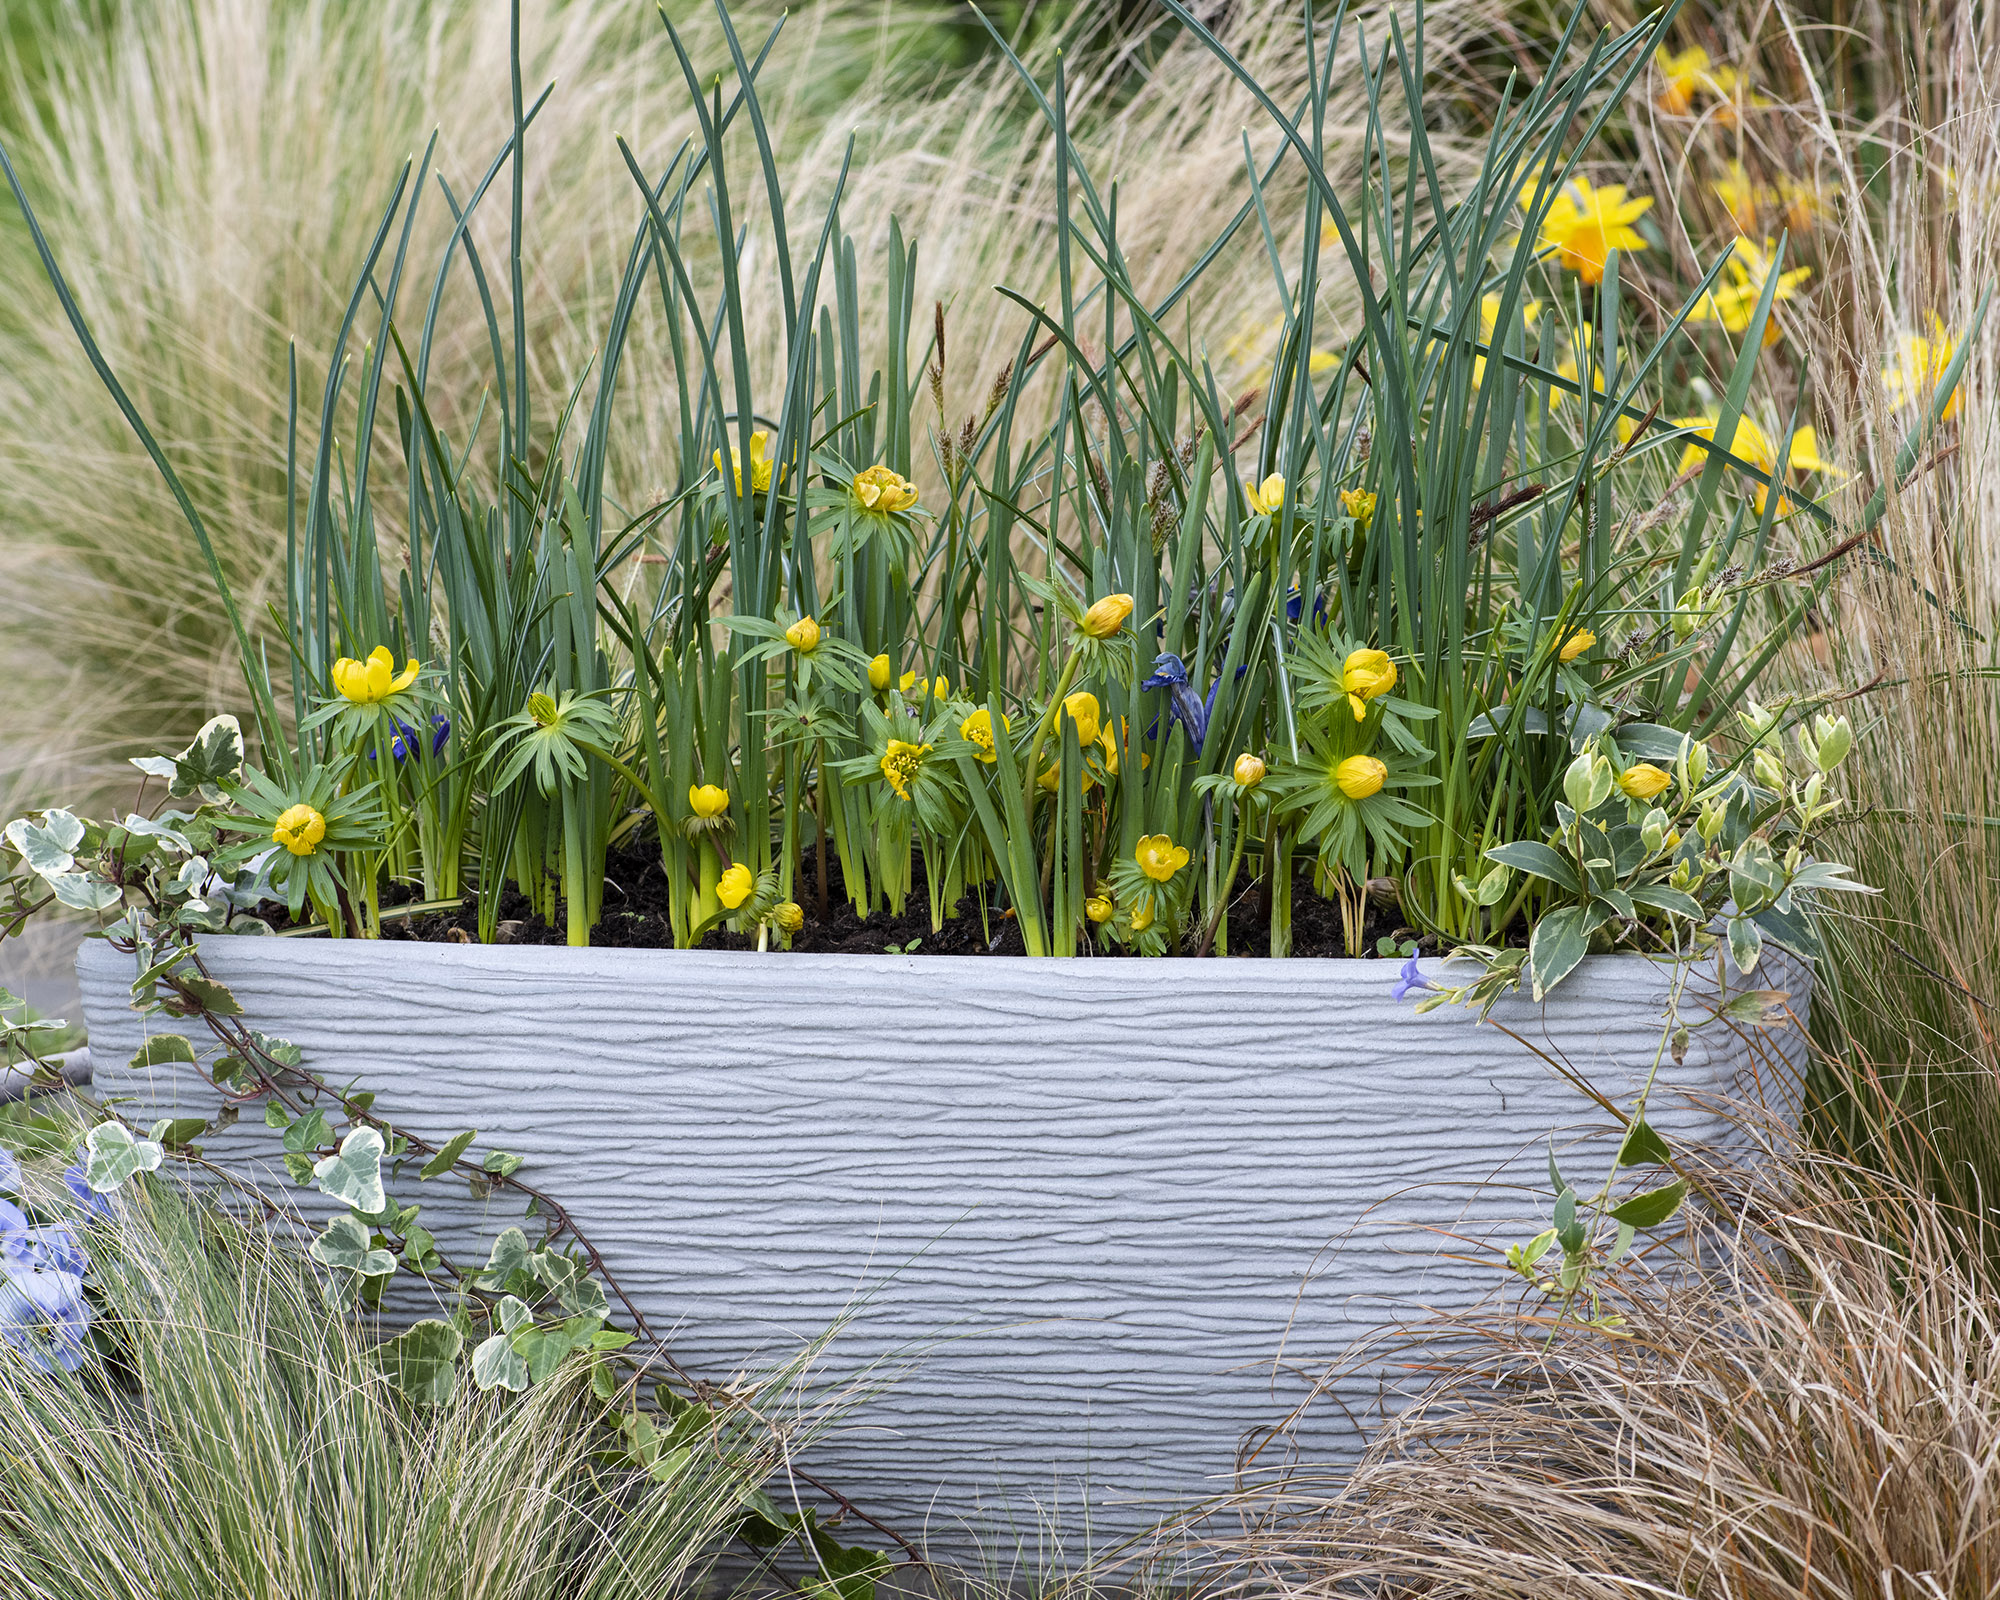
First in winter, yellow winter aconites, Eranthis hyemalis, push up between the thin iris leaves.
When should you plant a bulb lasagne?
The best spring bulbs need planting in fall, so start thinking about the planting combinations you want to try out in your bulb lasagne ideas then. Generally, early fall is best for most, but double-check the instructions on your chosen bulbs' packets. Tulip bulbs are the last bulbs to be planted at the end of fall.
Our guides on how to plant hyacinth bulbs and how to plant crocus bulbs are full of practical tips if you want to add those to your display.
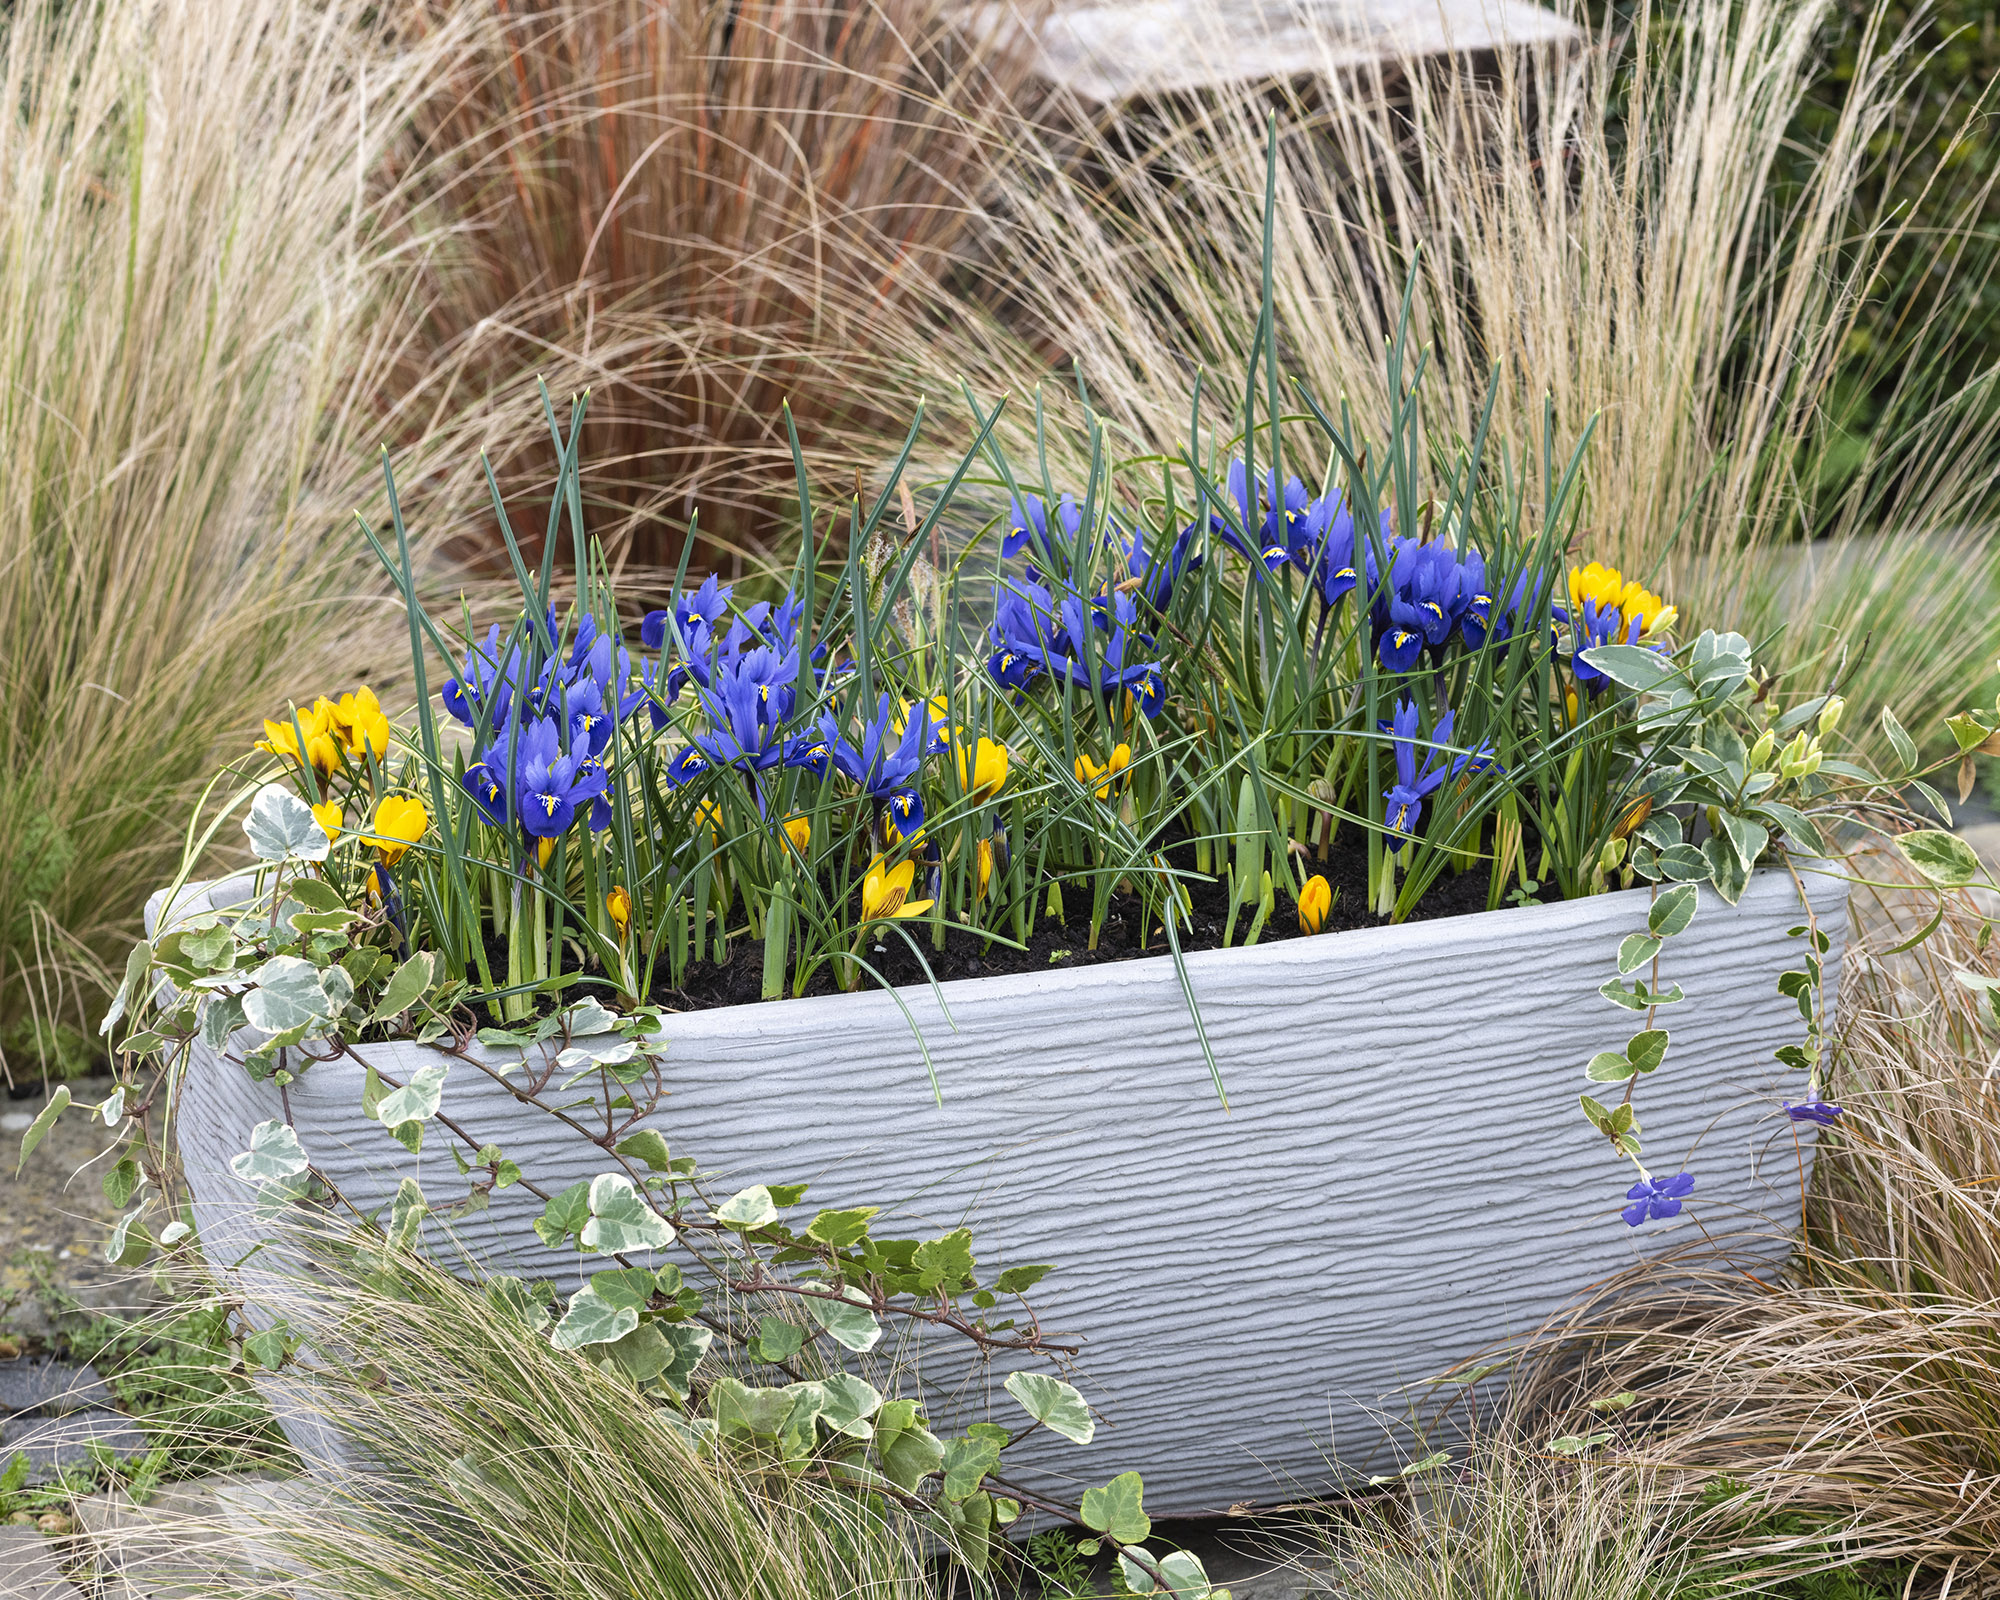
Next, emerges the yellow Crocus fuscotinctus and Iris reticulata
What can you put on the top of your bulb lasagne?
Of course, once your bulb lasagne starts blooming it will look fabulous, but until then, it can look a little bare. However, there is a way to give it a bit more visual appeal over winter.
Marcus Eyles suggests including some of the best winter plants for pots such as pansies or violas on the top for instant color. You could also add a layer of decorative grit or gravel, which always looks smart and deters rodents.
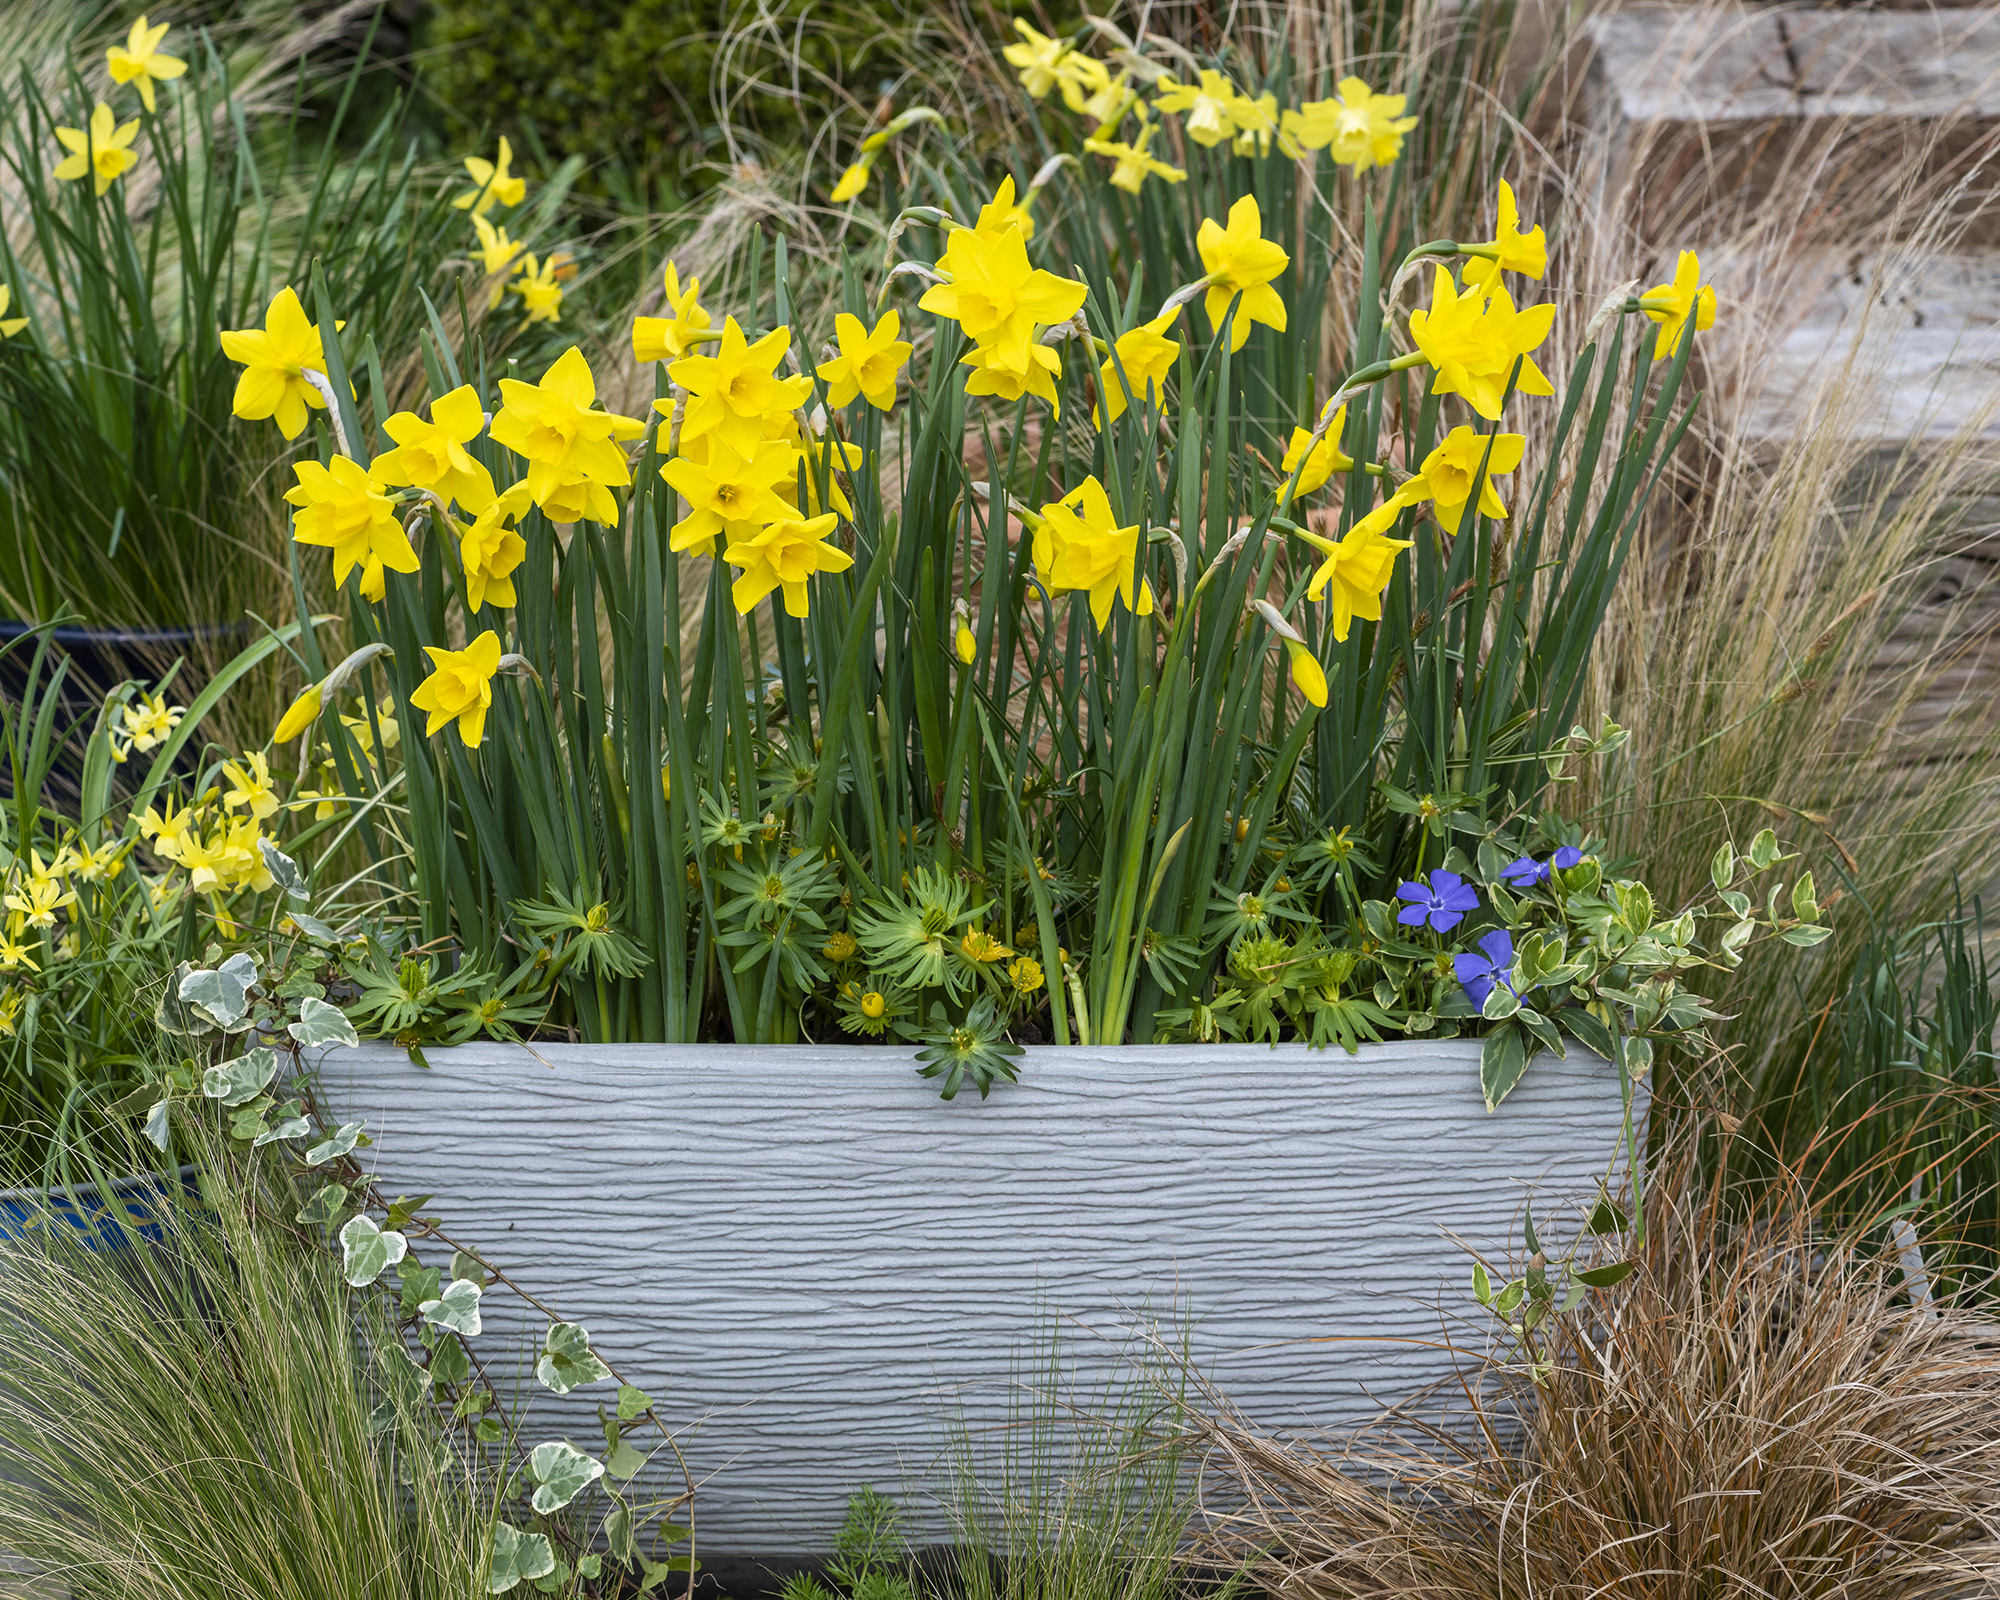
In early spring, the last but deepest layer of daffodils emerges
Can you plant a two-layer bulb lasagne?
If you're new to this, learning how to plant a bulb lasagne with two layers is a good idea while you get the hang of things. The display will still look gorgeous. For example, try using crocus or miniature irises on top and tulips beneath.
Go for three layers if you're feeling more confident and you've got a large enough pot. You can try crocuses on top, daffodils in the middle and tulips at the bottom, or go for a different combination – there is plenty of opportunity to get creative.
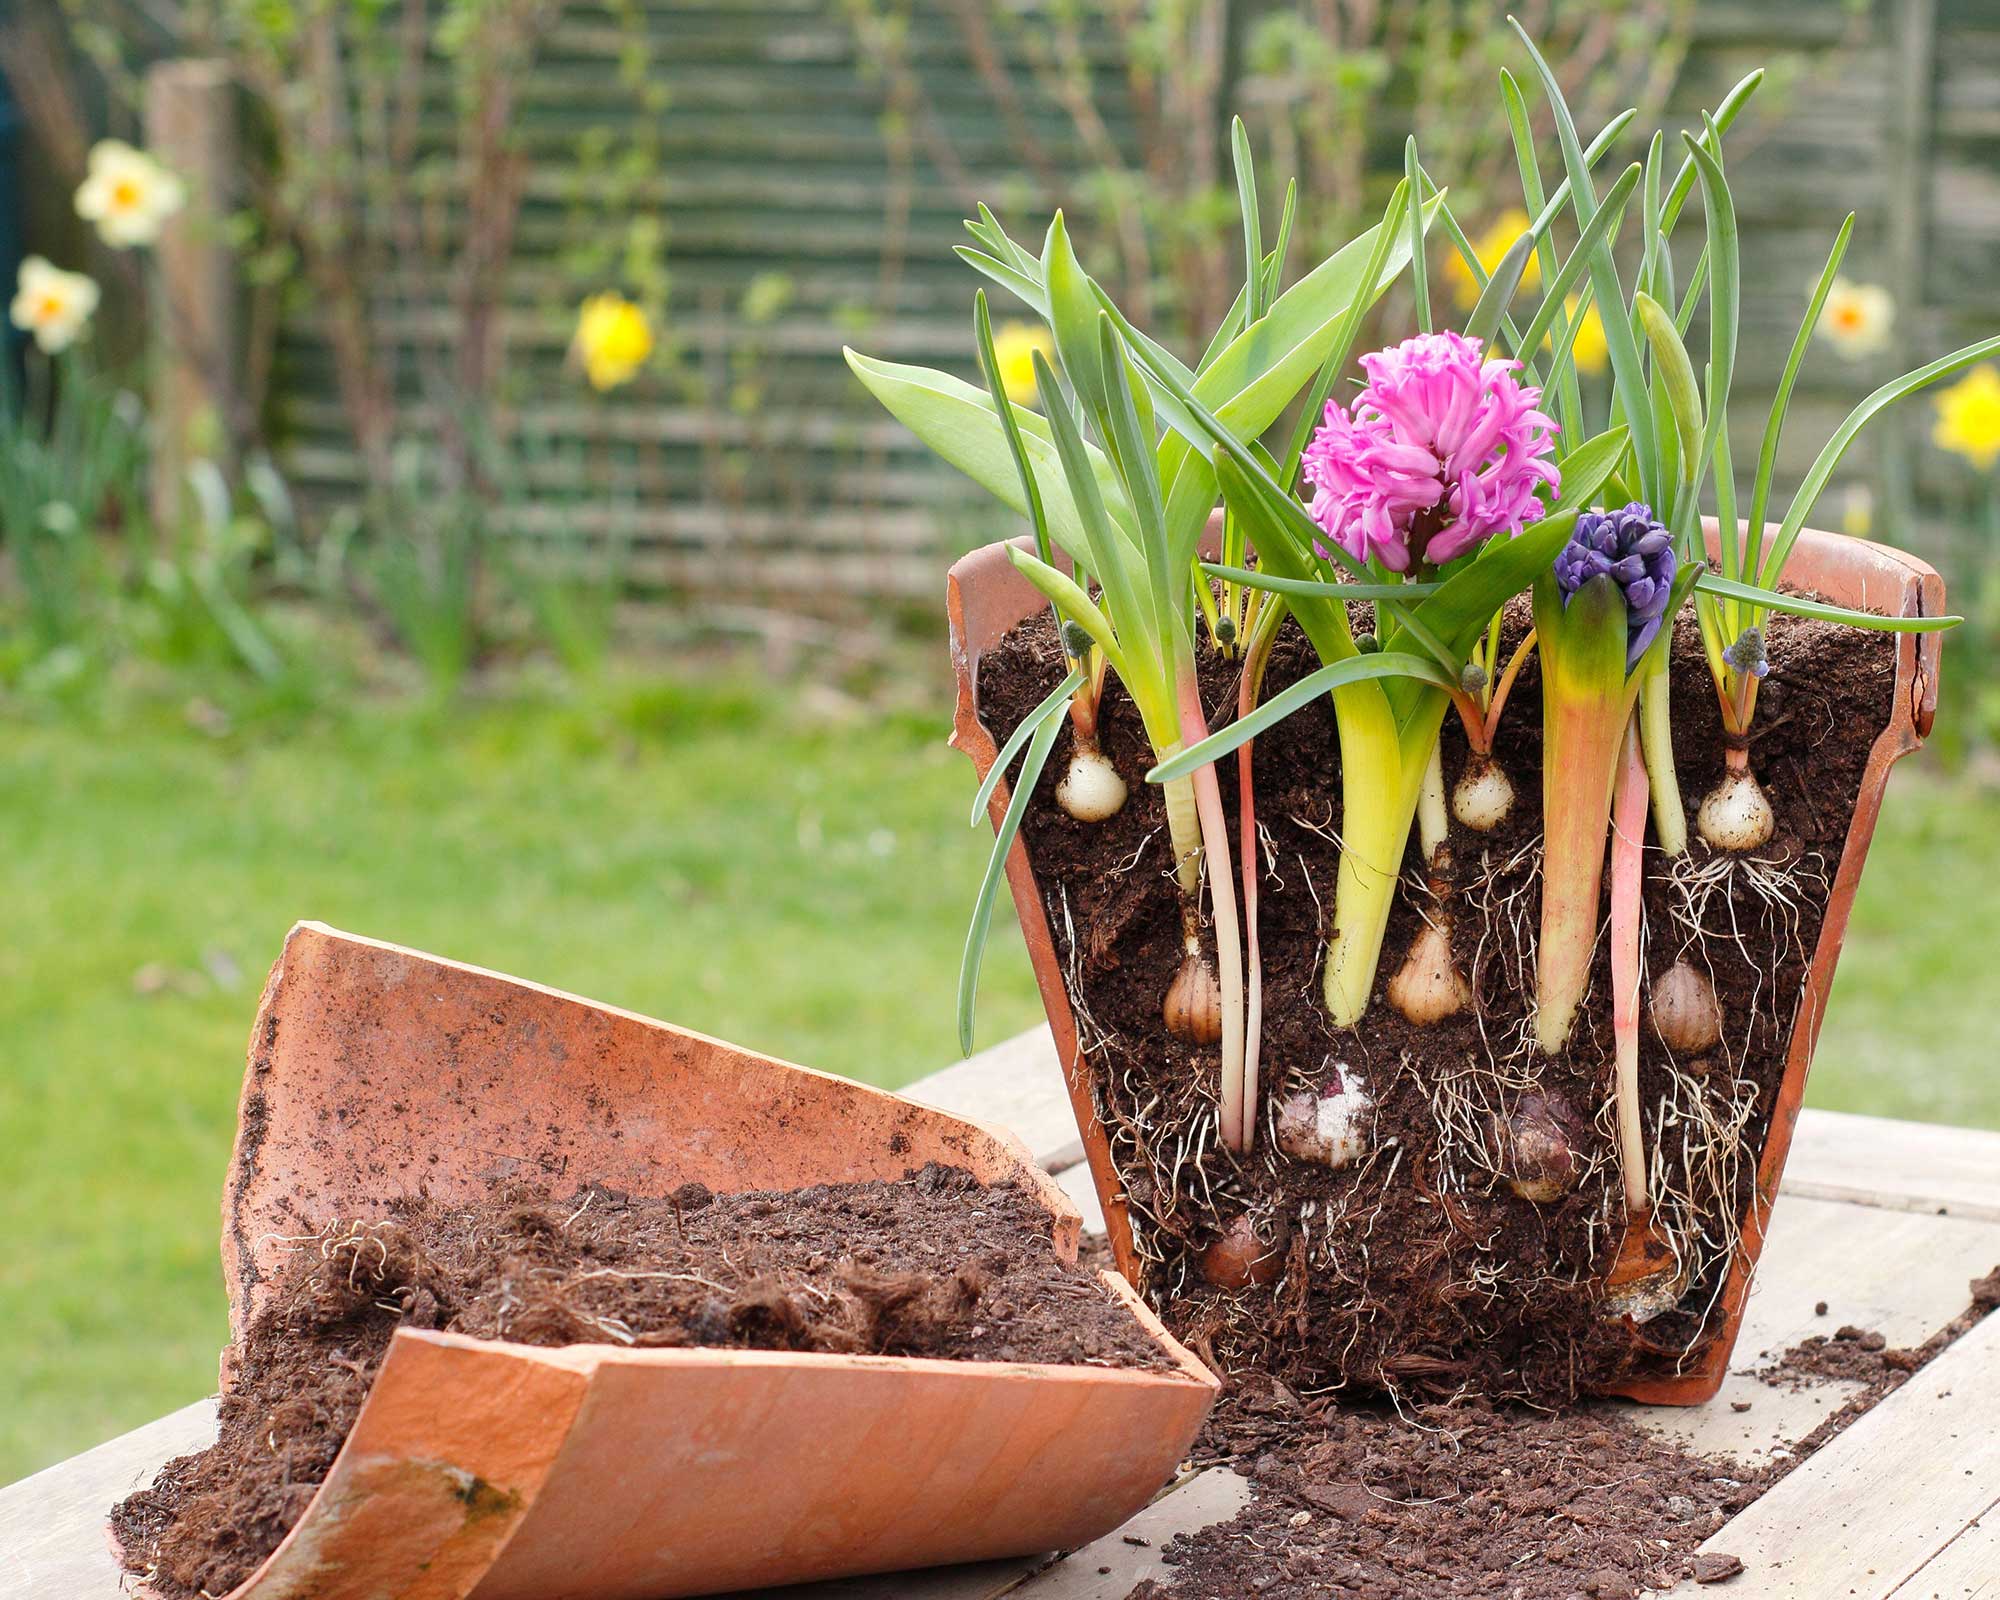
You can try adding more layers to your pot if you wish
What other flowers can you use for your bulb lasagne?
You can go for any combination of bulbs that you prefer, including varieties such as snowdrops, hyacinths, and muscari. You'll find plenty there are endless combinations once you start planning.
It's also possible to make a lasagne simply with different types of tulips, as some varieties flower later than others. Just check the details on the bulb packet for information on when they flower and how deep they need to be planted to plan the perfect combination.
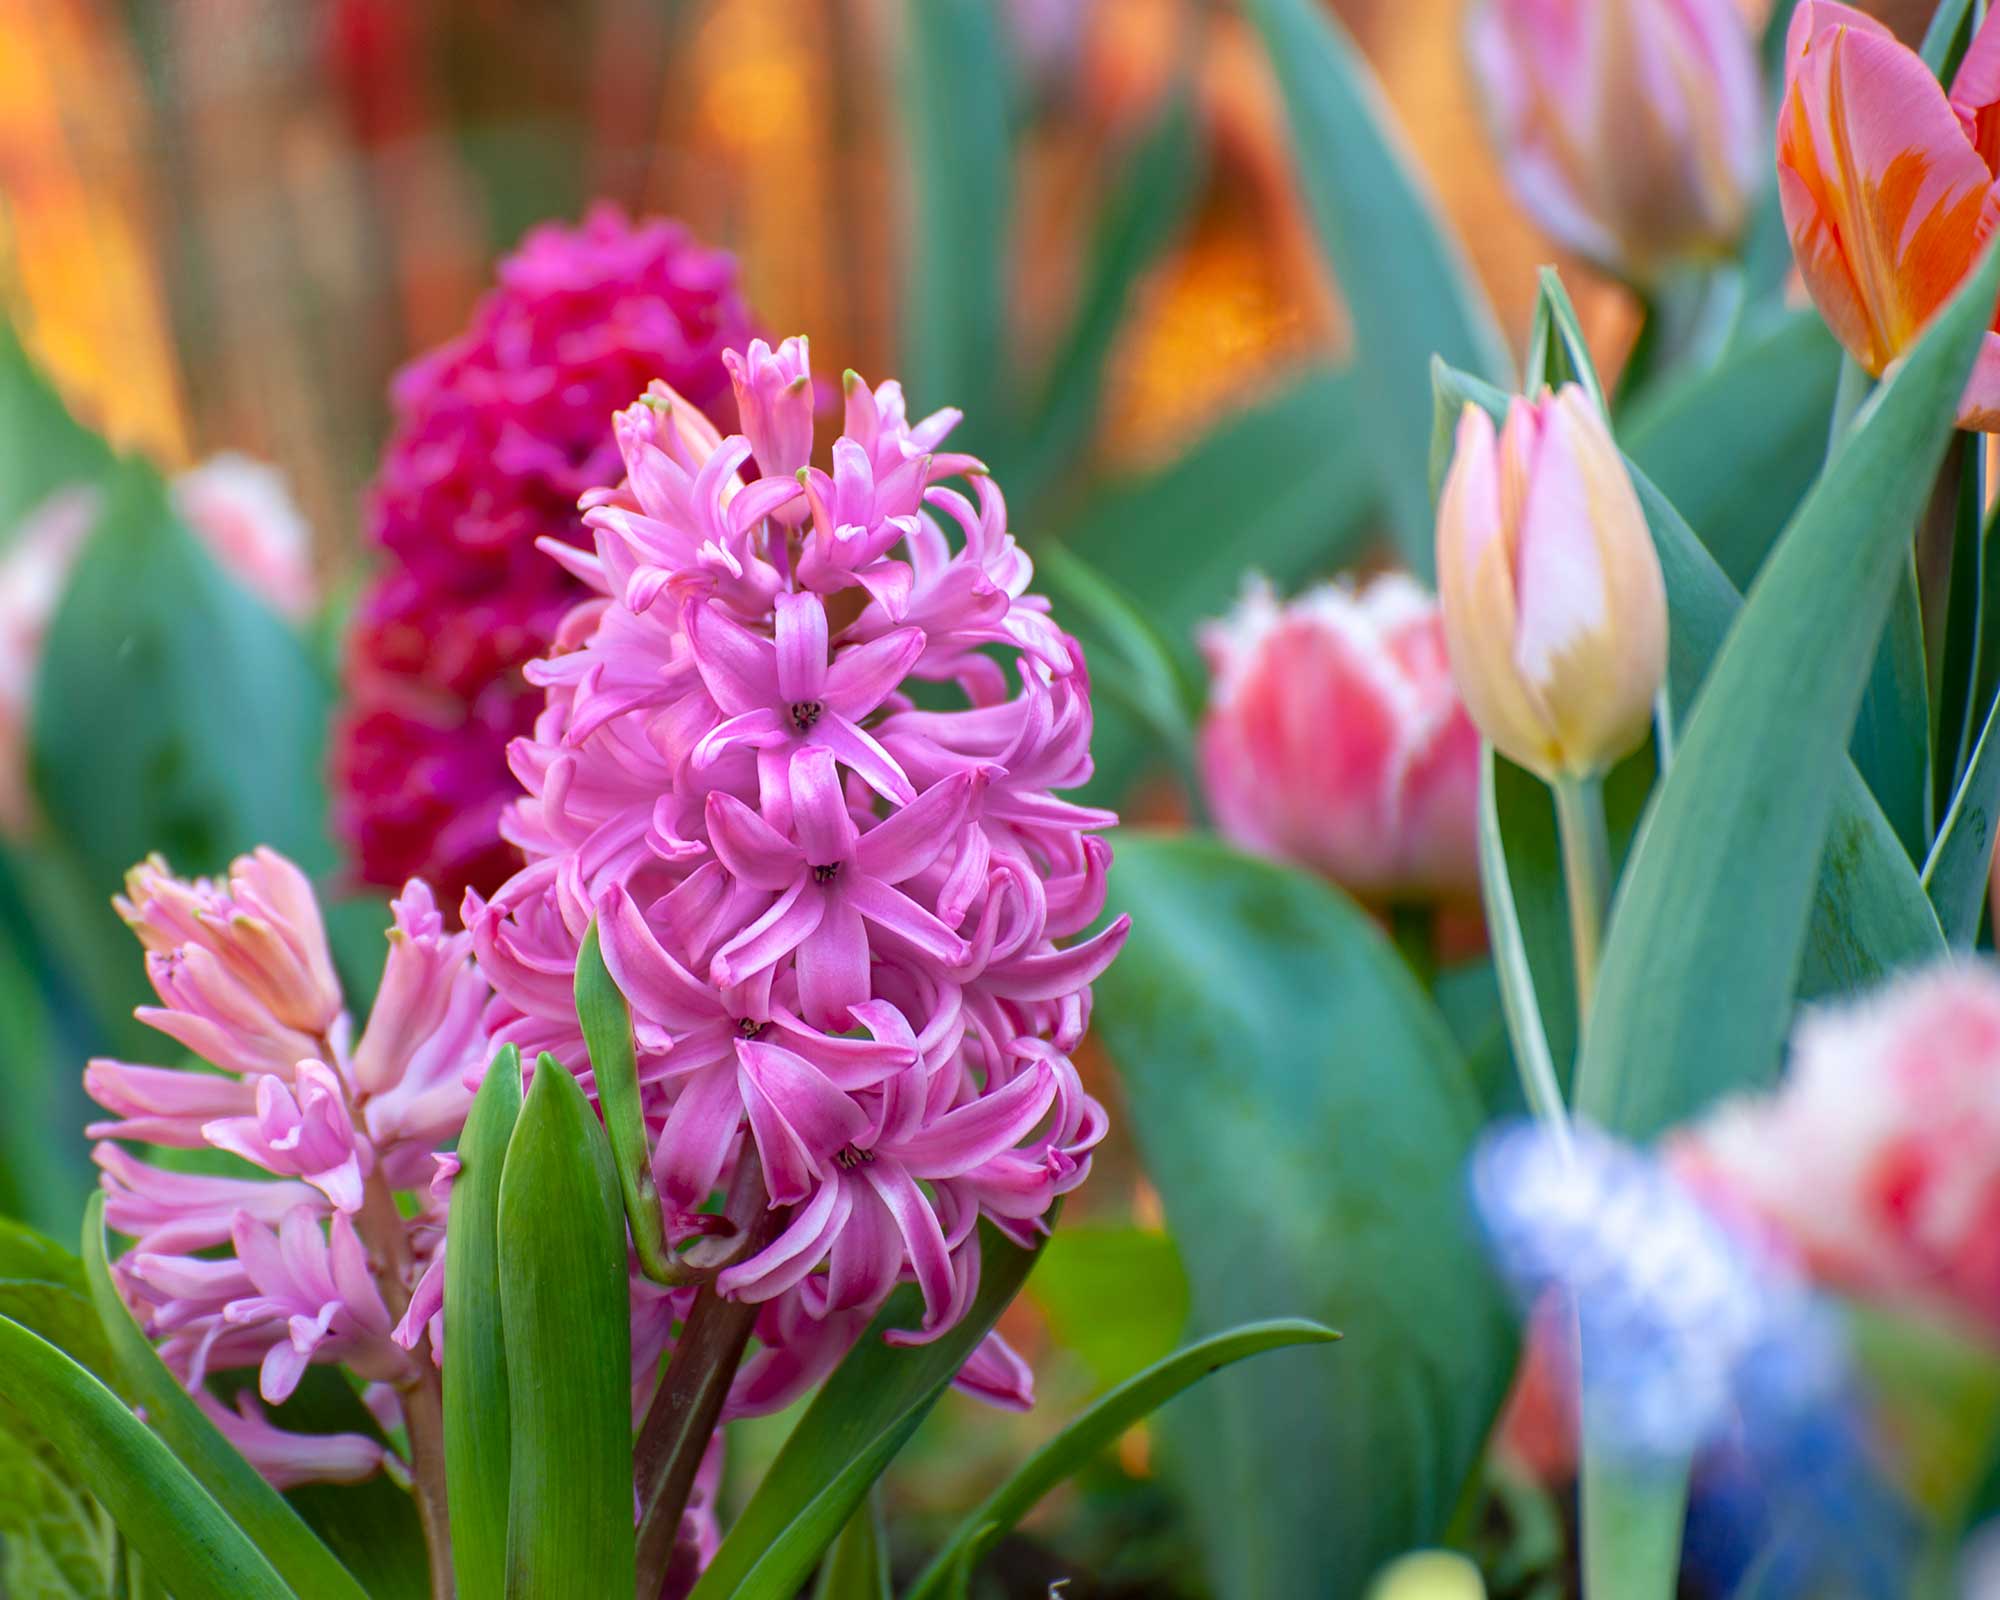
Get creative with your bulb combinations
What should you do when your bulb lasagne has finished flowering?
Most bulbs planted in the ground are likely to come back year after year, but for those planted in pots, a repeat show is a little less reliable.
You can dig up the bulbs after they have finished flowering and simply discard them, then plant a fresh design the following fall. In the meantime, you can refresh your container gardening ideas with summer bedding plants.
To save money, however, it could be worth learning how to store tulip bulbs so you can dig them up and try replanting them in your pots the following year.
Alternatively, you can try your luck at planting the bulbs in the ground to see if they appear next year. If you decide to give this a go, let the foliage die back before digging them up, discard any damaged or diseased ones, then place what's left into storage for them to dry out. They'll be ready for replanting later in the year.
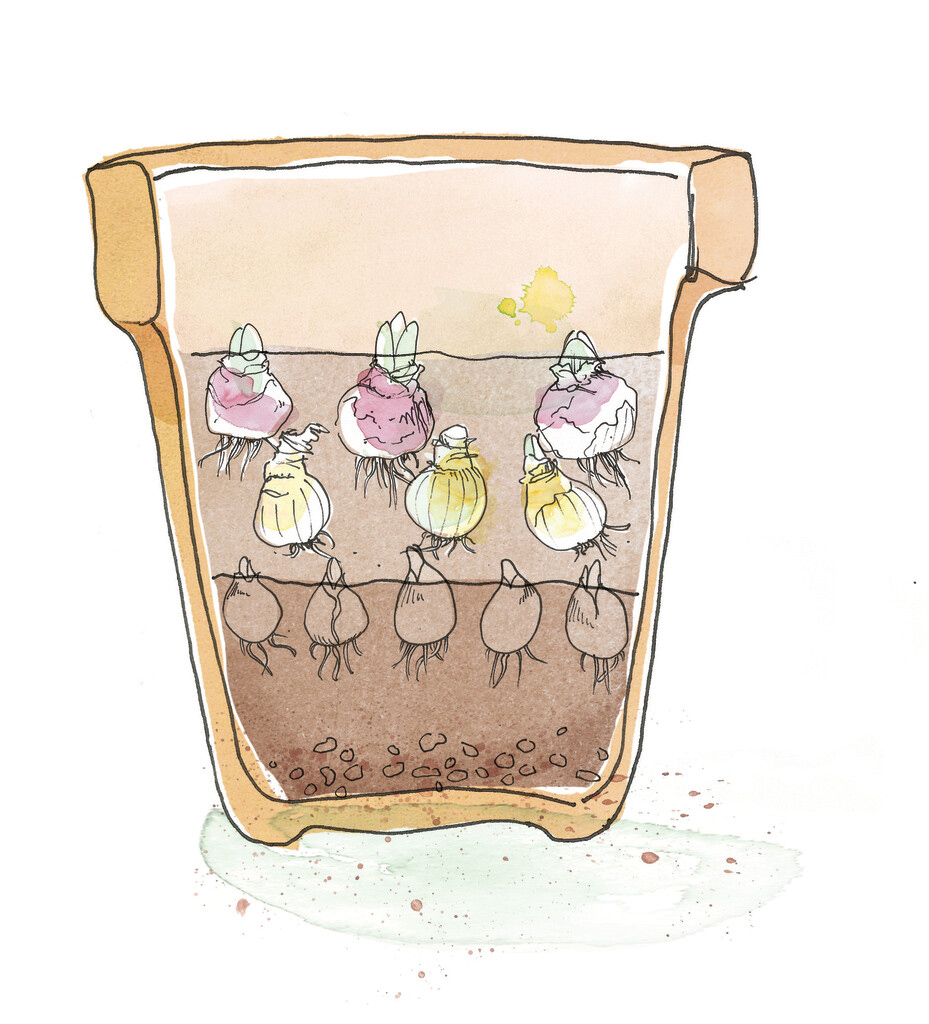
Layer up your bulbs with compost in-between

Teresa has worked as an Editor on a number of gardening magazines for three years now. So she is lucky enough to see and write about gardening across all sizes, budgets and abilities. She recently moved into her first home and the garden is a real project! Currently she is relishing planning her own design and planting schemes. What she is most passionate about when it comes to gardening are the positive effects it has on our mental health to grow and care for plants, as well as being great for the environment too and help provide food and shelter for wildlife.
- Sarah WilsonContent Editor
