How to make a Halloween wreath: simple steps for a beautiful door decoration
Learning how to make a Halloween wreath is the perfect project to give your home a stylish and seasonal touch
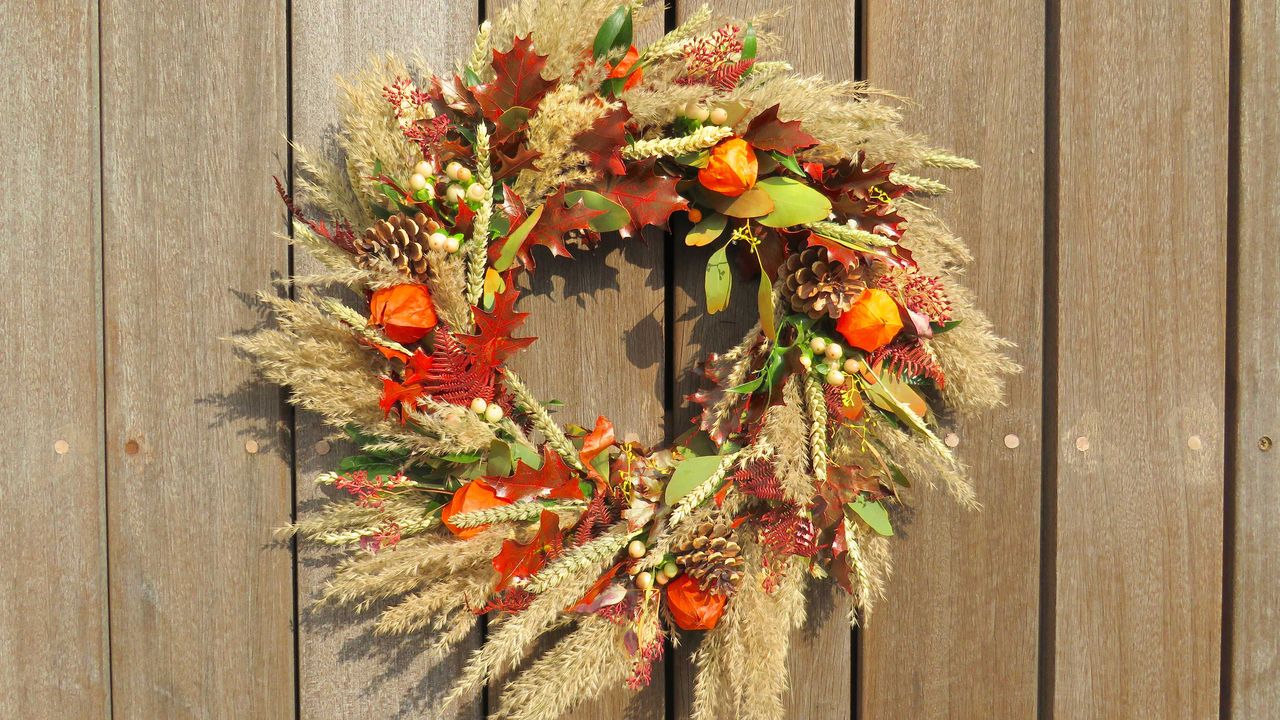

Want to learn how to make a Halloween wreath so you can welcome guests in style this fall? You're in the right place.
It's important to consider the entrance of your home when planning your outdoor Halloween decor ideas. After all, it's lovely to greet trick-or-treaters and other visitors with a delightful, seasonal scene. And, despite the spooky theme of the holiday, there's nothing stopping you from creating a display that's more chic than scary, if that's more your style.
The best way to do this is to embrace the natural bounties of the season in all their flame-toned splendor. A pumpkin or two can never go amiss, but another way to give your home instant curb appeal is with a wreath, adorned with colorful foliage. Anna Eklöv, the founder of bespoke florist LOV Flowers, says, 'We love to incorporate natural elements in our autumnal and Halloween decor to give it a rustic and inviting feel.
'Unlike Christmas wreaths that have a green wreath base made out of pine, we think that a natural twine or rattan wreath base works best for autumn wreaths and gives it that organic look,' she adds. And as well as foliage, there are other autumnal treasures to get creative with: think berries, miniature pumpkins, or Chinese lanterns (Physalis alkekengi), for instance.
Anna shares her expert tips on how to make a Halloween wreath below. Whether you're making it for your own Halloween porch decor or planning on gifting it to a friend, if you love a spot of crafting it's a fabulous project to try.
How to make a Halloween wreath for your front door this season
Anna's simple-to-follow steps are all it takes to create your own stunning display. So grab a cuppa and put aside a cozy afternoon for crafting – it's the perfect way to get into the spirit of the season.
What you will need to make a Halloween wreath
Before you learn exactly how to make a Halloween wreath, you will need to collect together a few bits and bobs, most of which are readily available online or at craft stores.
Often, dried foliage can also be purchased at florists. If you followed our guide on how to dry flowers, you can add in some goodies from your garden, too.
- Natural wreath base
- Craft wire and wire cutters
- Glue gun and glue
- Dried foliage of your choice, including burgundy, red, orange, and brown leaves
- Dried pampas grass and wheat
- Sharp scissors or snips to cut foliage to size
- Decorations such as dried berries or fresh hypericum berries, mini pumpkins, pinecones, or a couple of stems of Chinese lanterns
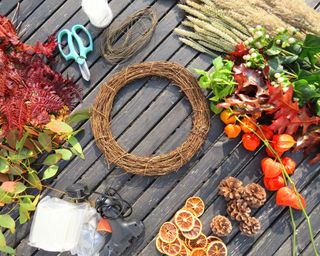
Make the most of the season's harvest when decorating your wreath
A simple step-by-step guide on how to make a Halloween wreath
- Start by attaching the foliage to the base of the wreath by sticking them in between the rattan weave. You can also use the glue gun at this point to make sure the leaves are extra secure. Keep in mind to attach them slightly overlapping one another yet loose and facing the same direction. Mix the colors of the foliage to create a natural and wild look. Cover the whole front and sides of the wreath.
- The next step is your pampas grass and wheat. Again, stick the stems down facing the same directions as the leaves and slightly out towards the sides. Focus on covering the sides of the wreath. Cut the stems down a bit where necessary.
- Lastly, add your decorations. Here you can really use your imagination and choose anything you think would look good in a Halloween wreath. Anna loves using decorations such as mini pumpkins, dried orange slices, berries, Chinese lanterns, yellow craspedia flowers and pinecones. It's best to attach the decorations with a glue gun or wire – make sure they're nice and sturdy to ensure they won't fall off in the wind. Place all your decorations on top of the wreath before you start attaching them so you can see roughly where you want them to go.
- A top tip is to make three bigger clusters of decorations around the wreath and spread smaller decorations around. For example, glue a mini pumpkin, pinecone and berries close together. Repeat this on two other places on the wreath and then add smaller decorations in between the clusters.
And there you have it! A beautiful, seasonal wreath that'll make the perfect addition to your Halloween door decorations this year.
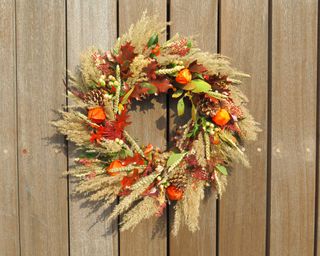
This finished Halloween wreath by LOV Flowers is sure to turn heads
How do you make a Halloween wreath with ribbon?
You can also make a Halloween wreath with ribbon. One eye-catching approach is to add just one or two lengths as accents to your decoration. For instance, a gold bow can add a touch of luxe, whilst a velvet black ribbon will add a sense of gothic chic.
However, if you prefer, you can switch out the more natural decor and use ribbons as the key element for your Halloween wreath instead.
You can simply use your glue gun to attach them. Alternatively, you can tie the ribbons directly onto your frame. If you choose this approach, it's easiest to use a metal wire frame – available on Amazon – for your base. Cut lengths of ribbons and simply tie them around the frame, making sure the ends lie flat. Alternate colors and patterns as you go, should you wish. Keep going all the way around, then once the outer ring is full, begin to fill the inner rings, and so on. Remember, the bigger the frame, the more ribbons you'll need.
If you use ribbons that have wire edges, then you don't even have to tie knots – you can simply twist them a couple of times to keep them in place. It's simple!
Looking for more easy Halloween decorating inspo? Our pumpkin painting ideas feature has tons of gorgeous looks to try out at home.
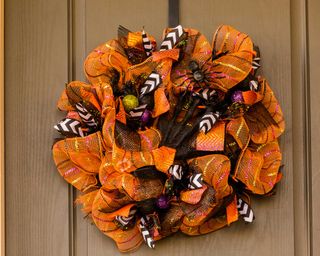
You can use ribbons to create a show-stopping display
How do you preserve fall leaves for a Halloween wreath?
You can preserve leaves from your garden to use for your wreath by using decoupage glue. This will help them maintain their beautiful autumnal color.
Collect up a selection of fallen leaves that haven't become brittle and overly dry. If the leaves are freshly picked, dry them out a little first, by pressing them in between two pieces of kitchen towel in a heavy book for a couple of days.
Pop a sheet of wax paper down to protect your work surface. Then, all you need to do is brush the glue onto one side of each leaf, allow it to dry (it will go clear and non-sticky), and then flip the leaves and repeat on the other side. For extra durability, add an extra coat. Once dry, they're ready to be used.
- If you're looking for more ways to bring natural decorations into your Halloween scheme, our pumpkin carving ideas are well worth a peruse.
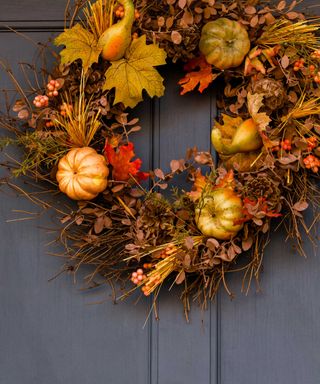
Faux foliage and pumpkins can look just as stylish as the real deal
More top tips for Halloween wreaths
- If it's too tricky to source real foliage, berries and pumpkins, don't be afraid to go faux. Nowadays, they can look super realistic, are definitely still chic, and the best part is, they'll last for years.
- Don't forget about the center of your wreath. If there's space left once you've finished decorating, it's the perfect place to hang a cute 'welcome' sign.
- If you're short on time, or simply prefer a more minimal look, then consider only decorating a portion of your wreath base. If you use a natural rattan style, then there's no harm in showing off its rustic texture.
- To give your Halloween wreath an extra magical touch, add in some microlights. Choose LED outdoor-suitable ones that stay cool to the touch, to stay safe. And why stop there? Adding lanterns or outdoor string lights to your front garden will give it even more atmosphere when evening falls.
- Spray paint can be used to give your wreath even more character – whether that's metallic mini pumpkins or an all-black, gothic look.
- For the most harmonious of displays, try to stick to a specific color palette.
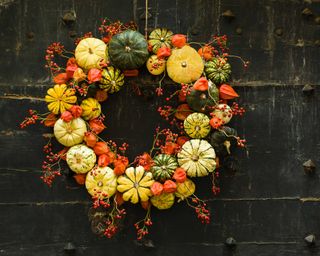
Yellow, green and red tones come together in this arrangement of mini squash, berries, and Chinese lanterns

The garden was always a big part of Holly's life growing up, as was the surrounding New Forest where she lived. Her appreciation for the great outdoors has only grown since then. She's been an allotment keeper, a professional gardener, and a botanical illustrator – plants are her passion.
-
 An Update on Gardeningetc
A word from our publisher
By Beth Murton Published
-
 Do you need to chit potatoes? Find out what the experts say
Grow Your Own Learn how to chit potatoes before planting them in the ground and you’ll be on your way to getting an earlier and bigger harvest
By Drew Swainston Published
