How to install a fence post: 6 steps for a sturdy finish
Learn how to install a fence post like a professional with our easy step-by-step guide

Want to learn how to install a fence post to save yourself paying a professional to do the job for you? You've come to the right place. It may be one of those garden jobs which, like me, you'd automatically dismiss as being outside your skill set and immediately turn to a professional to take on. However you might discover that once you've made yourself aware of the basic principles, it could indeed be something you could achieve yourself. Particularly if it's just one or two fence posts which need replacing.
First off, before you pick up that shovel and start digging your post hole, you'll need to check the deeds for your house. See whether you or your neighbor is responsible for the boundary in question. If it's your neighbor's and they don't agree to replacing or repairing it, you can build your own next to it. But to avoid any potential awkwardness it's a good idea to inform neighbors of your plans.
Part of making a decision on your garden fence ideas, or indeed any DIY garden project, is considering the costs involved. When it comes to the cost of fence posts, timber is usually the cheapest option. However, check what treatment they have been given before you buy them. Without the right treatment they can be prone to rot, which does not make for a sound investment. There's also the concrete option, which may not be the most visually appealing, but you will find they will last longer than timber and can always be disguised with a lick of masonry paint.
Follow this expert advice on how to install a fence post properly
A good solid garden boundary is not only crucial for security but also for creating privacy fence ideas. And from a visual perspective it can really enhance the general appearance of your garden by giving it a smooth finish.
Not all fence types will even require fence posts, but if yours does then you will need digging equipment and concrete, among a few other key items to get you started. The number of fence posts you'll need with be the same as the amount of fence panels you need, plus one extra.
So, say you're putting in one panel you will need one plus one i.e. two posts. For 12 panels you will need 13 posts. But if this is feeling too much like a math equation simply draw up a diagram and mark out the amount of panels and where the posts will need to go.
What you will need:
- Metal or treated wood fence posts (and panels if required)
- Shovel or an auger attachment for drills at Amazon
- All-purpose gravel
- Fast setting concrete (try postcrete at B&Q)
- 1-gallon bucket
- Spirit level
- Trowel
- Bamboo canes
- Long tape measure
- Hammer
- Nails
- Drill
- Thick gloves
- Protective goggles
- Dust mask
1. Prep the area
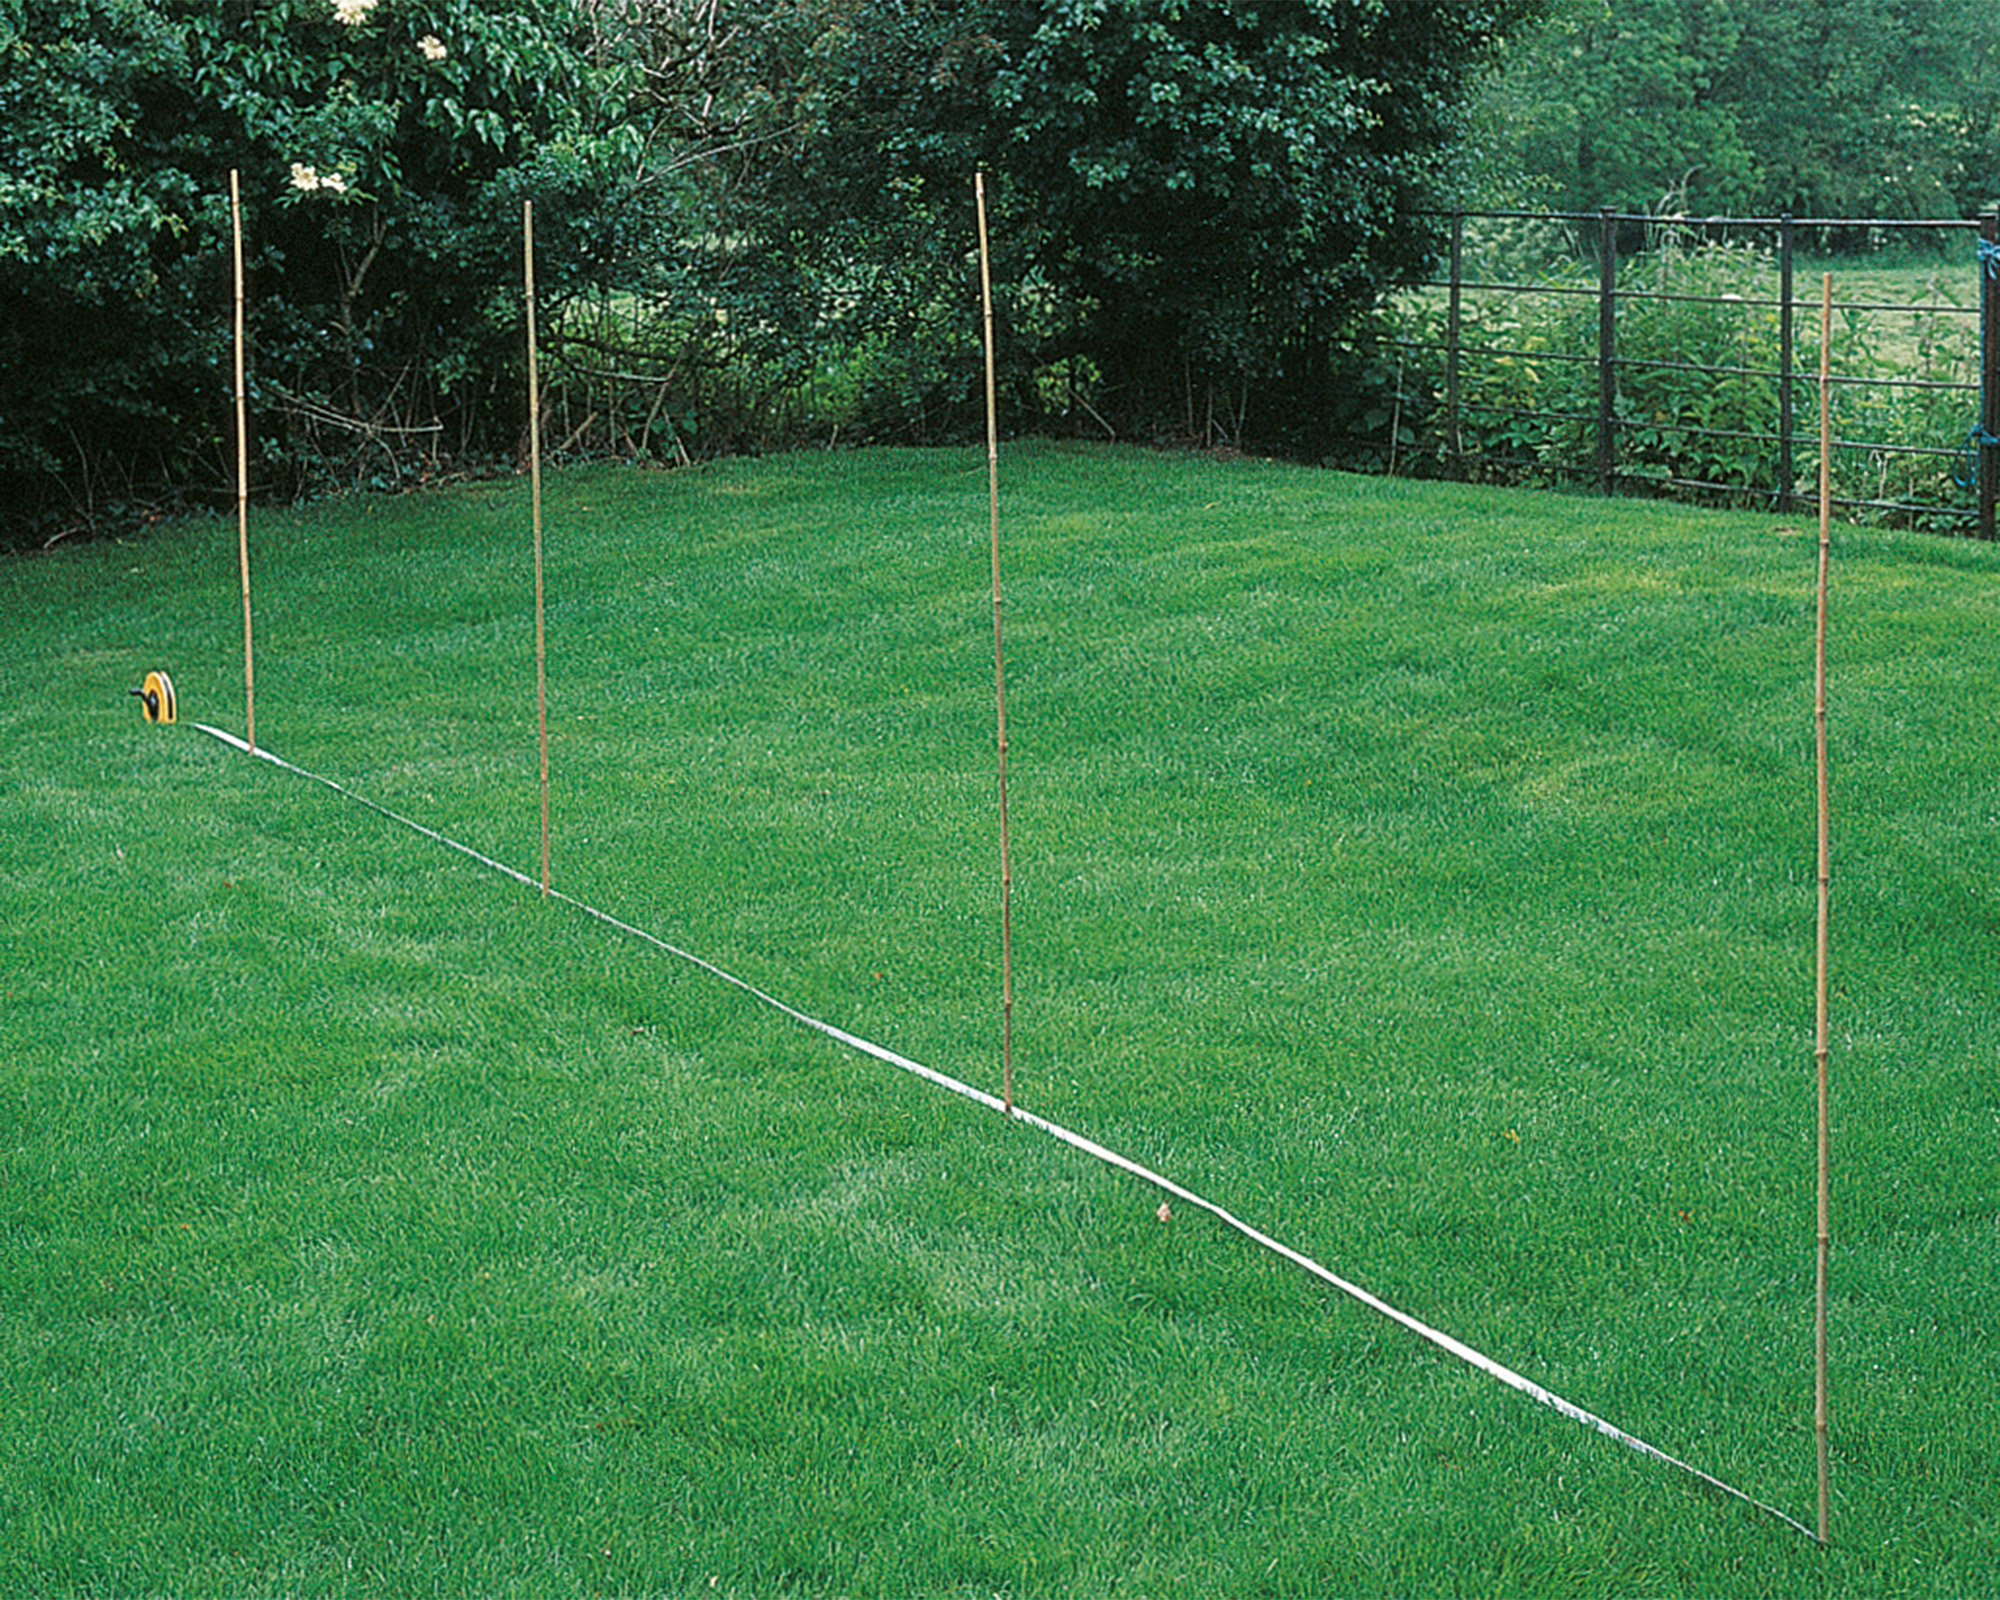
It seems like an obvious thing to say, but preparing your area is an important step in how to install a fence post. Start by removing any plants and debris from the area where your new garden screening is to go. Then mark out a line where the fence is going. The B&Q experts have used a long tape measure.
Then mark out the exact position for each fence post with a bamboo cane. It goes without saying that these should account for the width of your specific fence panel. If you're replacing an existing panel, try your best not to cause any damage to any existing plants near the fence.
2. Dig your hole
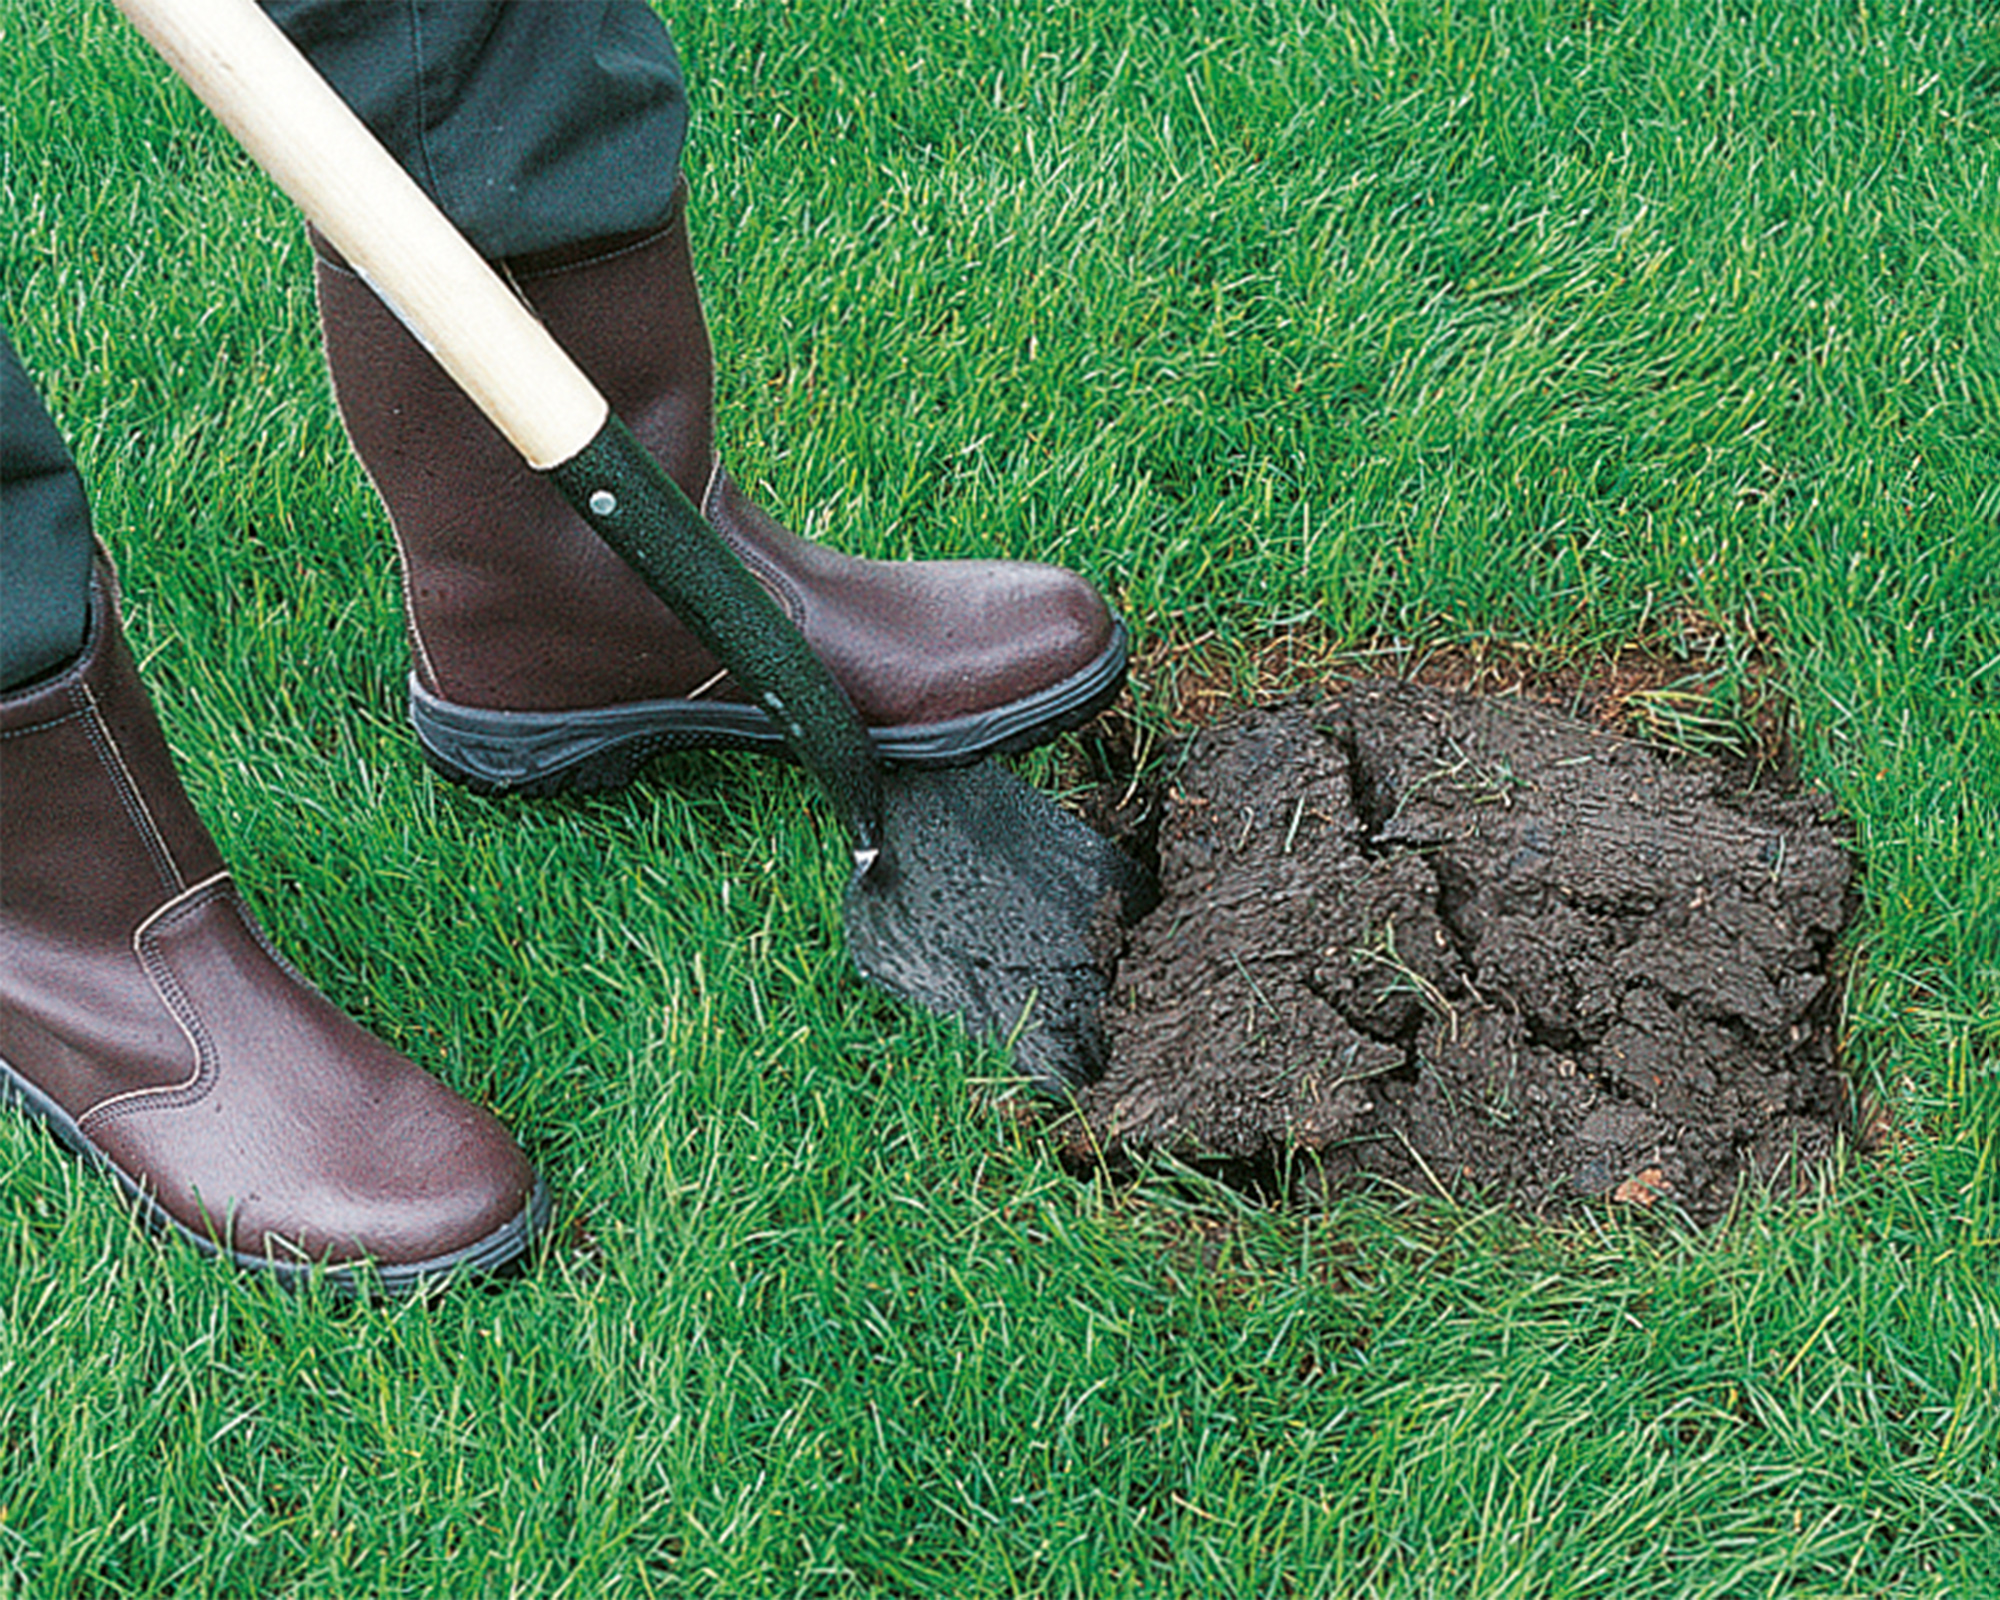
Next, dig the hole for the fence posts using the best garden spade or auger. 'The rule of thumb for digging is to bury at least a third of the post in the hole. However, you should check with your local building codes before doing this,' says Thomas Goodman construction expert at Myjobquote. 'This will help you determine the size of the hole, and you should then add a few inches onto this (for gravel). The diameter of the hole should also be around three times the width of the fence posts.
'Once you’ve dug the hole, you should then add a few inches of gravel into the base and then tamp it down using the fence post. This will prevent the posts from coming into contact with the soil.'
Digging the holes for your fence posts is probably the most labour intensive part. And if you're starting to doubt your decision at this point, then remind yourself that this is a cheap fence idea which is guaranteed to save you money on labour costs.
3. Position your post in the centre of the hole
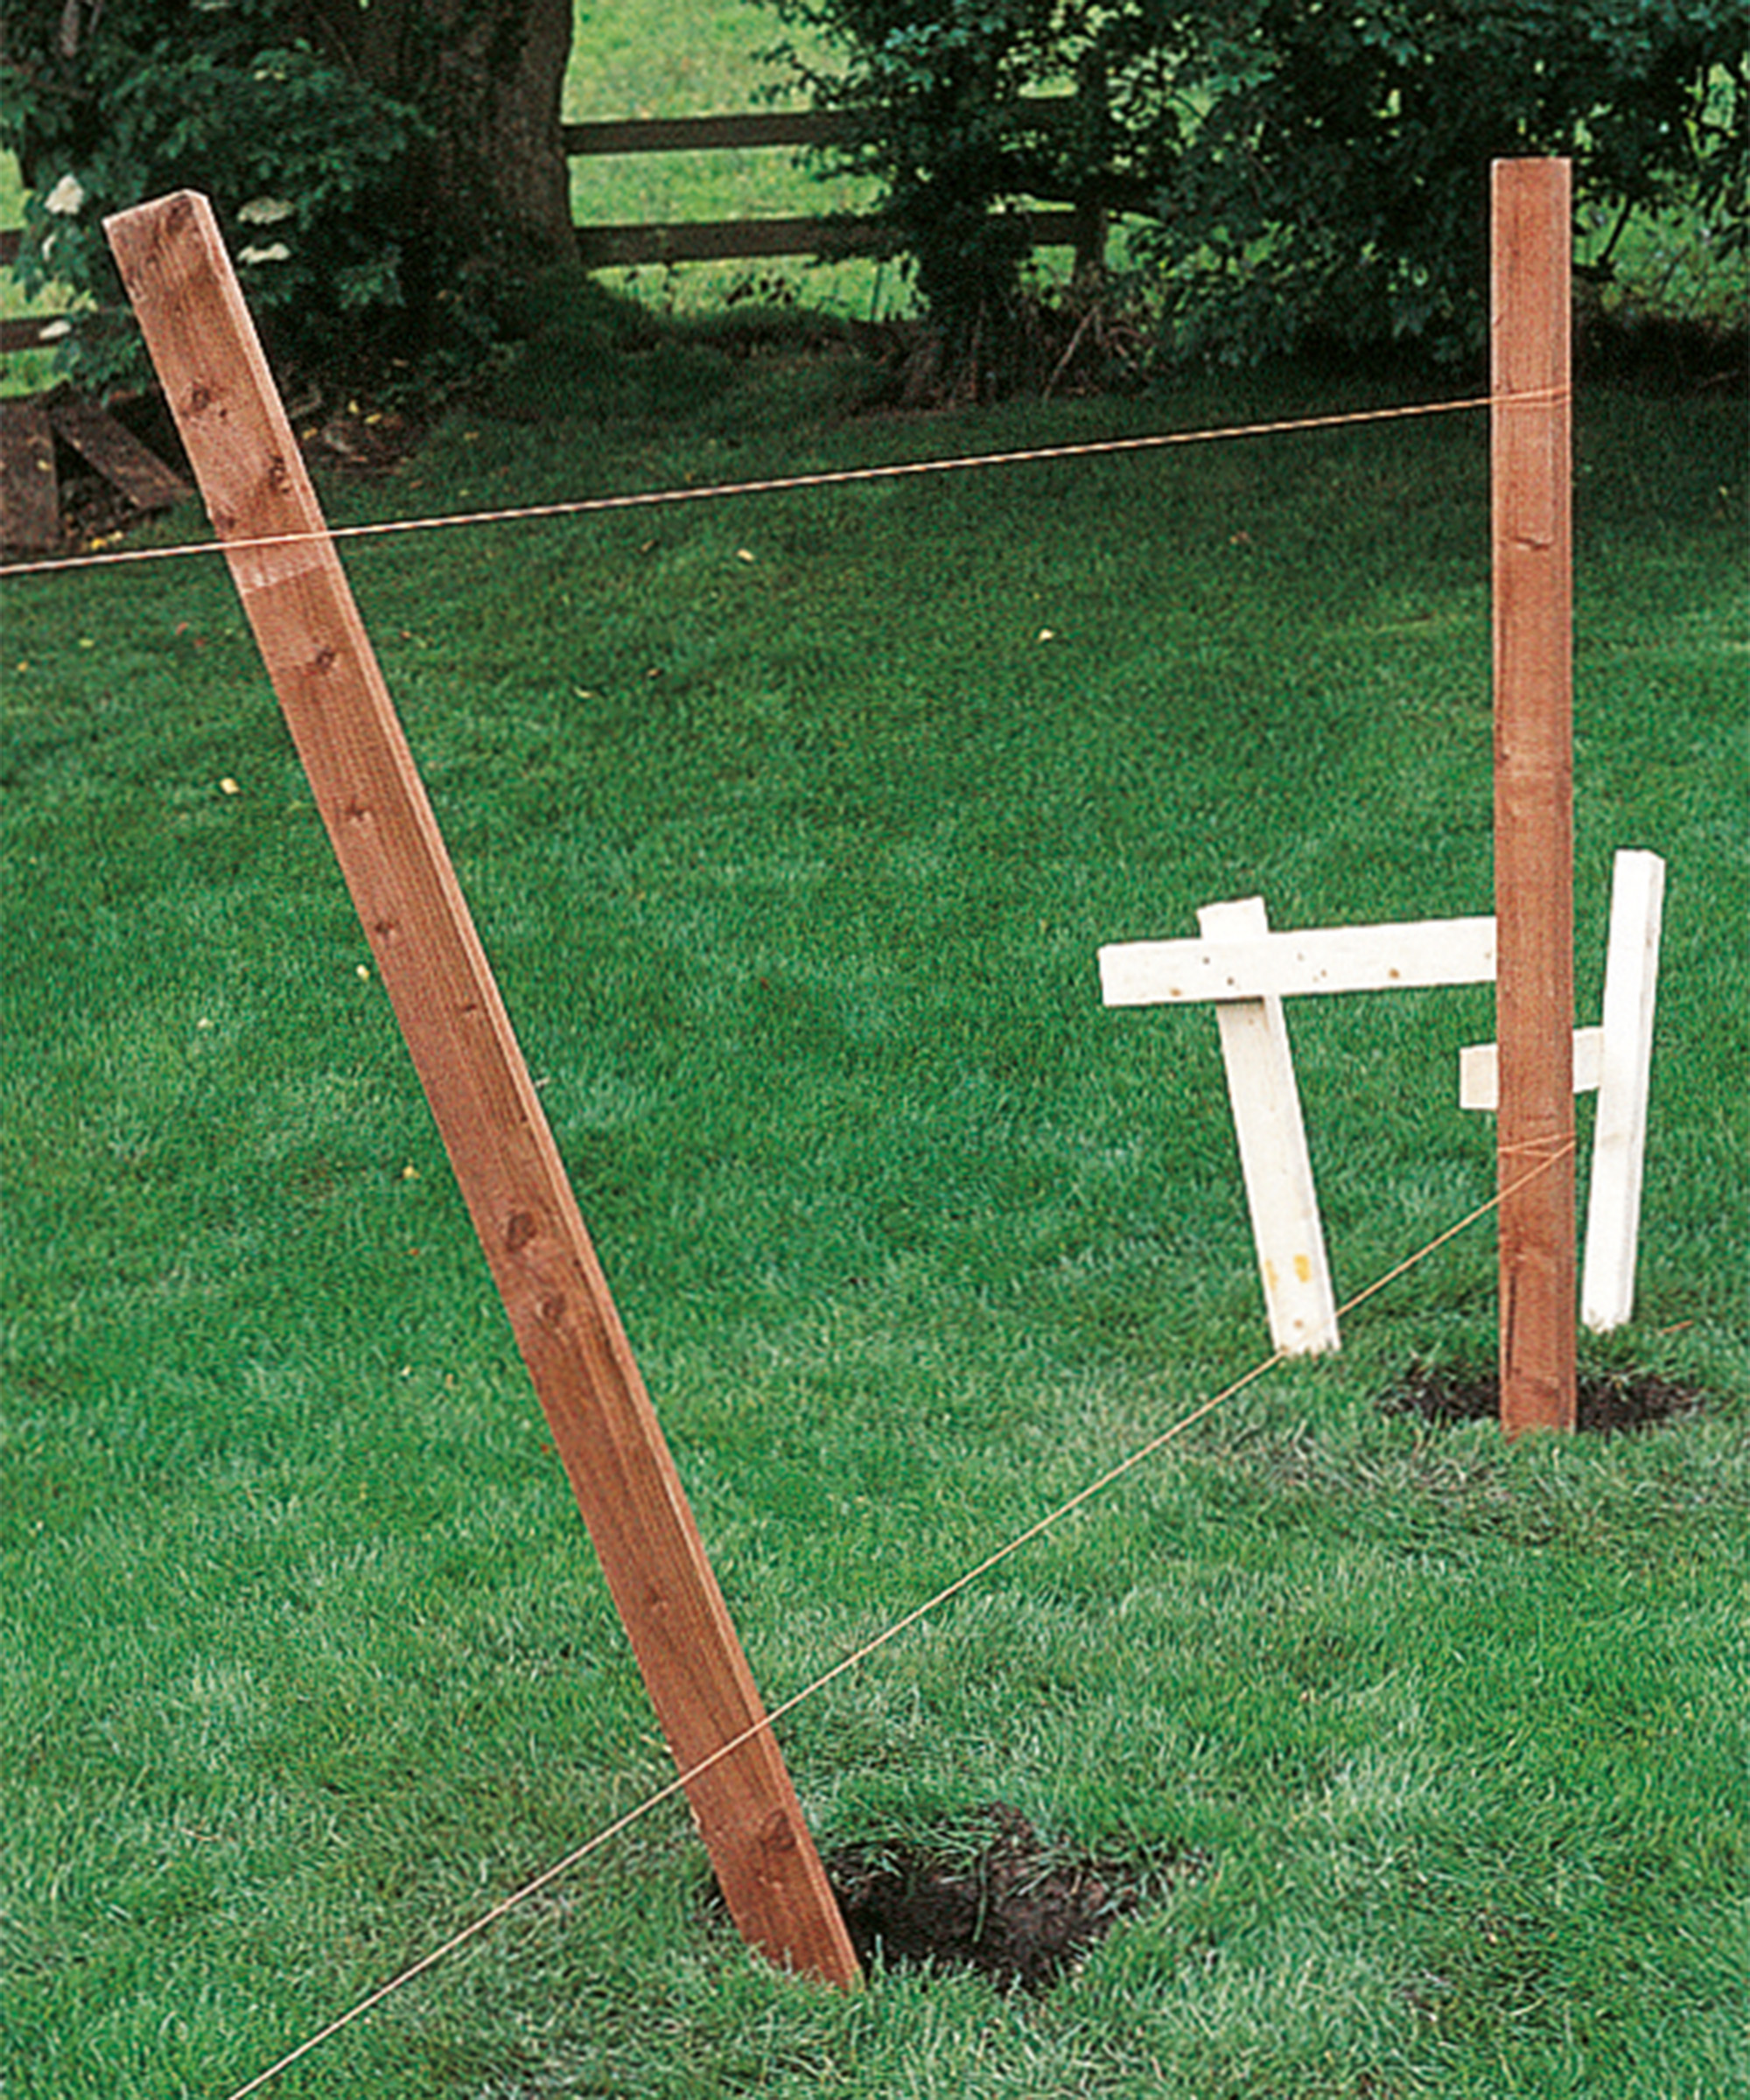
To install a fence post, you should place it in the centre of the hole and hold it in an upright position. If you don't have another person helping you to hold the fence posts in position when you're nailing in your panel, the experts at B&Q recommend: 'Make wooden props by nailing two pieces of wood together in a T shape and use these to hold the posts in place. Insert your first post into the ground, secure to the prop and check it’s vertically level with a spirit level. Repeat with the second fence post.'
Our top tip? Don't dig all your holes at once and rather dig as you go along. The last thing you want is getting to the point of putting in your next fence panel and finding that you haven't measured quite correctly and having to start the process all over again.
4. Fit your first panel
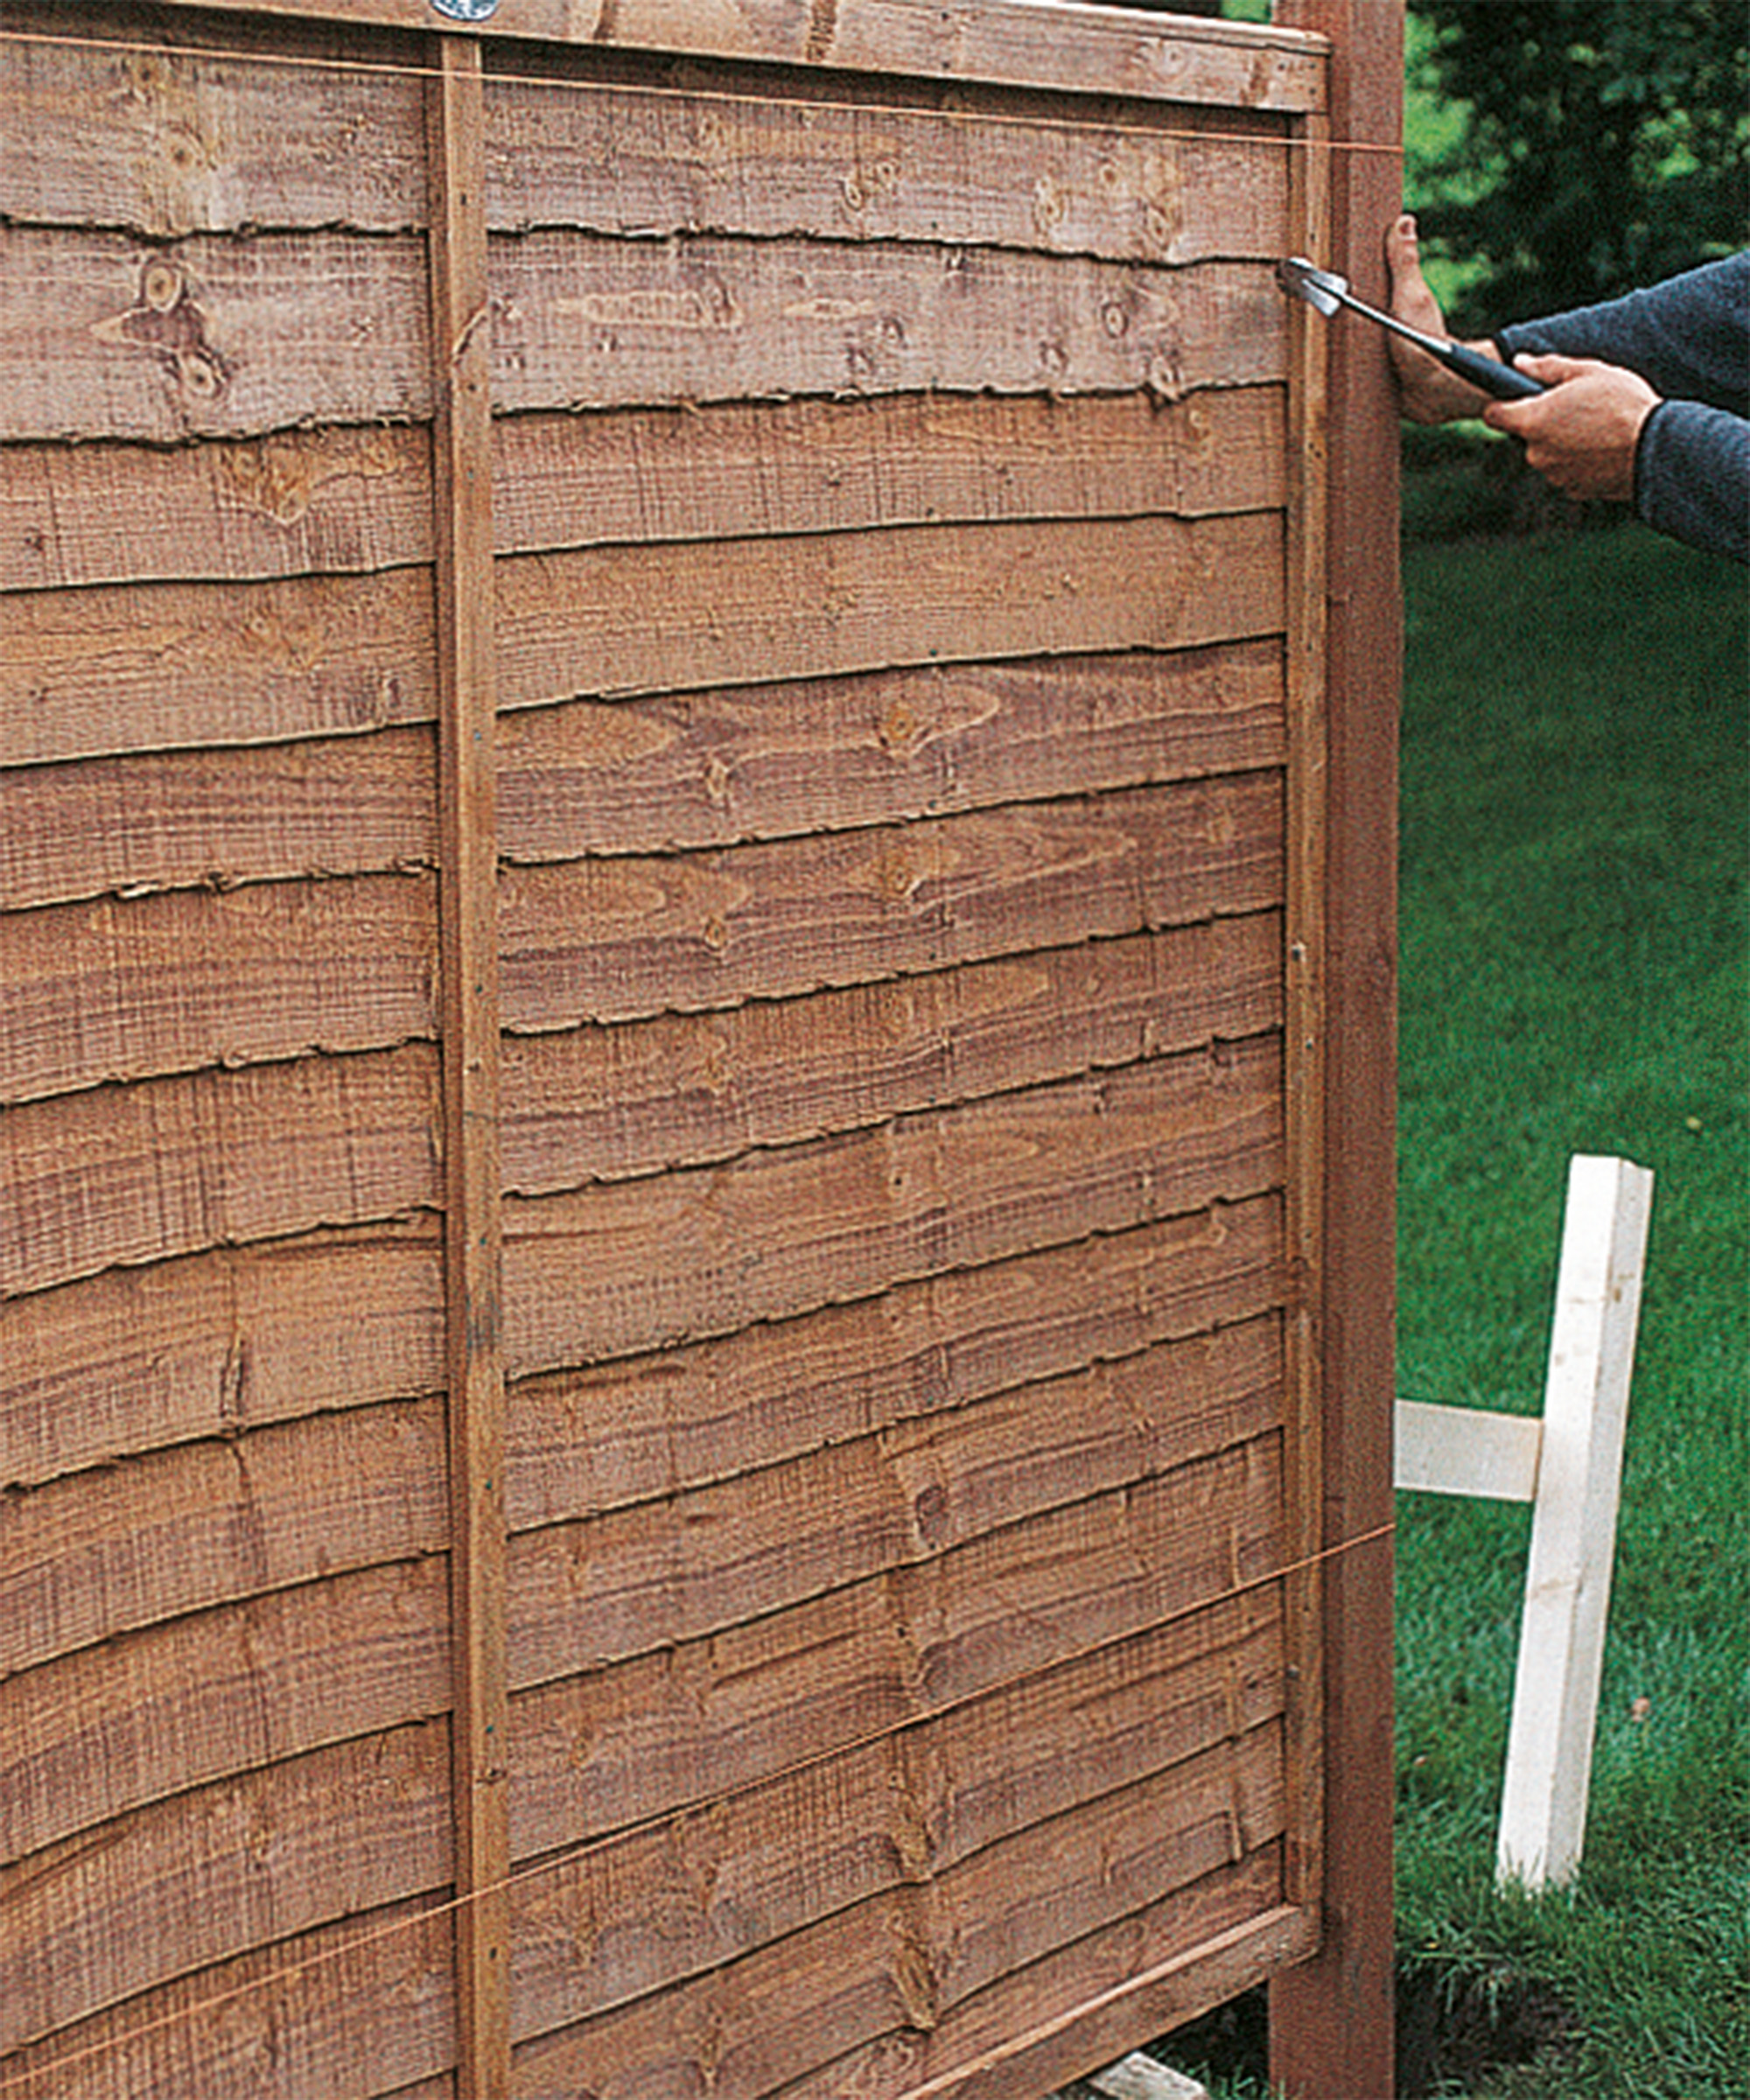
To fit your first panel between the two posts, drill six pilot holes evenly down the batten framing, use a level to check the fence is straight and hammer galvanized nails into the pilot holes to secure the panel to the post. Repeat for the other side of the panel.
5. Secure your post with concrete
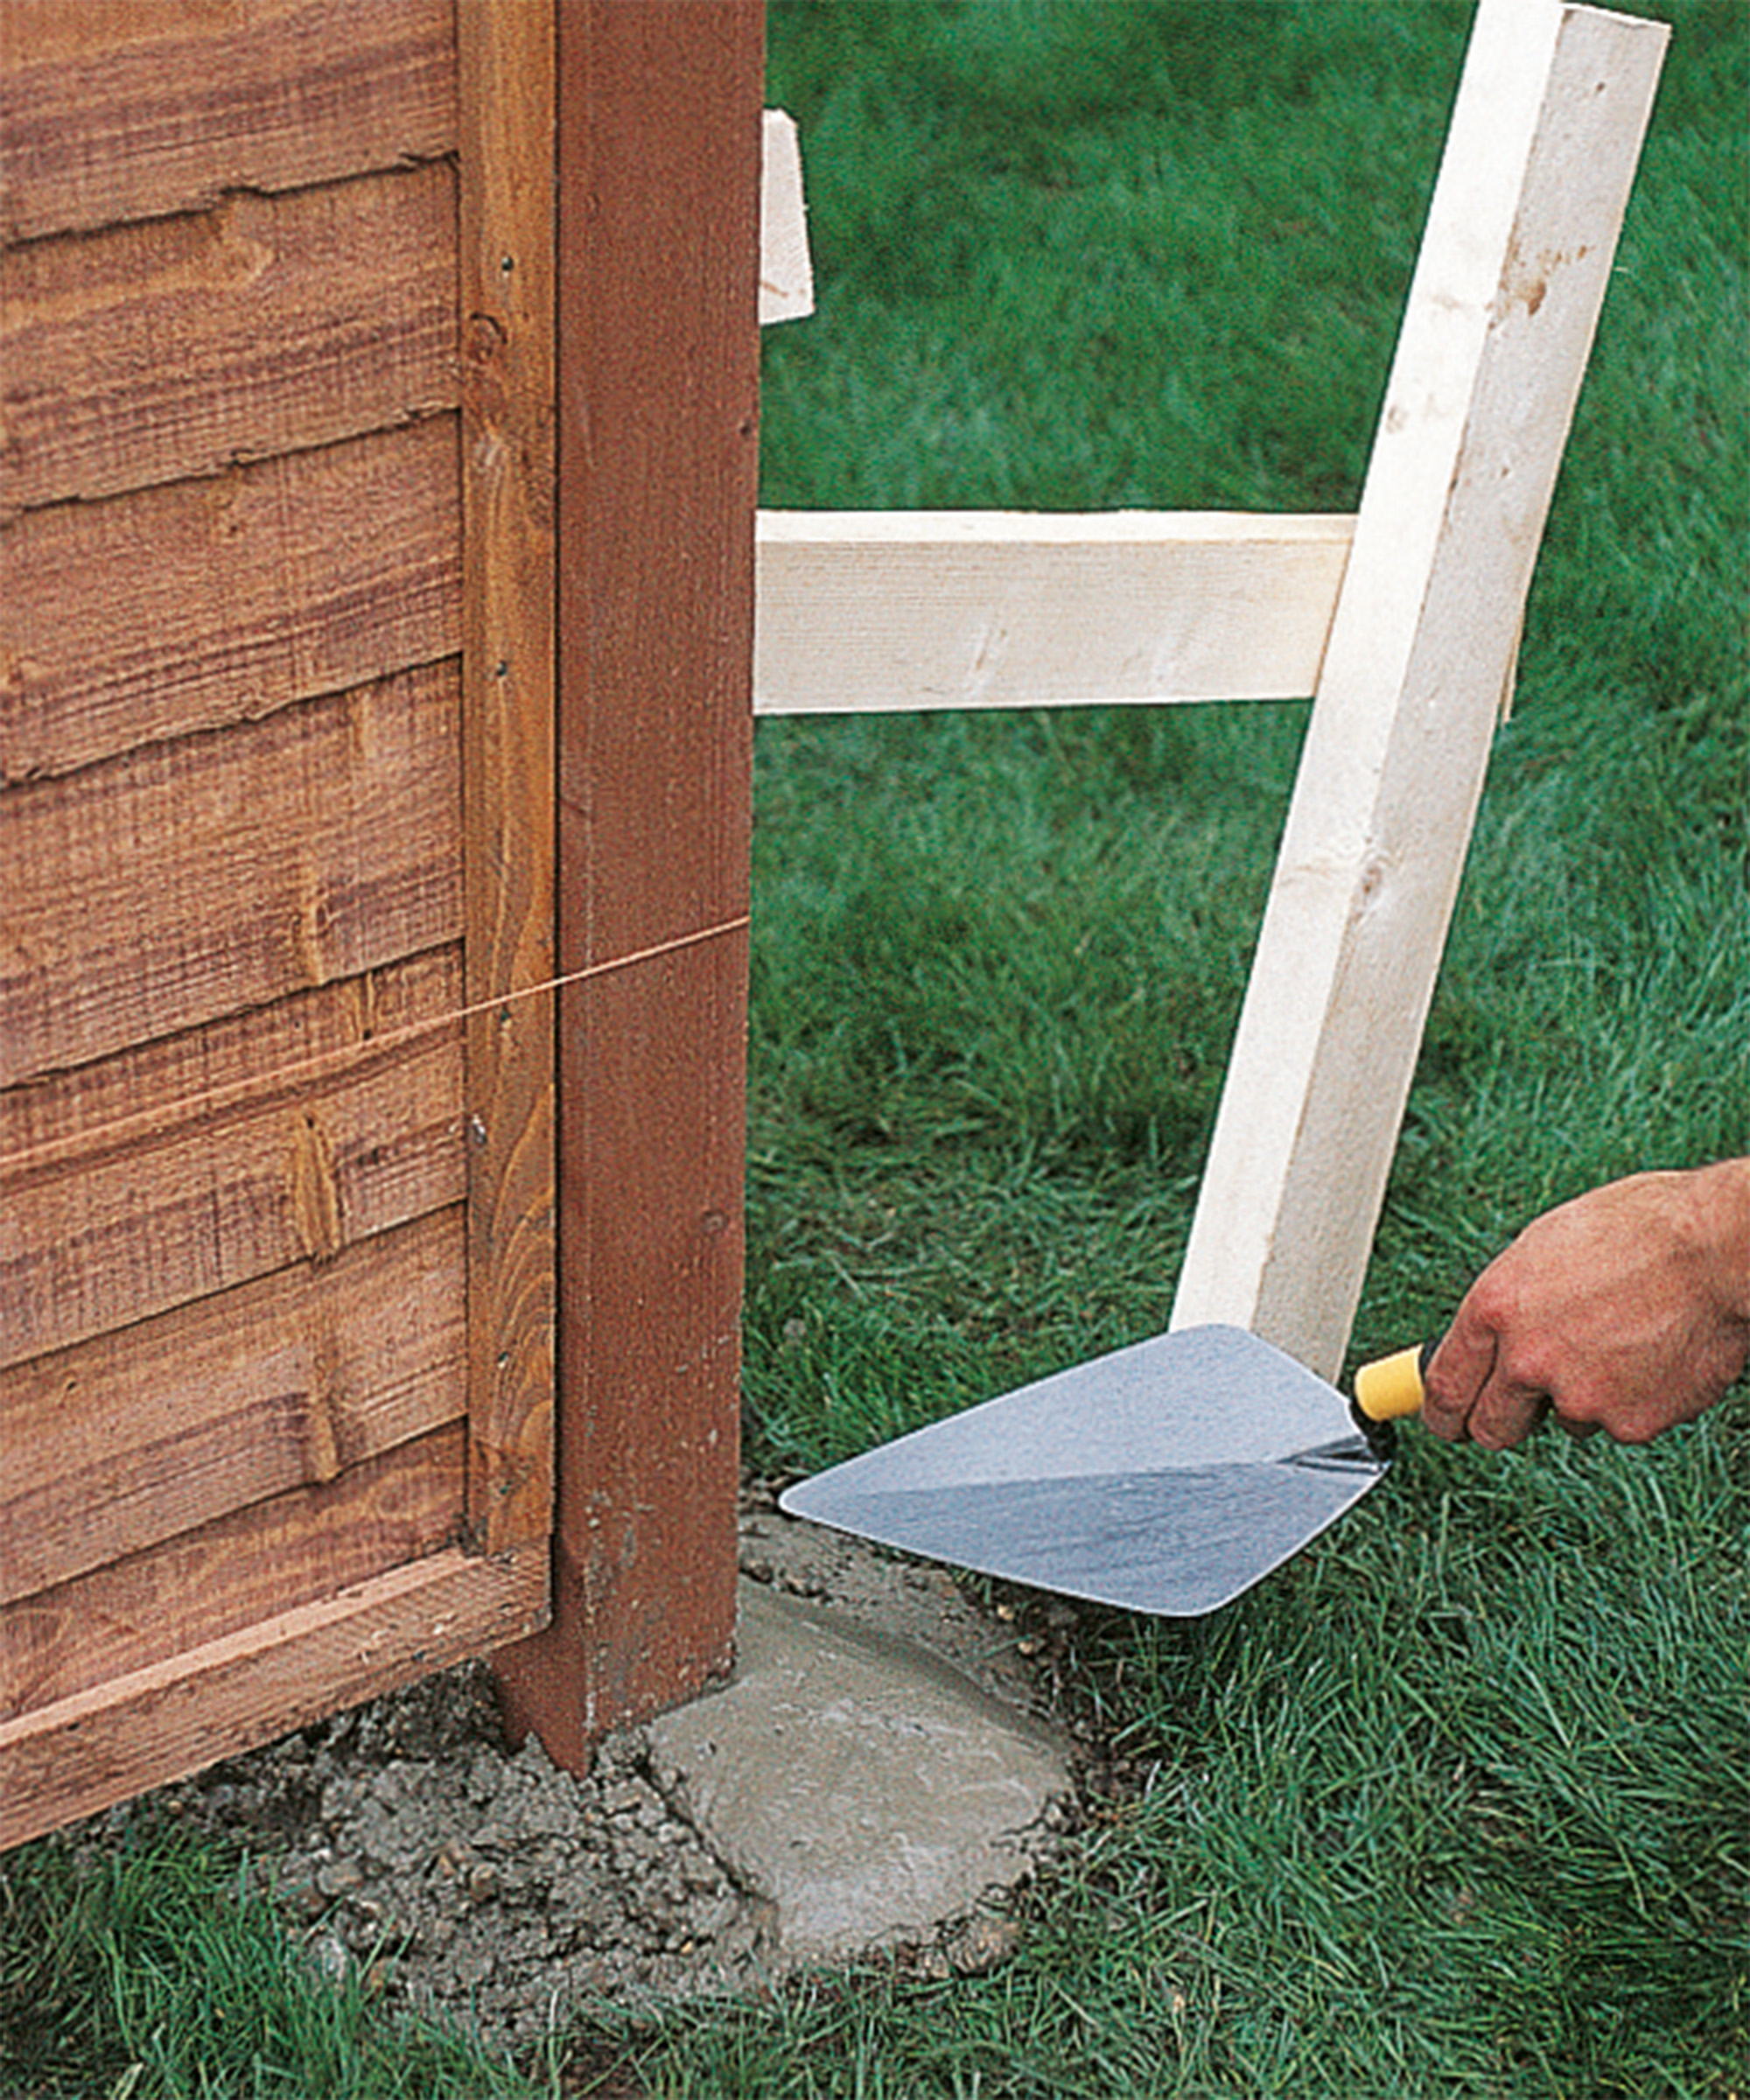
Once your fence panel is attached and your fence posts are ready to be set, you should then pour the concrete (try postcrete for speed) into the hole and around the fence post. 'When doing this, make sure you wear all of your protective gear to prevent irritation,' says Thomas Goodman from Myjobquote.
'You should continue to pour the concrete until it sits three inches below the ground level. Water should then be poured on top of the concrete. The rule of thumb for this is one gallon of water per 50 pounds of concrete mix. You should then level the post immediately and use a shovel to press the concrete down.'
We then suggest smoothing out the concrete with a trowel downwards so water will drain away from the post.
6. Add the finishing touches
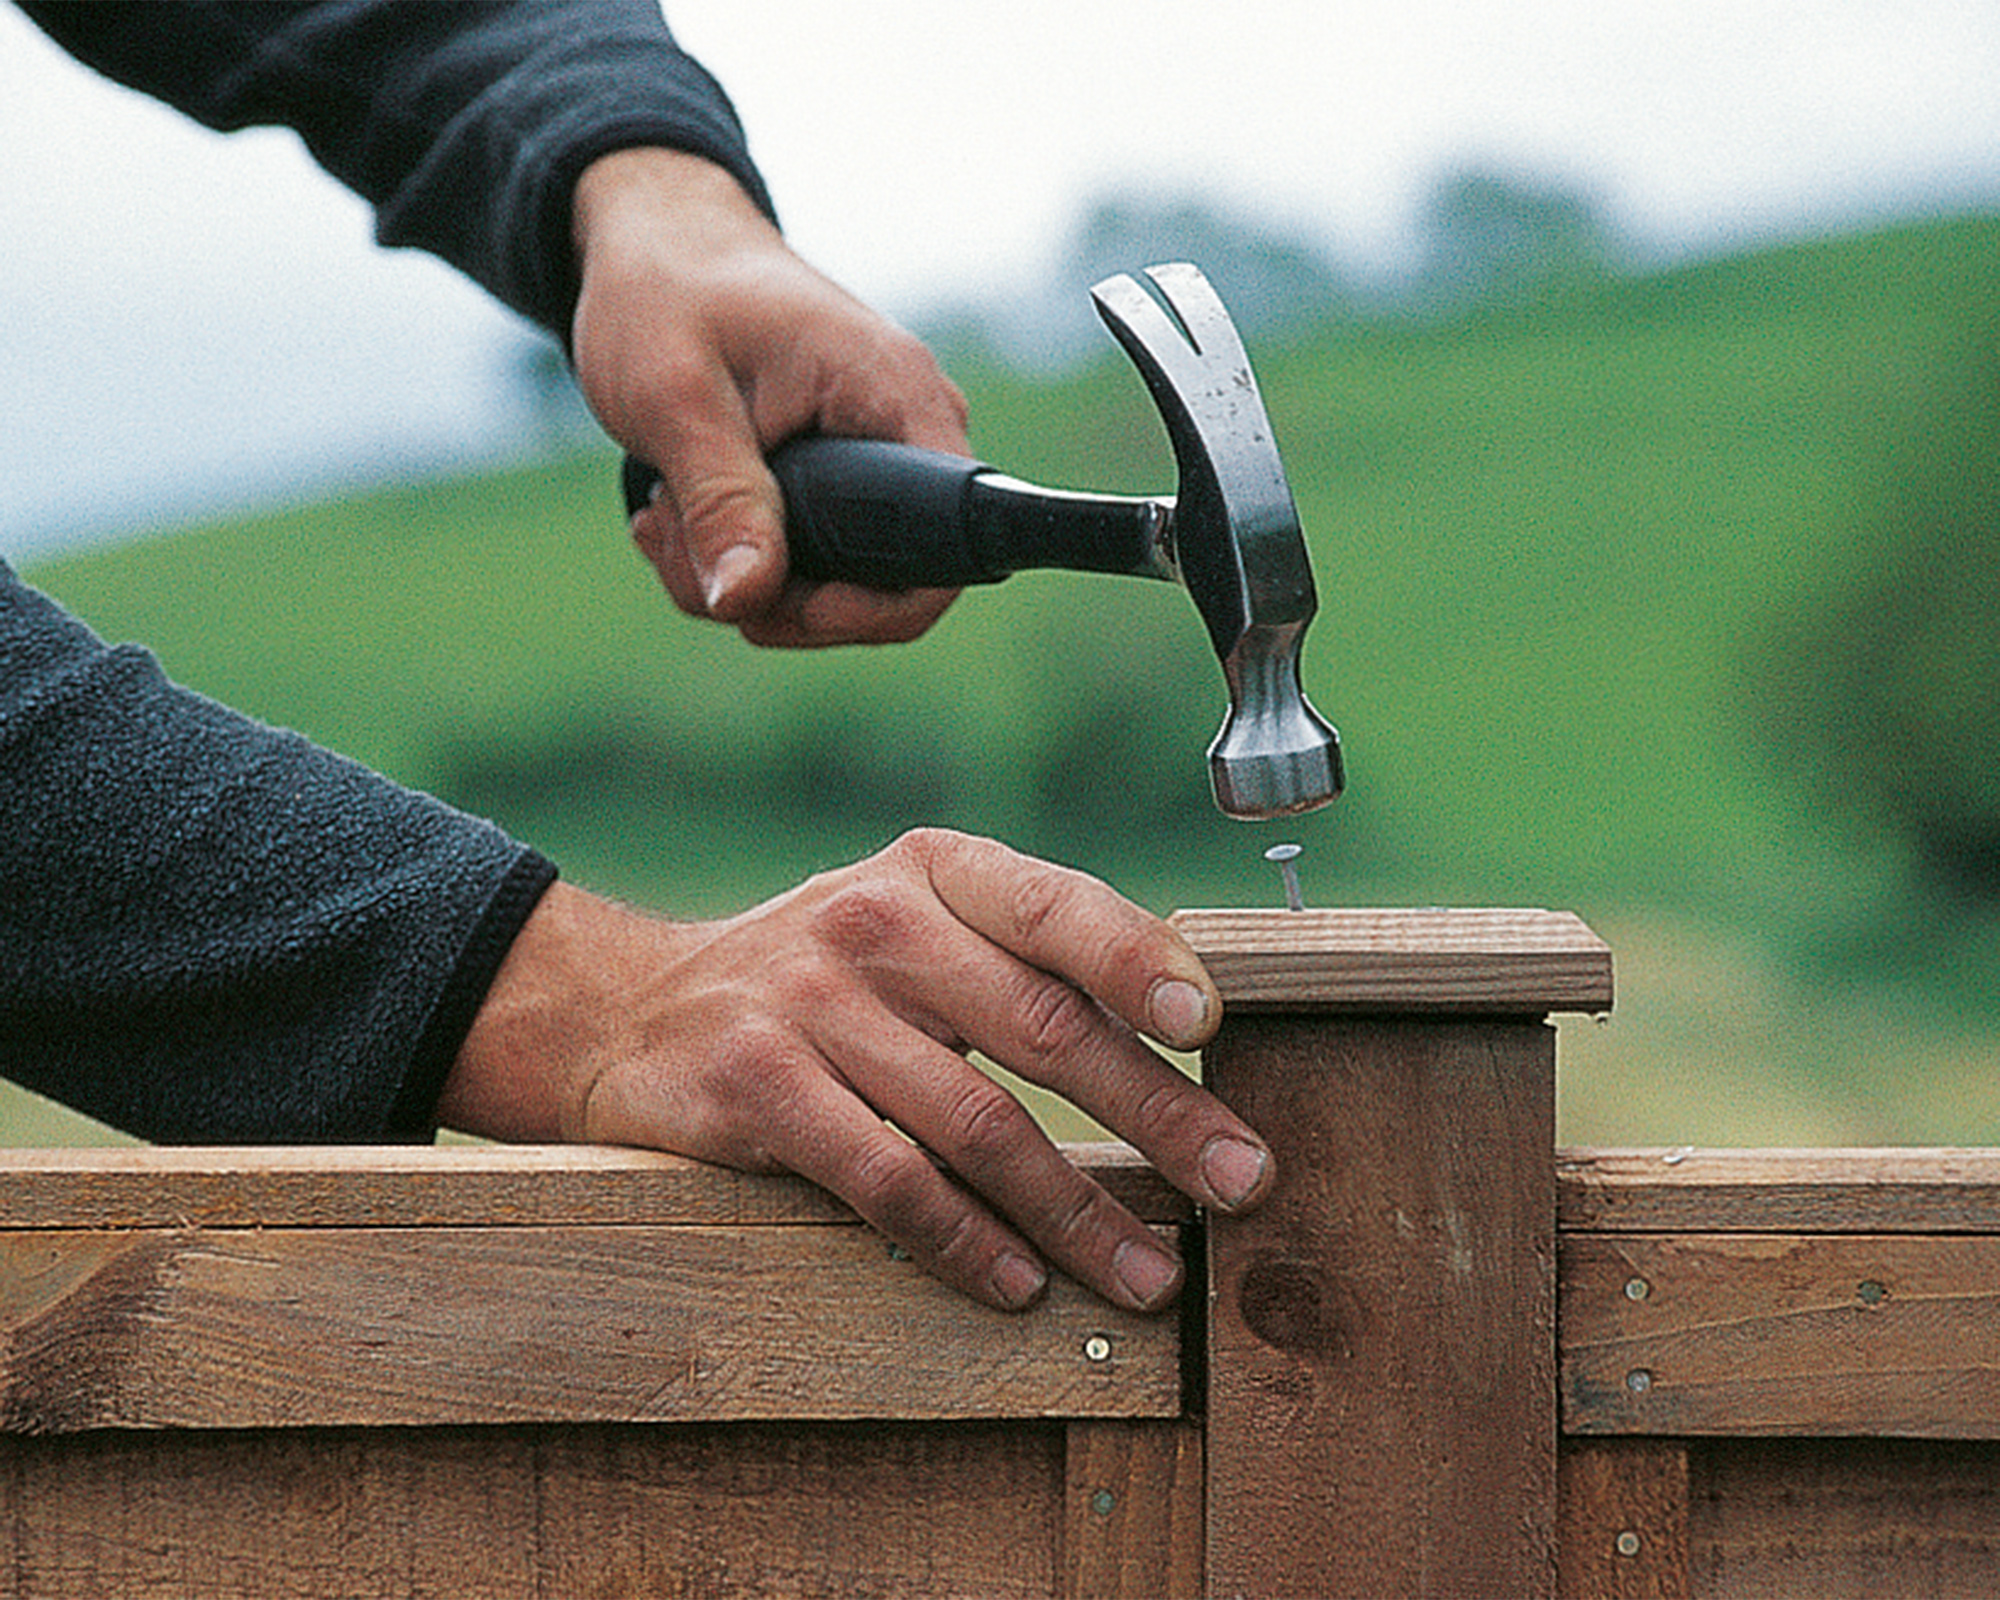
If you are installing just one fence panel, for a simple garden divider idea for example, then you can applaud yourself for a job well done. Otherwise repeat the previous steps for the remaining posts and panels.
Top the posts with post caps and glue and nail into position to prevent the fence posts from rotting. Finish off by staining or painting your fence with the best exterior wood paint.
'For aesthetic purposes,' says Thomas, 'you can add soil around the fence post or you can use sloped concrete if you live in an area that gets a significant amount of rainfall, as this will prevent the wood from rotting.'
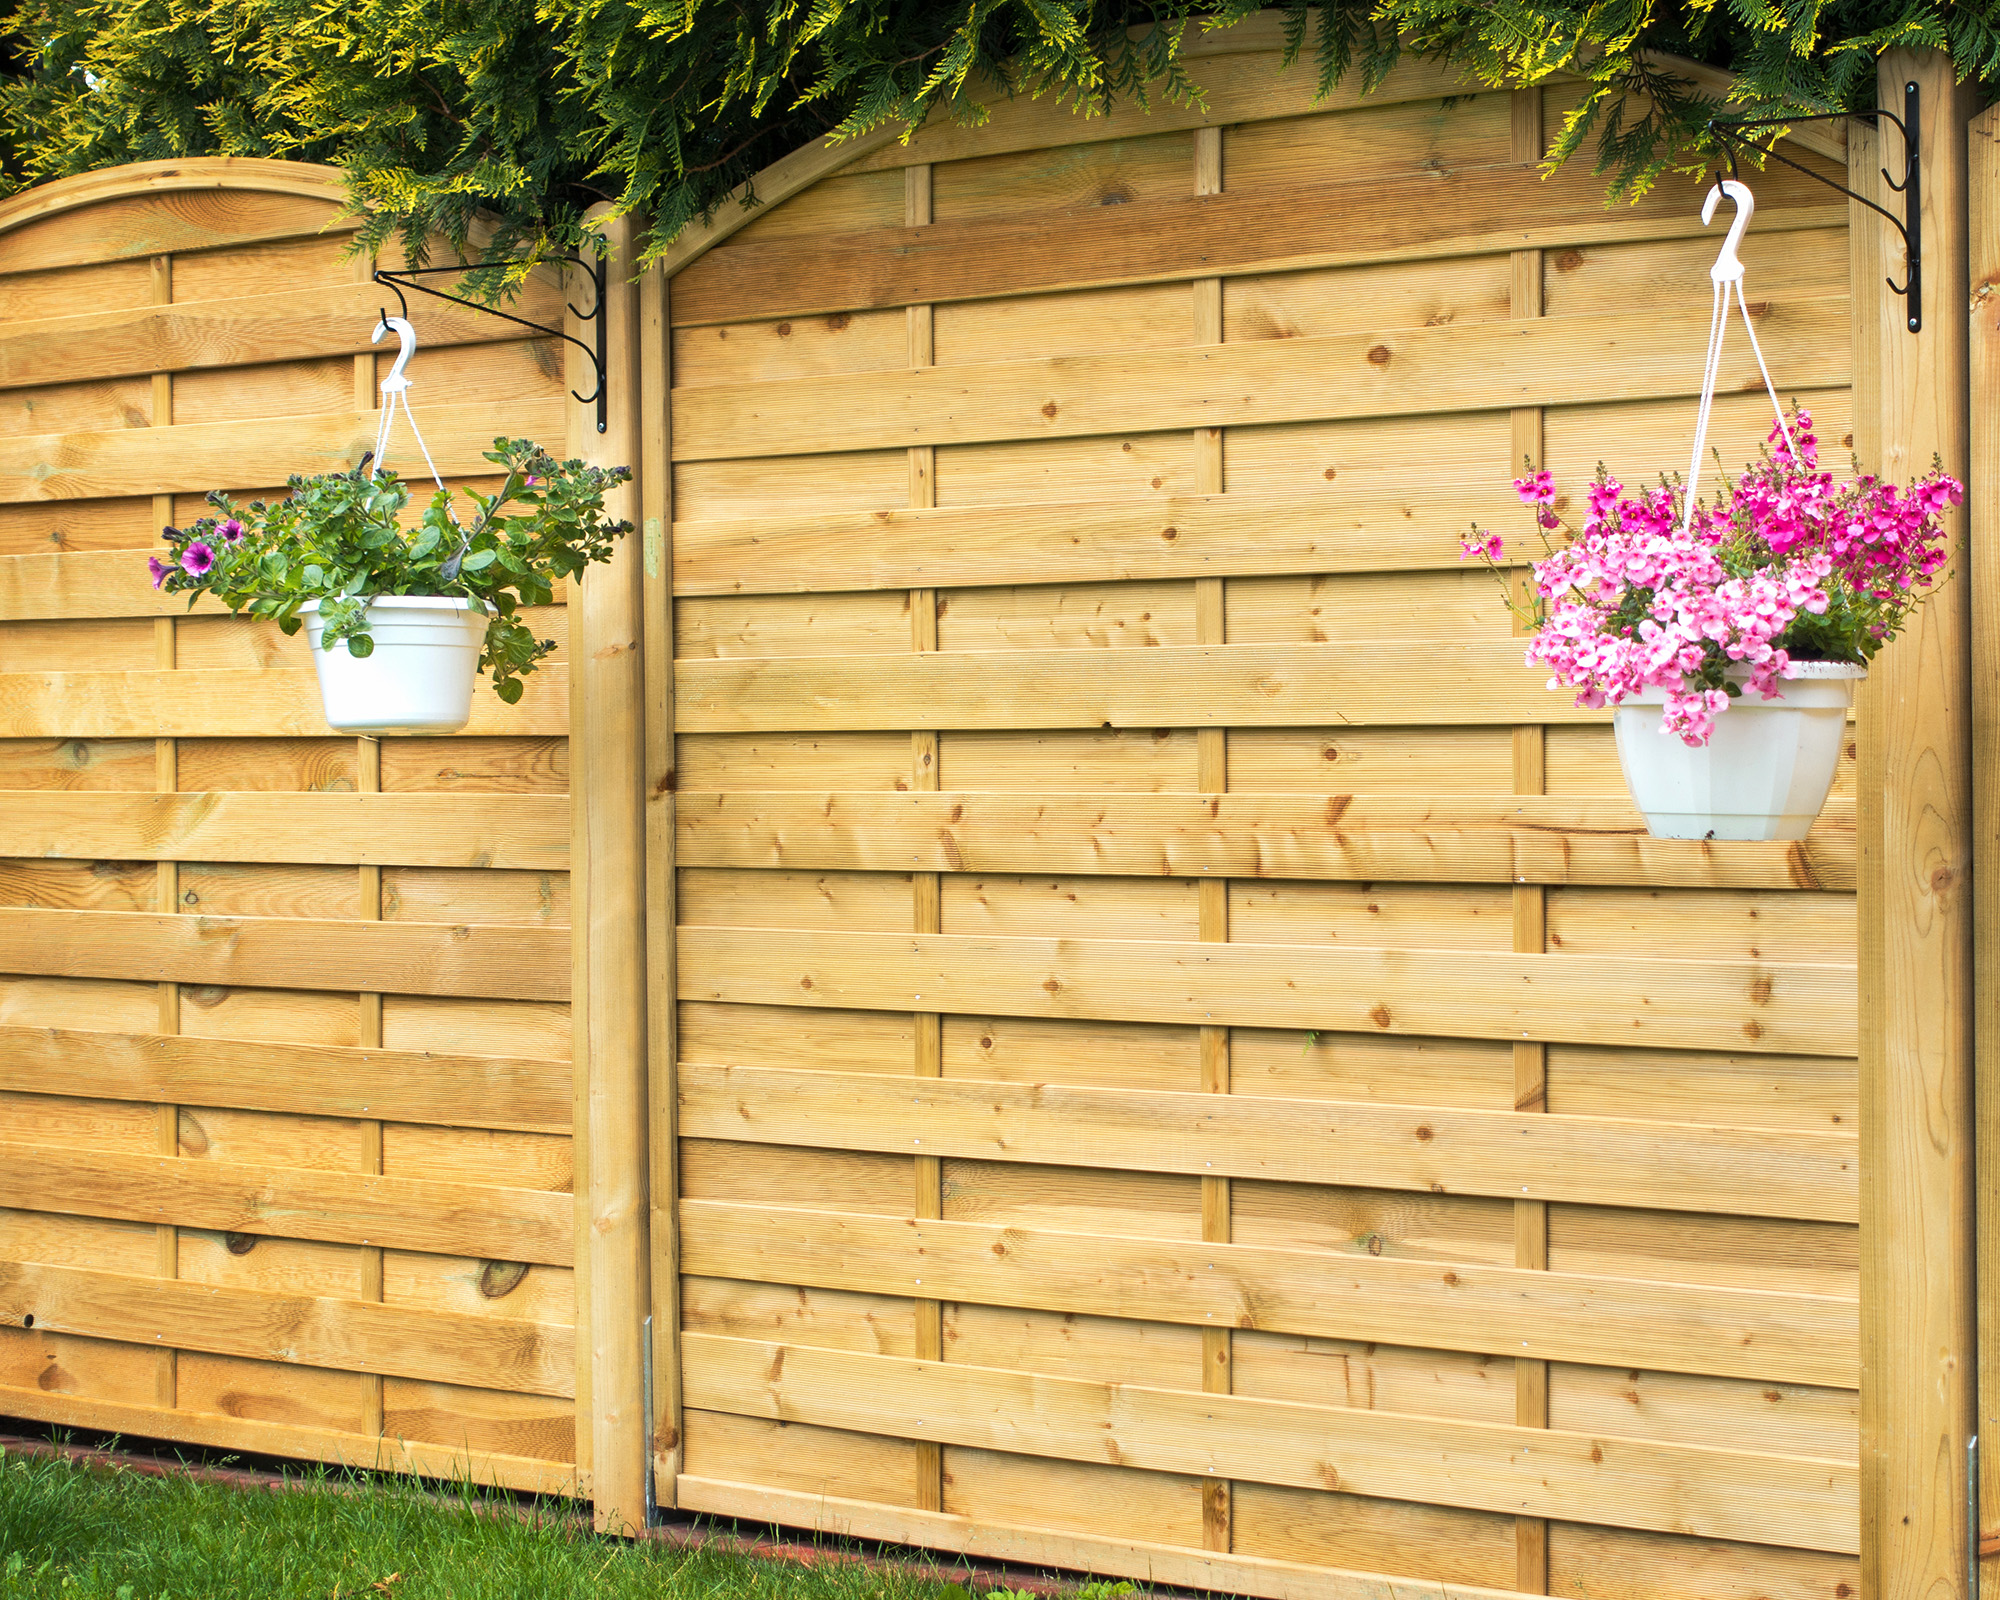
All that's left is to plant some of the best plants for your fence line to soften the look of your new fence.
Should fence posts be set in concrete?
'Fence posts can be tricky to install in certain types of soil. If the soil type is dense and well-draining, you should be able to install your fence posts directly into it or in gravel,' says Gena Lorainne, gardening and landscaping expert at Fantastic Services. However, if the soil is more clay like or sandy, you'll need a couple of extra steps and concrete to make sure that your posts are stable. '
'There are several alternatives to concrete, including galvanised post ’spikes’ that can be driven into the soil to hold your posts,' says Waltons marketing manager, Anna Sippel. 'For fences that are being added to decking or patios you can also use bolt-down ’shoe packs’ to anchor your posts. Both of these options come in different sizes as required.'
Alternatively, 'you can set fence posts with gravel, as this is a surprisingly strong anchor that also prevents water damage to the posts,' says Thomas Goodman, construction expert at Myjobquote.
How deep do fence posts need to be in the ground?
'We recommend that all posts should be dug to a minimum of 23in (60cm) into the ground,' says Leigh Barnes of Jackson's Fencing. 'We also suggest that the post hole is approximately three times wider than the fence post with nice straight sides. For example, if you have a 3 inch wide post that you need to sit over 6ft (1.83m) in height above the ground, we recommend the hole size should be 9in (23cm) wide and 23in (60cm) deep. It's worth noting that ground conditions can have an impact on the size of the hole.'
Can you put dry concrete in a post hole?
Yes, fast setting concrete can be put into a post hole when dry. The dry material is poured into the hole and then water is added (check the pack for specific measurements). Then simply wait for the posts to set. Try Blue Circle ready mixed postcrete at B&Q.
Once your post is secured in place by your concrete then you can learn how to install fence panels properly.

Teresa has worked as an Editor on a number of gardening magazines for three years now. So she is lucky enough to see and write about gardening across all sizes, budgets and abilities. She recently moved into her first home and the garden is a real project! Currently she is relishing planning her own design and planting schemes. What she is most passionate about when it comes to gardening are the positive effects it has on our mental health to grow and care for plants, as well as being great for the environment too and help provide food and shelter for wildlife.
